Tan Home: Your guide to a sunny glow at home
A radiant, sun-kissed complexion no longer has to be the result of hours in the sun or expensive trips to tropical destinations. In 2026, more and more people are opting for a tan home experience: creating a perfect golden glow from the comfort of their own bathroom. This development perfectly suits today's conscious consumer who wants to combine beautiful results with skin-friendly choices. With the right products and techniques, you can transform your skin at home into a natural, sunkissed look that radiates for days.
The benefits of a tan home routine
Building a tan home ritual brings numerous benefits that go beyond just a beautiful color. Modern self-tanners are developed to seamlessly integrate into your daily care routine.
Skin Protection
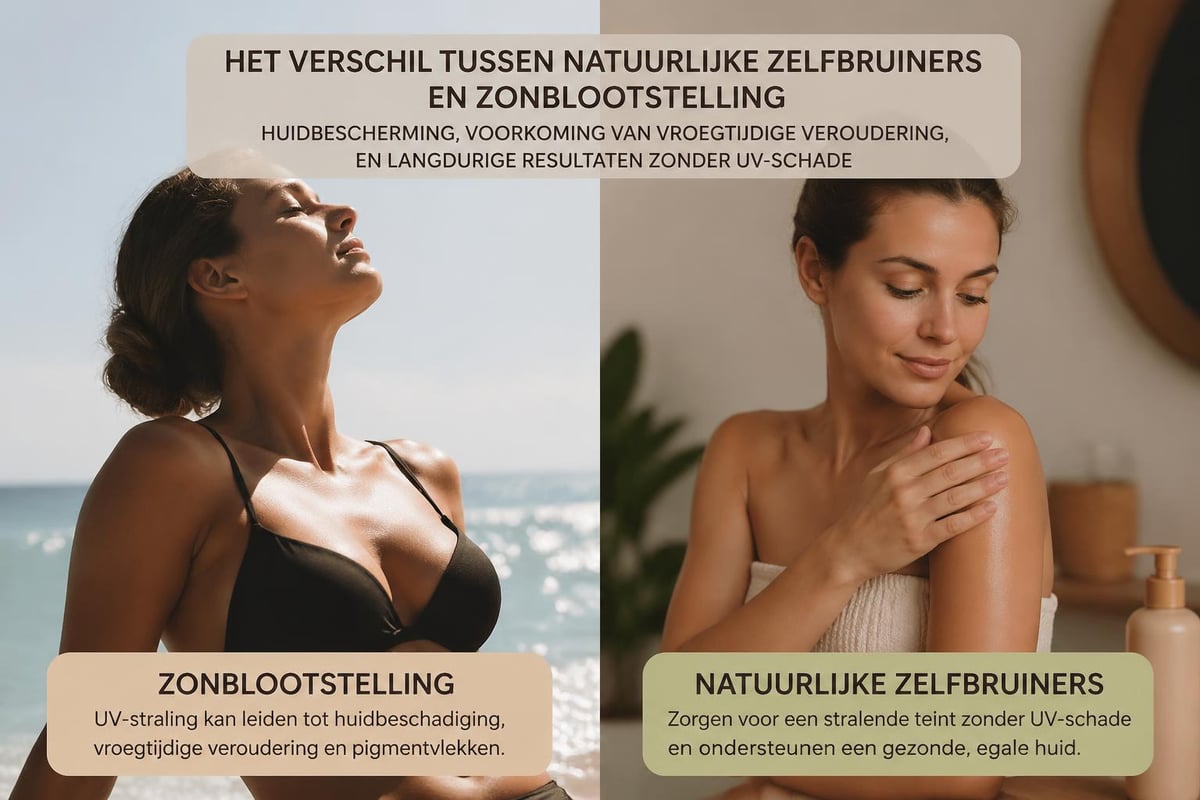
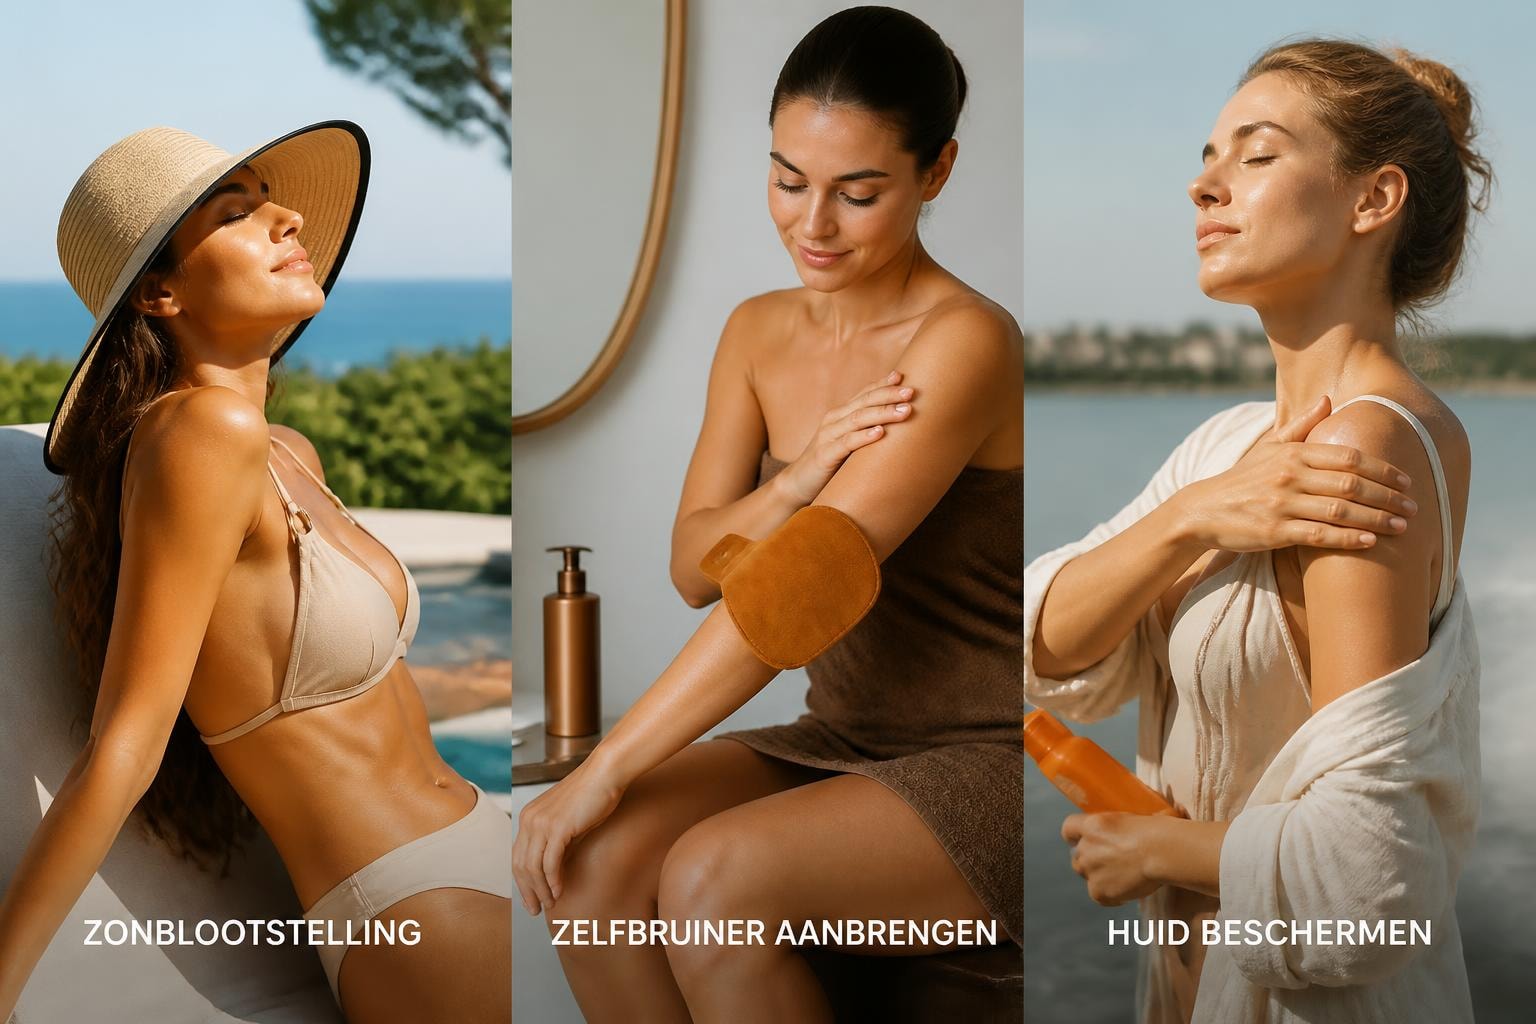
The greatest advantage of a tan home approach is, of course, the protection of your skin from harmful UV radiation. According to experts on the safe use of self-tanners, your skin remains healthy and ages slower when you choose a self-tanning formula instead of sun exposure.
Key health benefits:
No risk of skin cancer from UV radiation
Fewer pigmentation spots and premature aging
Maintenance of your skin's natural elasticity
Even results without the risk of sunburn
Protection of collagen for a youthful appearance
Convenience and Flexibility
A tan home experience completely adapts to your life. You decide when to apply the treatment, how intense the color will be, and how often you maintain it. Modern self-tanner technology makes it possible to achieve a visible result within 2-3 hours.
Aspect |
Tan Home Benefit |
Traditional Sun |
|---|---|---|
Duration |
15-20 minutes application |
Hours of exposure needed |
Planning |
Anytime of the day |
Dependent on weather and season |
Result |
Visible immediately after 2-3 hours |
Multiple sessions required |
Maintenance |
Looks good for 5-7 days |
Daily maintenance |
Cost |
One-time product purchase |
Solarium or travel costs |
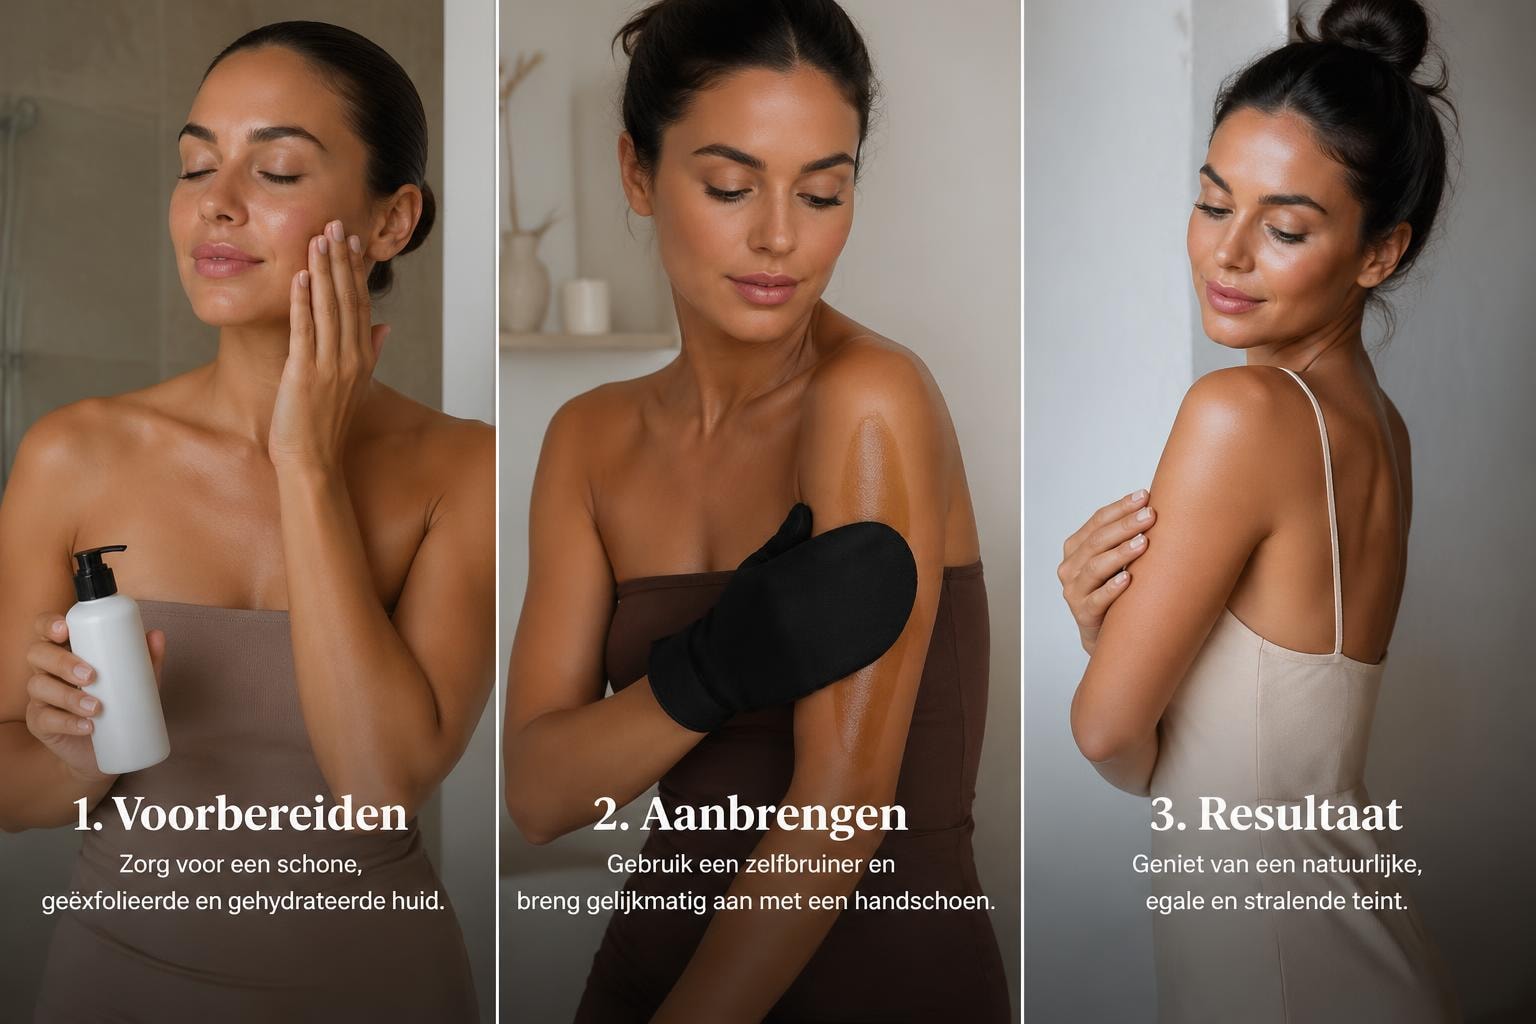
The Perfect Preparation for your Tan Home
The key to an even, long-lasting tan lies in preparation. Just as a painter first smooths the surface, you create the perfect canvas for your tan home result.
Exfoliation: The Foundation of Success
Begin with thorough exfoliation at least 24 hours before your tan home session. Use a gentle scrub that removes dead skin cells without irritating your skin. As described in this practical self-tanner guide, paying attention to dry areas is essential.
Pay extra care to:
Elbows and knees
Ankles and feet
Hands and wrists
Knees and thighs
Décolletage area
Hydration as a Foundation
After exfoliating comes hydration. Well-hydrated skin absorbs self-tanner evenly and prevents patchy results. Apply a rich body lotion to your entire body 12 hours before your tan home application.
Focus on these areas with extra moisture:
Knees and elbows - These areas can absorb self-tanner more intensely
Hands and feet - Prevent dark spots with light hydration
Face - Use a light day cream as a base
Neck and décolletage - Create a natural transition
The Art of Application
Applying your tan home product requires care and the right technique. With current formulas, it's easier than ever to achieve professional results.
Choose the Right Application Moment
Schedule your tan home session in the evening before bed. This gives the formula time to fully absorb and develop while you rest. Make sure you have at least three hours before showering or sweating.
Application Technique for Even Results
Always start with your legs and work upwards. This prevents you from smudging freshly applied self-tanner. Professionals recommend using circular motions for optimal distribution.
Step-by-step process:
Start with your legs, from the ankles upwards
Treat your arms and shoulders
Apply product to your torso in upward motions
Use minimal product on elbows and knees
Finish with your face and neck
Wash your hands immediately afterwards
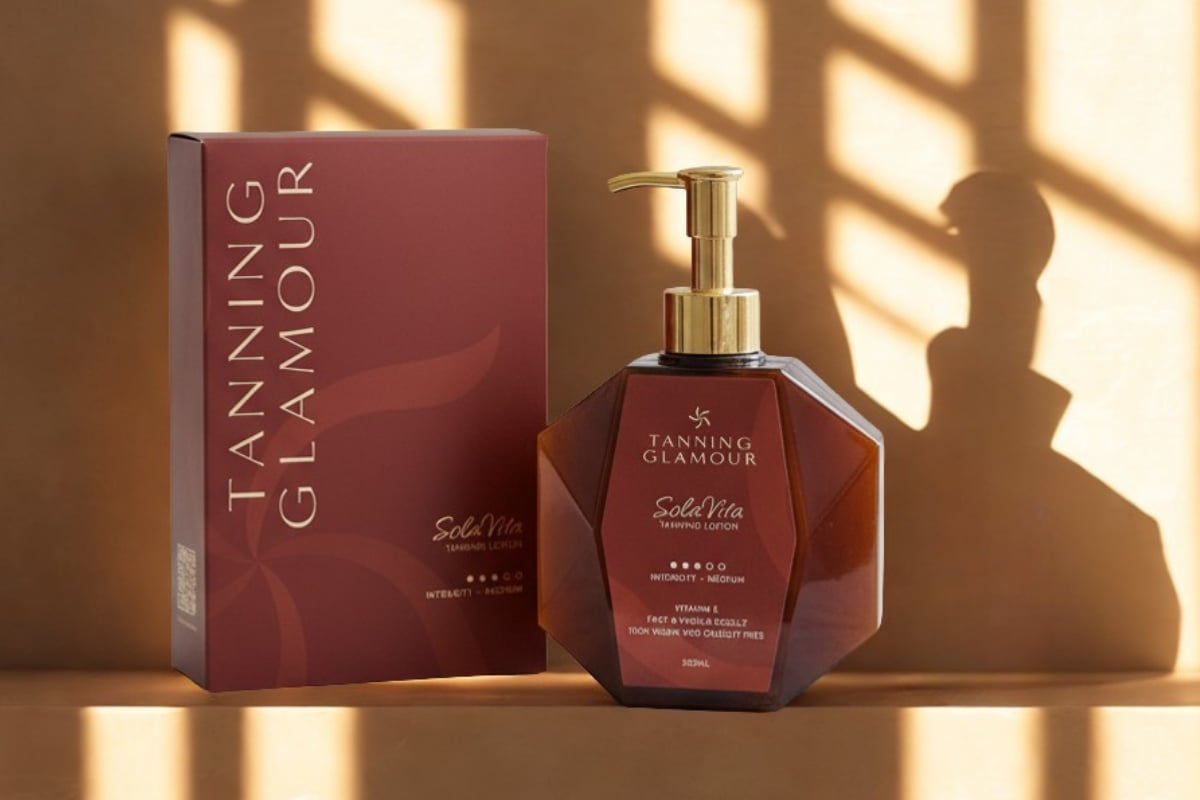
For the best tan home result, a special applicator mitt is indispensable. This ensures a streak-free, even distribution without staining your hands. The SolaVita Self-Tanning Lotion works perfectly with a velvet mitt for a luxurious, professional result that radiates for days.
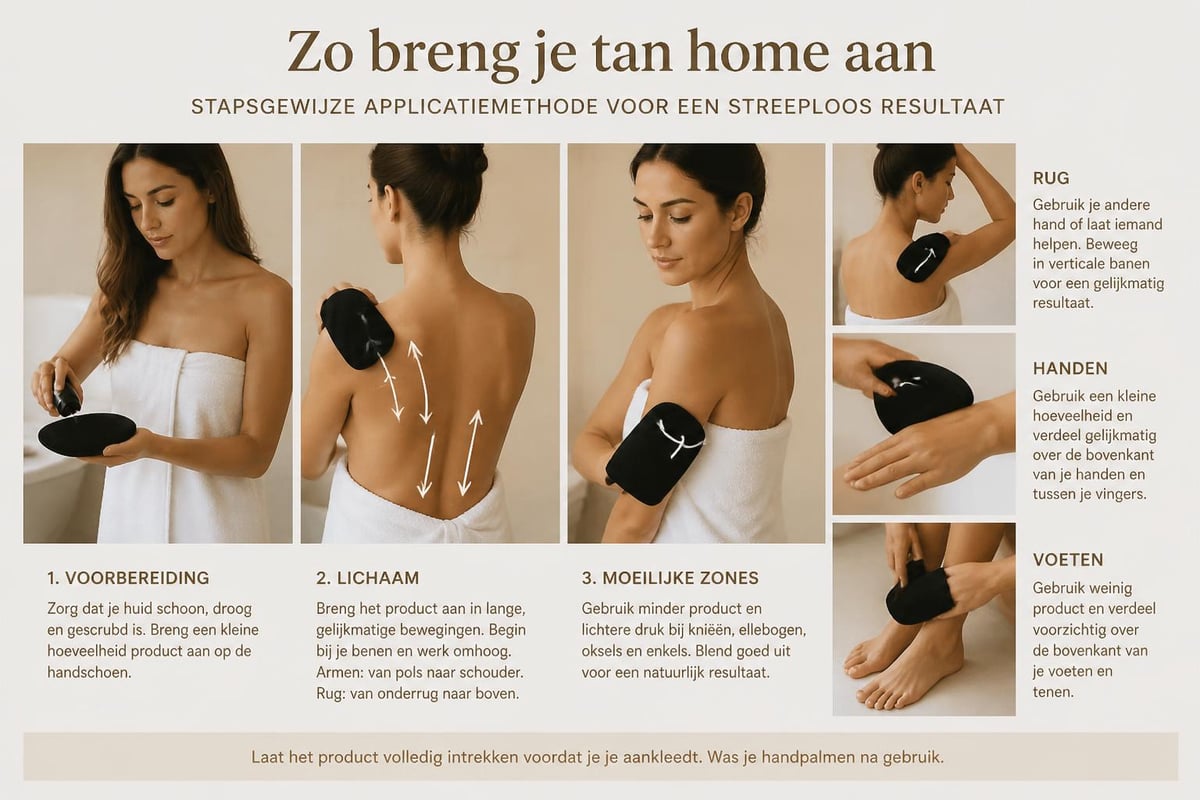
Addressing Difficult Areas
Certain body parts require extra attention during your tan home routine. The back, hands, and feet are known challenges that can be perfectly treated with the right approach.
Area |
Challenge |
Solution |
|---|---|---|
Back |
Hard to reach |
Use a back applicator or ask for help |
Hands |
Patchy fingers |
Apply minimal product, wash immediately |
Feet |
Uneven color |
Mix product with body lotion (1:2 ratio) |
Face |
Too dark result |
Start with half dosage |
Maintenance and Care of your Tan Home
A beautiful tan is the beginning, but maintenance determines how long you enjoy your tan home result. With the right care, your glow will remain beautiful for up to a week.
Daily Hydration
The most important tip for long-lasting enjoyment of your tan home is daily hydration. Dry skin exfoliates faster, causing your tan to fade unevenly. Apply a nourishing body lotion twice a day.
Hydration schedule:
Morning: Light, fast-absorbing lotion after showering
Evening: Richer cream for optimal nourishment
Extra: Facial oil for décolletage and face
Weekly: Gentle exfoliation to remove old cells
Showering and Bathing
How you shower directly affects the longevity of your tan home. Avoid long, hot showers and use mild, sulfate-free products. Pat your skin dry instead of rubbing.
Practical showering tips according to experts in this field:
Wait at least 8 hours after application before showering
Use lukewarm water instead of hot
Limit shower time to a maximum of 10 minutes
Choose mild, moisturizing shower gels
Gently pat skin dry with a towel
Apply body lotion immediately
Solving Common Tan Home Challenges
Even with the best preparation, small imperfections can arise. Fortunately, most tan home problems are easy to solve with the right knowledge.
Correcting Streaks and Patches
Do you discover unwanted streaks or dark patches after your tan home session? There are several ways to soften or remove them before your result has fully developed.
Take immediate action:
Moisten a cotton pad with micellar water
Gently dab over the dark spot
Use a gentle exfoliating mitt
Apply body lotion to blend the difference
Repeat if necessary until desired result
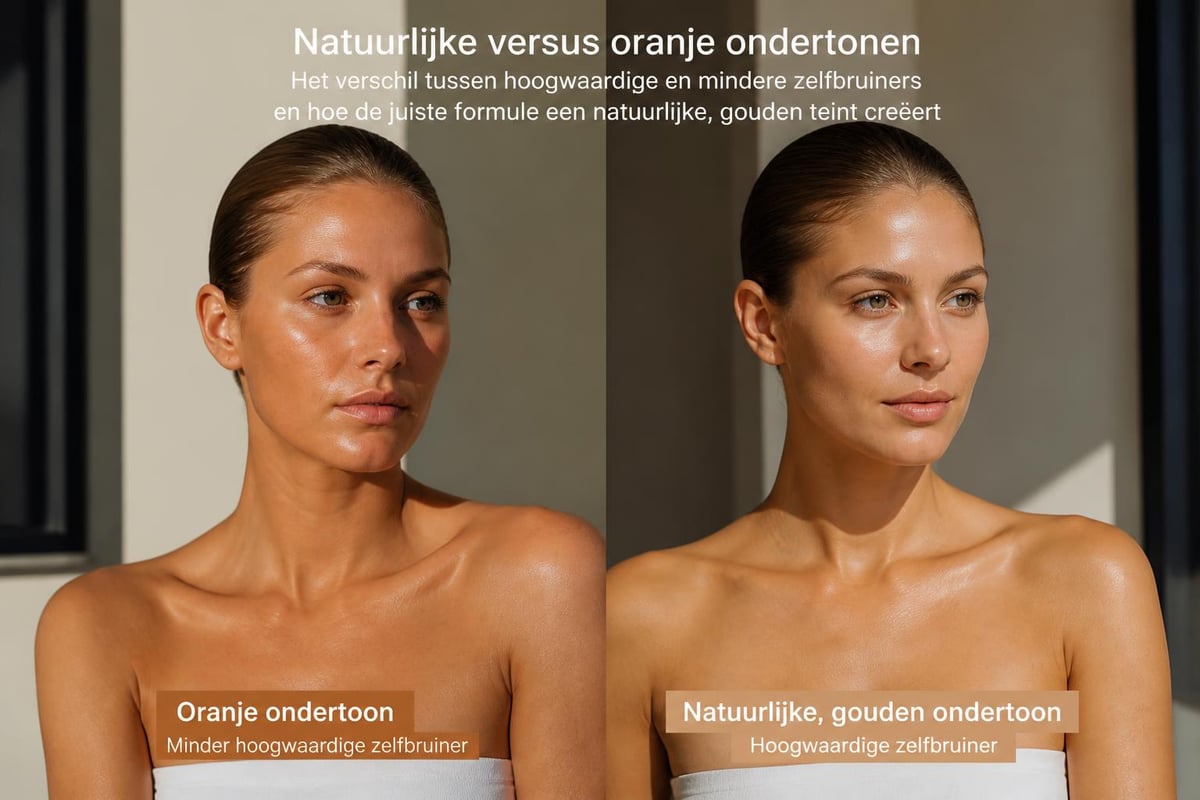
Avoiding Orange Undertones
A common complaint with self-tanners is the unnatural orange glow. Modern formulas are specifically developed to prevent this. For more information on natural results, visit the Tanning Glamour knowledge base.
Preventative measures:
Choose formulas with a green undertone
Test on a small skin area first
Build color gradually
Use products specifically for your skin type
Avoid too much product at once
Seasonal Tan Home Strategies
Your tan home routine can vary depending on the season and your needs. In 2026, personalization is more important than ever.
Spring and Summer Glow
During warmer months, you often want a more subtle tan home look that appears natural alongside your lightly tanned arms and legs. Focus on evening out your complexion and accentuating a healthy glow.
Seasonal tips for spring:
Lighter formulas for subtle results
Frequent application (every 5 days)
Focus on legs and arms for even color
Combine with sun protection during outdoor activities
Hydrate extra in warmer weather
Autumn and Winter Maintenance
As the days get shorter, a tan home routine helps you maintain that summer glow. In the colder months, extra care is essential for long-lasting results.
Winter Challenge |
Tan Home Solution |
|---|---|
Dry air |
Increase hydration frequency |
Central heating |
Use richer body lotions |
Less sunlight |
Increase application frequency |
Thick clothing |
Plan sessions for special occasions |
Advanced Tan Home Techniques
For those who have mastered the basics, there are refined techniques to take your tan home result to the next level. These professional tricks make the difference between good and excellent.
Contouring with Self-Tanner
Just like makeup contouring, you can use self-tanner to create subtle shadows and definition. Apply a little more product in strategic places for a sculpted effect.
Contouring zones:
Collarbones - Thin line for definition
Shoulders - Emphasize curves
Legs - Apply to sides for a slimmer effect
Arms - Follow natural muscle line
Layering for Intensity
Some moments call for a deeper tan home complexion. Layering - applying multiple layers - gives you control over the intensity without the risk of streaks. More about this technique can be found in this comprehensive guide.
Layering protocol:
Apply first layer according to standard routine
Wait 24 hours until fully developed
Lightly exfoliate dry areas
Hydrate thoroughly
Apply second layer with half dosage
Evaluate after 4-6 hours
Mixing for Personalized Color
For ultimate control over your tan home result, you can mix different products. This gives you the freedom to create exactly the right shade for your skin and occasion.
Mix options and ratios:
Day cream + self-tanner (3:1) for subtle glow
Serum + drops (4-6 drops) for face
Body lotion + lotion (2:1) for difficult areas
Two shades (1:1) for a perfect match
The Science Behind a Tan Home
Understanding how self-tanners work helps you achieve better results with your tan home routine. The active ingredients and their interaction with your skin are fascinating.
DHA: The Magic Ingredient
Dihydroxyacetone (DHA) is the ingredient that makes your tan home possible. This sugar reacts with amino acids in the outermost layer of the skin, creating a brown color without sun exposure. Modern formulas use optimized DHA concentrations for natural results.
Scientific facts:
DHA works within 2-4 hours after application
Reaction takes 24-72 hours to fully develop
Color lasts 5-7 days depending on care
No damage to living skin cells
Safe for frequent application
Natural Ingredients for Extra Care
High-quality tan home products contain more than just DHA. Nourishing ingredients support your skin and enhance the application experience.
Important additions:
Aloe vera - Soothes and hydrates
Vitamin E - Antioxidant protection
Hyaluronic acid - Deep hydration
Natural oils - Soften and nourish
Green tea extract - Anti-aging properties
For those who value these natural ingredients, various options are available, such as drops that you can mix with your favorite skincare products. Check out the possibilities on the Tanning Glamour product page for more information on natural formulas.
Tan Home Trends in 2026
The self-tanning industry is constantly evolving, and 2026 brings exciting innovations for your tan home experience. From new application methods to smart technology – the future looks bright.
Personalization and Customization
The trend towards personalized beauty also reaches the tan home world. Consumers want products that perfectly match their unique skin type, color, and lifestyle.
Personalization developments:
Online color-matching tools
Custom formulas per skin type
Seasonal variants
Mixable drops for control
Skin tone-specific shades
Sustainability and Conscious Choices
Environmentally conscious consumers in 2026 choose tan home products with natural ingredients and sustainable packaging. This trend perfectly aligns with the values of modern beauty enthusiasts.
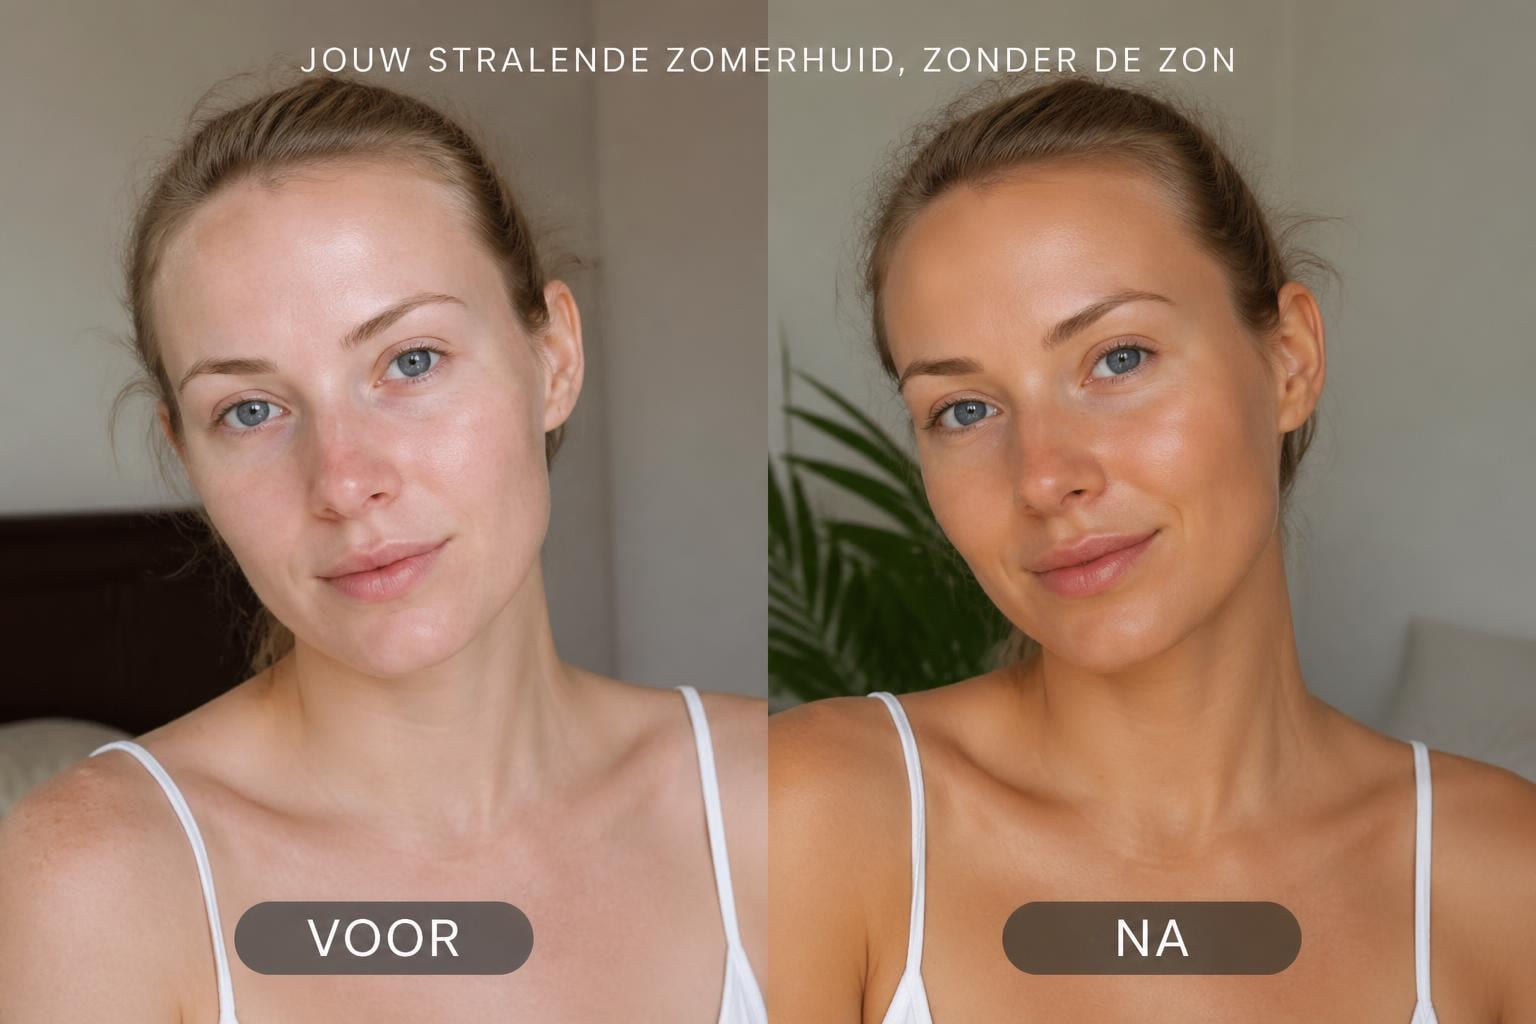
A radiant, natural tan does not have to come at the expense of your skin health or precious time. With the right tan home routine, you can create an even, long-lasting glow from your own bathroom that looks as if you've just returned from vacation. Whether you opt for a subtle summer glow or a deeper bronze tan, the key lies in good preparation, careful application, and consistent maintenance. Tanning Glamour helps you with natural self-tanners that are visible within 2-3 hours, last beautifully for 5-7 days, and are completely free of streaks and orange undertones – for that perfect sunkissed look you crave.
Read more
Discover how to achieve a natural, even tan with self-tanners. Practical tips, how self-tanners work, and everything about a sun-kissed glow.
Discover how to tan safely without skin damage. From responsible sunbathing to self-tanners: all the tips for a natural glow in 2026.