Self-tanner: how to achieve a glowing complexion
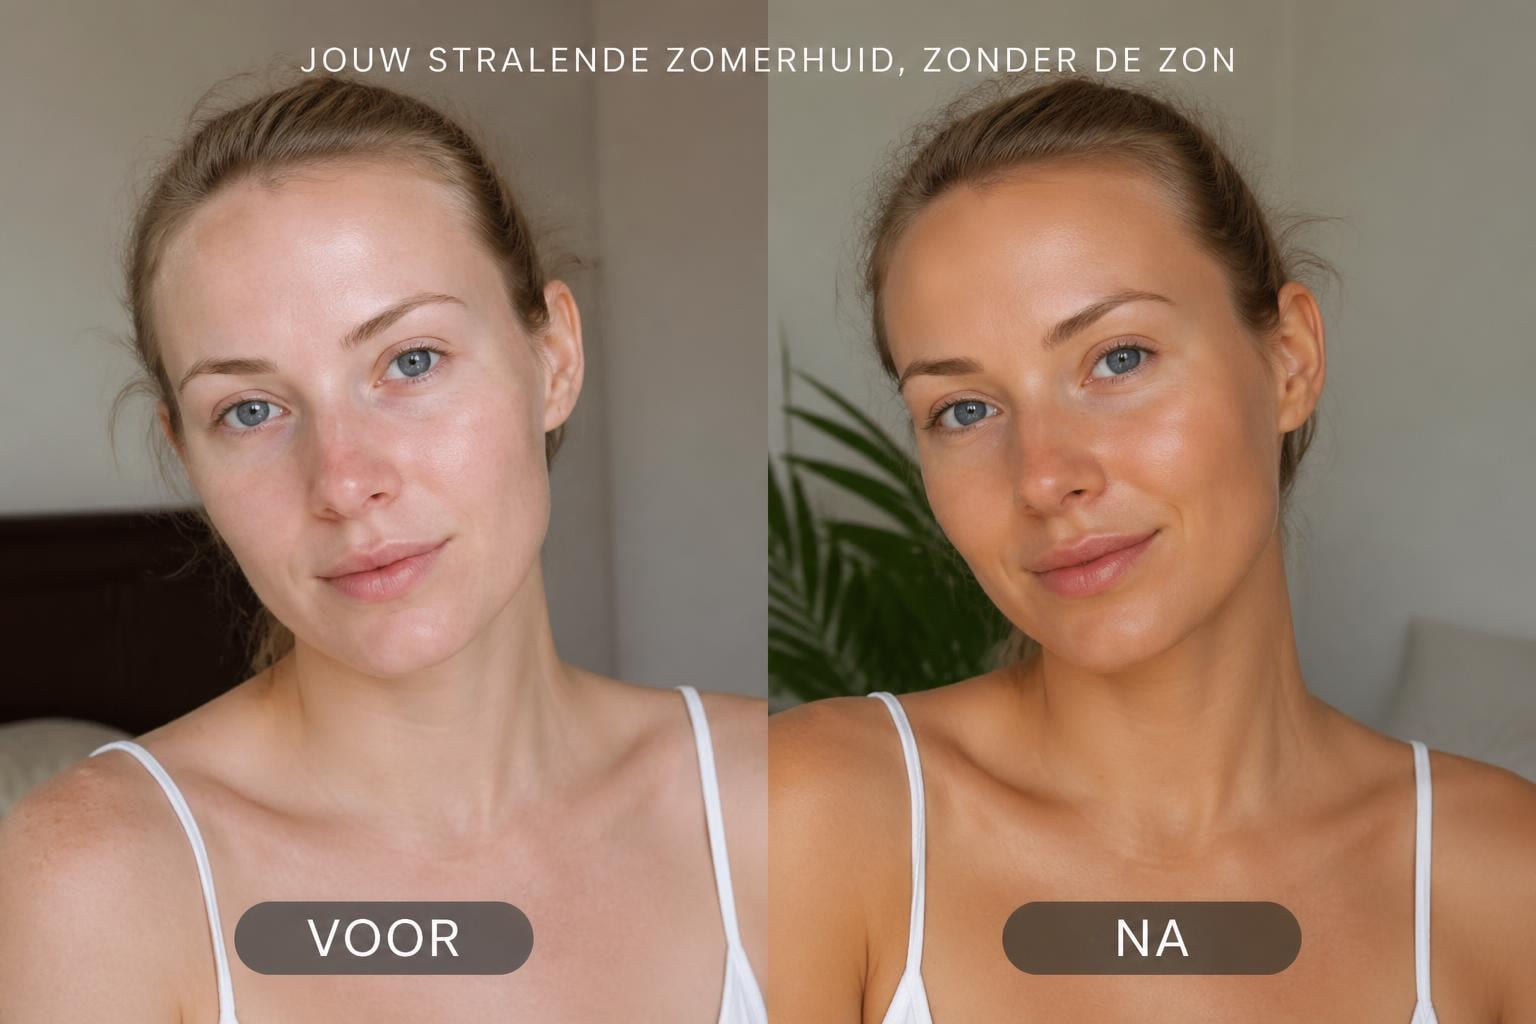
Achieving a beautiful, natural tan no longer requires harmful UV rays or time-consuming hours in the sun. The ability to get a tan without sun has revolutionized skincare and cosmetics. With the right products and techniques, you can achieve that desired sun-kissed glow within hours, without exposing your skin to sunlight. Modern self-tanners in 2026 are developed to provide an even, natural result without the orange undertones or streaks that earlier generations struggled with.
Why choose a tan without sun exposure
Protecting skin from UV radiation is currently central to skincare. Dermatologists have been warning for years about the damage that sun exposure can cause, from premature aging to an increased risk of skin cancer. Yet, for many, a tanned complexion remains synonymous with a healthy, well-groomed appearance and increased self-confidence.
The health benefits of self-tanners
By getting a tan without sun, you avoid the harmful effects of UV radiation. This means:
No increased risk of melanoma or other forms of skin cancer
Fewer pigment spots and premature wrinkles
Preservation of your skin's natural elasticity
No dehydration due to excessive sun exposure
An even complexion without sun damage
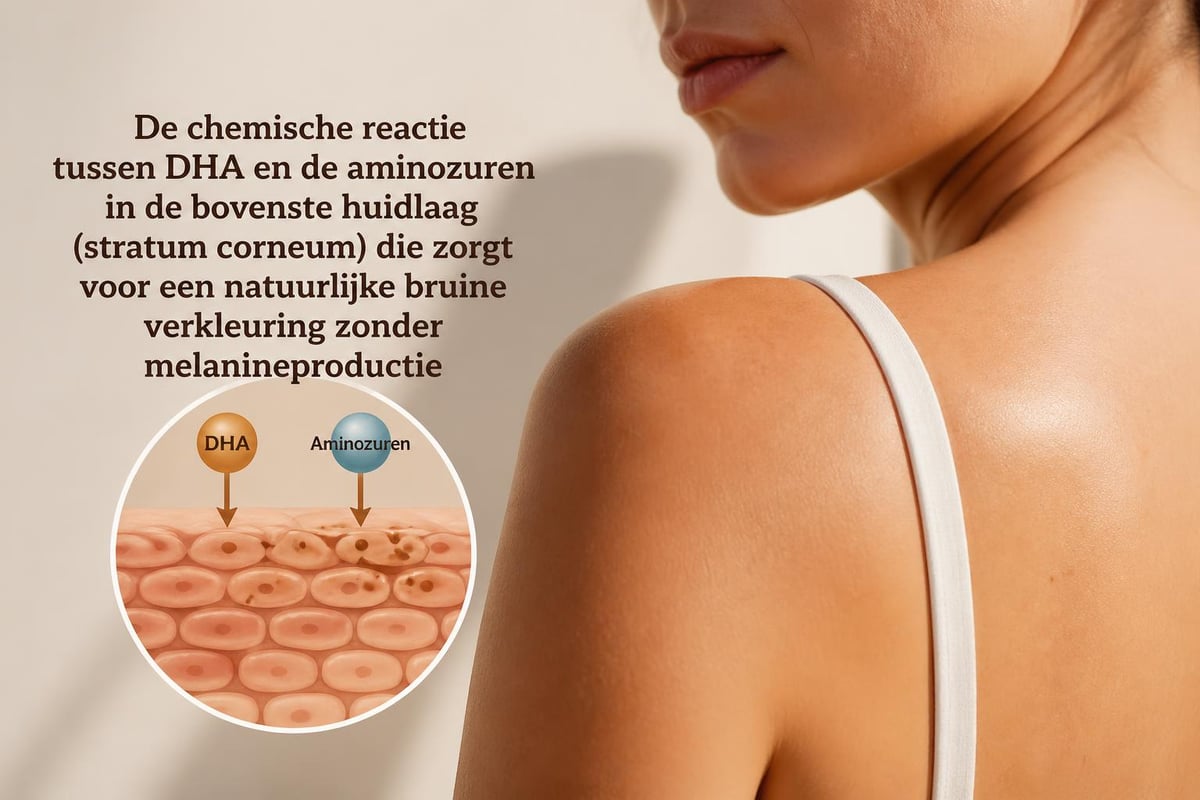
The effectiveness of self-tanners is scientifically proven and safe for the skin. The active ingredient DHA (dihydroxyacetone) reacts with amino acids in the outermost layer of the skin, creating a brownish discoloration without melanin production.
Time-saving and flexibility
A trip to the beach or tanning bed takes time and planning. With self-tanners, you decide when and where you take care of your tan. You simply apply the product at home, put on comfortable clothes, and within 2-3 hours, you'll see the first results. For more information on how self-tanner works, you can consult various sources that explain the process step-by-step.
Aspect |
Sunbathing/Tanning Bed |
Tan Without Sun |
|---|---|---|
Time per session |
30-120 minutes |
5-10 minutes application |
Visible result |
Multiple sessions |
2-3 hours |
Durability |
Fades after days |
5-7 days |
UV damage |
Yes |
No |
Even result |
Varies |
Consistent |
The right preparation for an even complexion
The secret to a radiant, natural tan without sunlight lies primarily in preparation. A well-prepared canvas ensures an even, long-lasting result that looks like you've just returned from vacation.
Exfoliating: The first step to perfection
Always start with a thorough exfoliation of your entire body. This removes dead skin cells that could otherwise lead to patchy results. Pay extra attention to:
Knees and elbows where skin cells accumulate
Ankles and feet for a natural color transition
Hands and wrists which often appear darker
Dry patches on legs and arms
Use a fine-grained scrub and massage it in circular motions over the skin. Then rinse thoroughly and dry your skin completely. Wait at least 30 minutes before applying the self-tanner, allowing your skin to be fully dry and hydrated.
Hydration: the foundation for a beautiful glow
Well-hydrated skin absorbs self-tanner more evenly and gives a more beautiful end result. Apply a neutral body lotion 24 hours before application, but avoid doing so just before using your self-tanner. Dry areas such as elbows, knees, and ankles can benefit from an extra thin layer of moisturizing cream to prevent them from becoming too dark.
Applying self-tanner for optimal results.
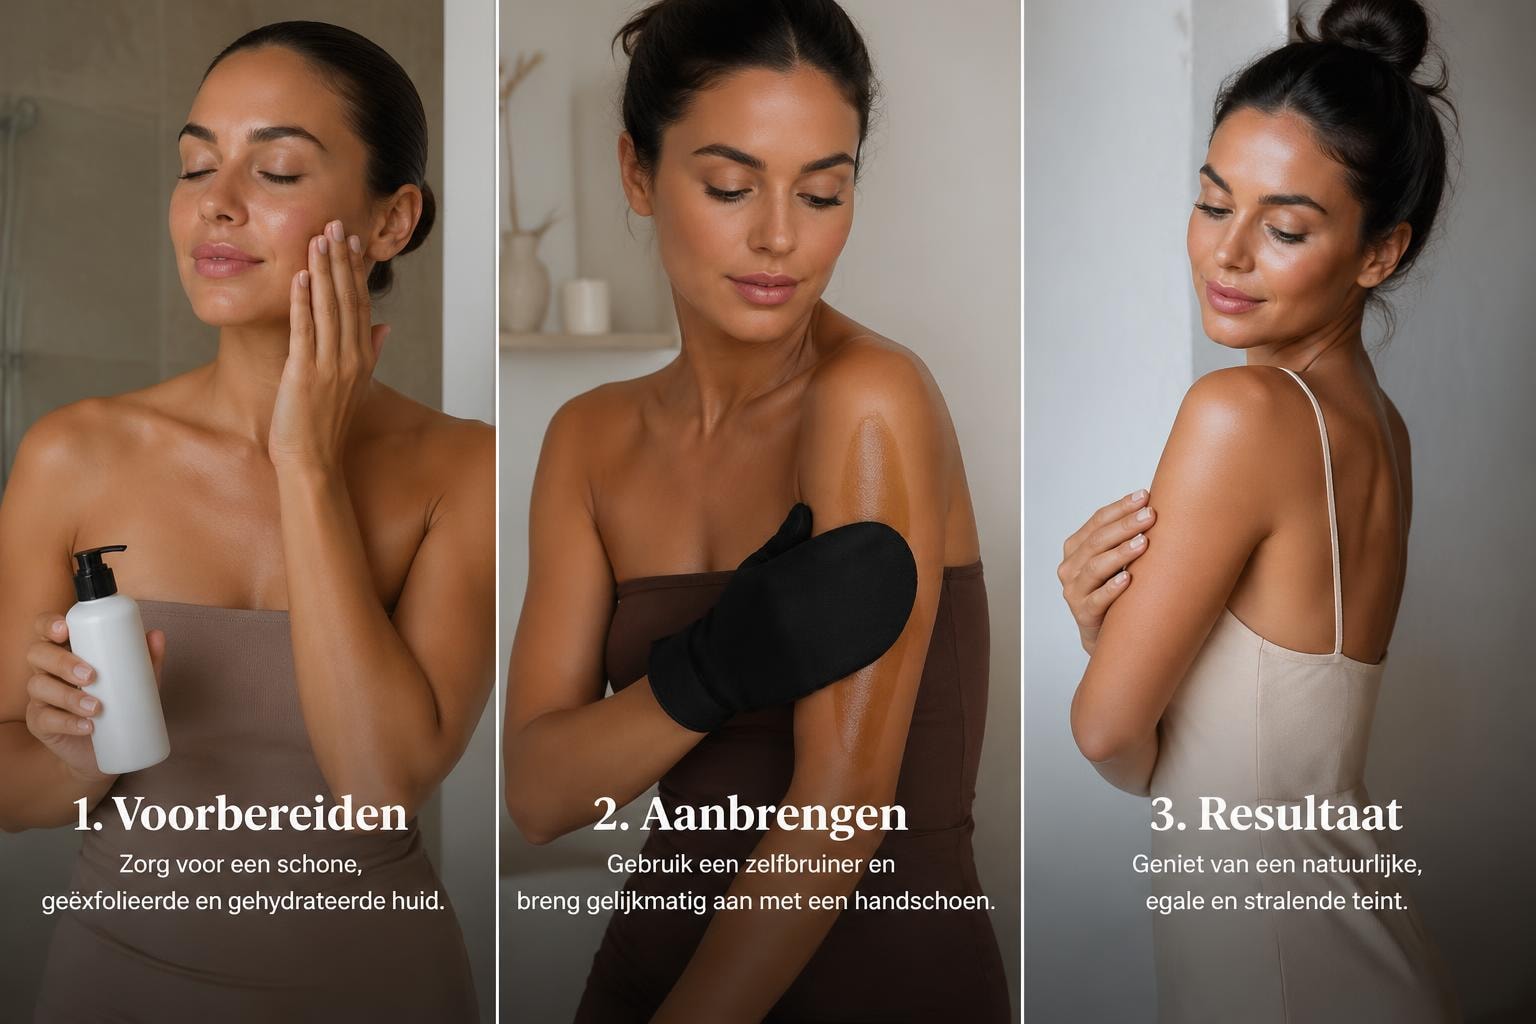
Getting a tan without sun requires the right application technique. Careful application makes the difference between a professional result and streaky patches. The practical tips for using self-tanners can help you perfect your technique.
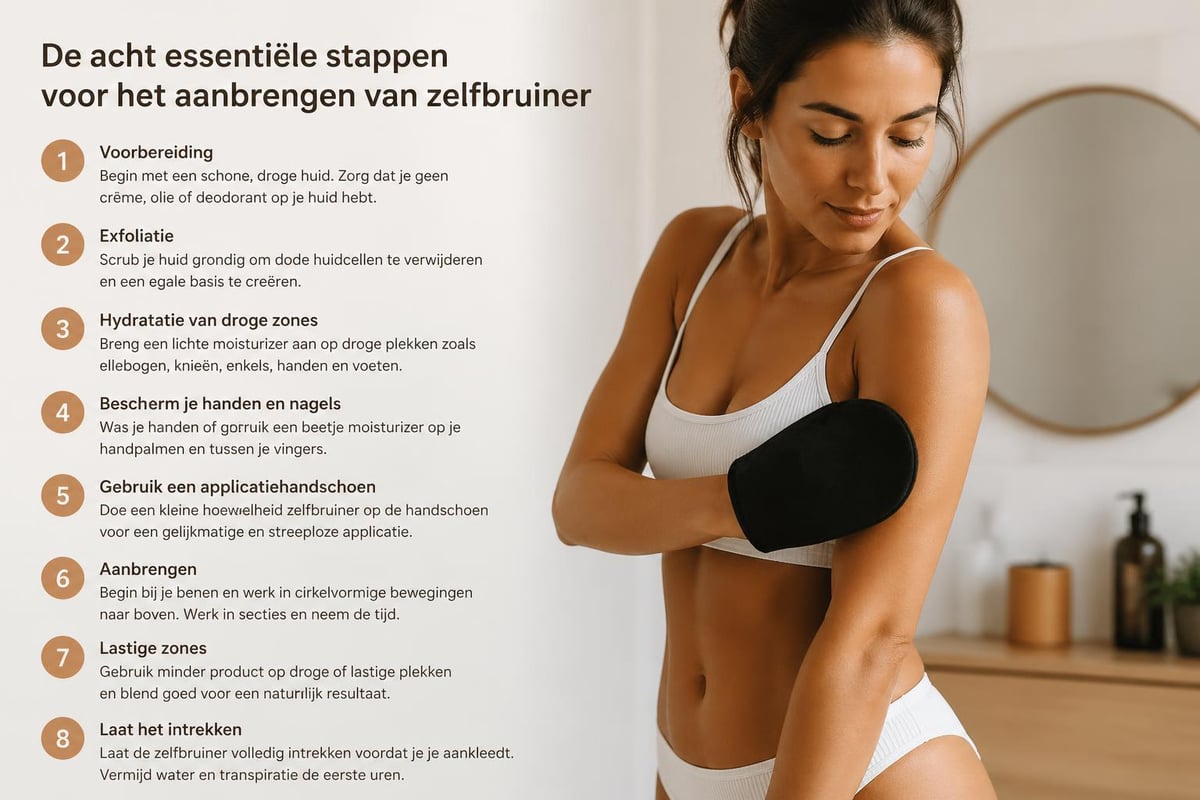
Step-by-step application method
Start with clean, dry skin immediately after showering and exfoliating
Use an application mitt for a streak-free result
Begin with your legs and work upwards towards your torso
Apply product in long, fluid strokes without rubbing back and forth too much
Use less product on knees, elbows, and ankles
Dilute palms and soles with a damp cloth
Allow the product to fully absorb before putting on clothes (at least 10-15 minutes)
Wash your hands thoroughly but leave the backs of your hands for a natural effect
For facial application, it is recommended to use a lighter formula or mix your body product with your day cream. This prevents a mask-like effect where your face is darker than your neck. Apply a small amount of product to the hairline, eyebrows, and along the jawline.
The best products for different needs
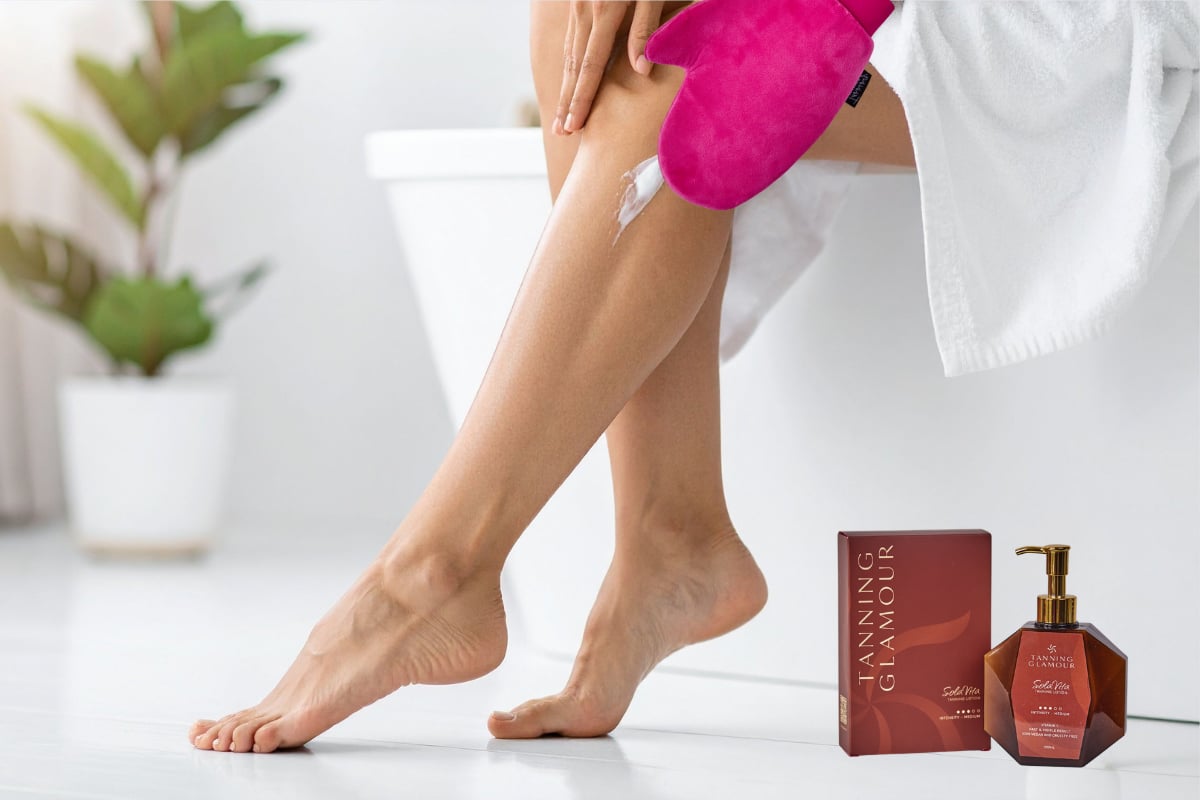
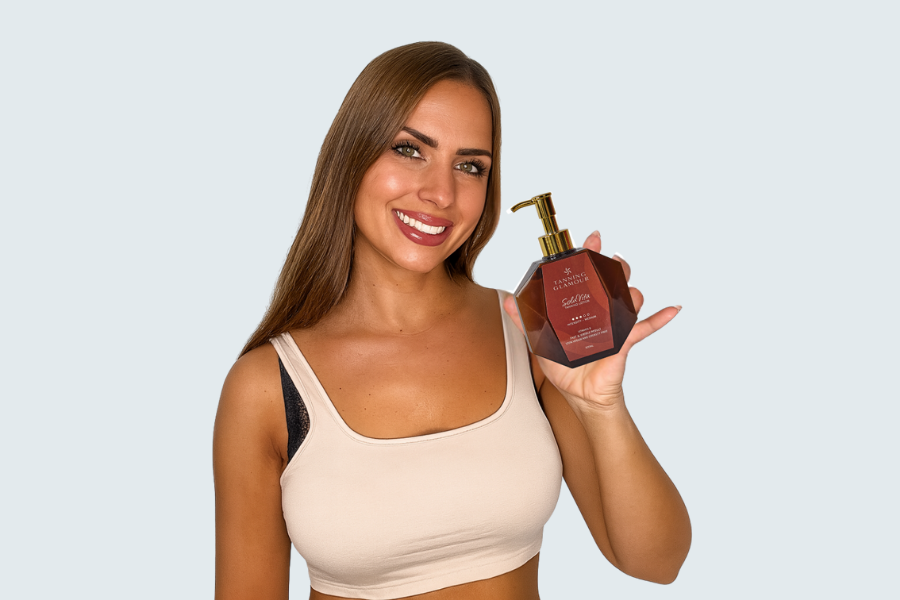
The self-tanner market has grown enormously, offering various formulas for every skin type and preference. Lotions generally provide the most even coverage and are ideal for beginners. The SolaVita Self-Tanning Lotion absorbs quickly, isn't sticky, and provides a warm glow that lasts beautifully for up to 5-7 days.
Drops offer more flexibility as you control the intensity by adjusting the number of drops. You mix them with your favorite body lotion or day cream to gradually build a tan. Sprays are useful for hard-to-reach areas like the back, but require some practice for an even result.
Maintenance and care of your sunny complexion
Maintaining a beautiful tan without sun requires proper care. With a few simple steps, your glow will last longer, and the color will fade evenly.
Daily care routine
Hydrate your skin daily with a neutral, fragrance-free body lotion. This extends the longevity of your artificial tan because your skin cells remain intact longer. Shower with lukewarm water instead of hot water and avoid harsh soaps or shower gels with excessive lather.
Pat your skin dry instead of rubbing
Use oil-free, non-sticky lotions
Avoid chlorinated water for the first 24 hours
Apply a new layer weekly to maintain color
Exfoliate lightly before a new application
When and how to refresh
Most self-tanners last well for 5-7 days, after which the color gradually begins to fade. For a consistent result, you can apply a new layer every 4-5 days. Exfoliate lightly first to remove uneven faded patches, but don't exfoliate as thoroughly as you did for the initial application.
Skin Type |
Recommended Frequency |
Intensity |
|---|---|---|
Light skin |
Every 5-6 days |
Light/Medium |
Medium skin |
Every 4-5 days |
Medium |
Dark skin |
Every 3-4 days |
Medium/Dark |
Common mistakes and how to avoid them
Even with the best products, things can sometimes go wrong when applying self-tanner. Knowing these pitfalls will help you avoid them and always achieve a professional result.
Correcting streaky results
Streaks usually occur due to uneven product distribution or excessive rubbing in the same spot. If you see streaks appear, gently exfoliate the affected areas with a scrub and apply a thin layer of self-tanner to even out the color differences. Prevention, however, works better: always use an application mitt and work in large, fluid motions.
Avoiding orange undertones
The effectiveness of various methods depends on the quality of the ingredients used. Modern formulas typically contain violet pigment to neutralize orange undertones. Choose products that specifically state they provide a natural, ash-free color. Too much product can also lead to an unnatural color, so always start with a thin layer.
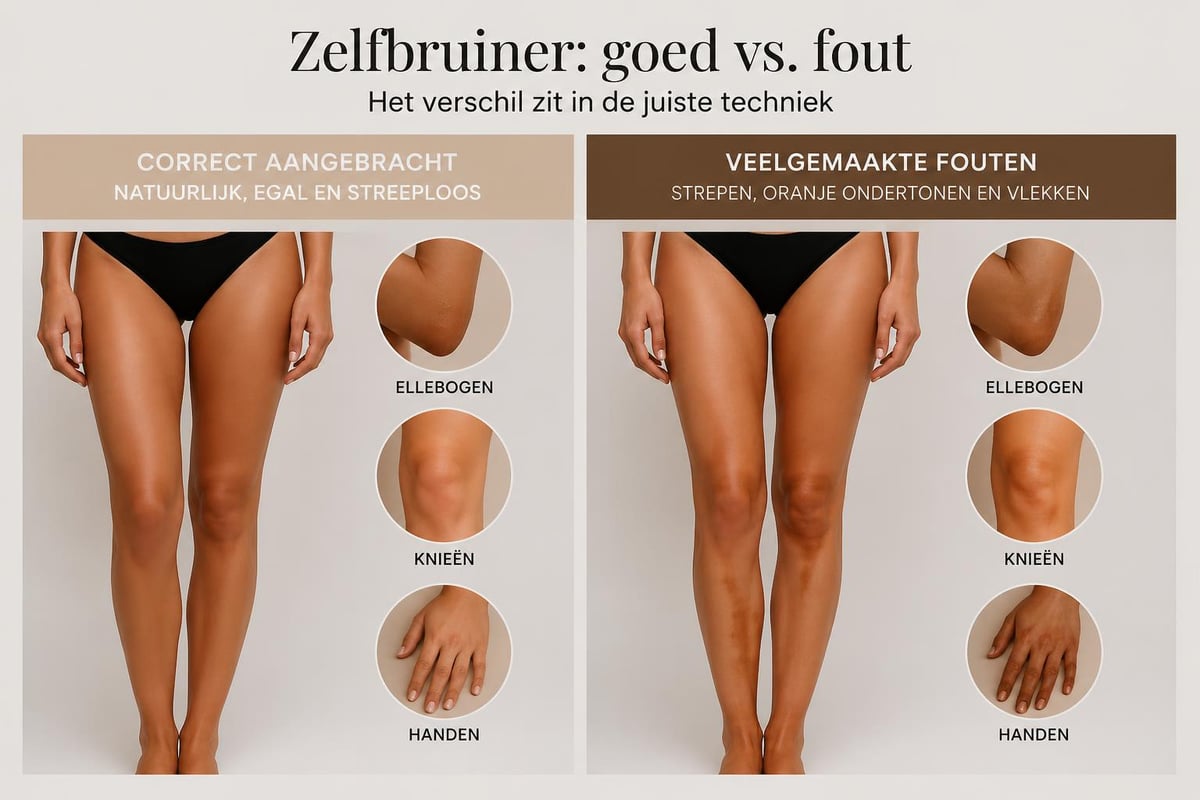
Stains on hands and feet
Hands and feet absorb self-tanner more intensely than the rest of your body. Use minimal product on these areas and dilute it with a damp cloth immediately after application. For your hands, it's best to use a special mini mitt for the backs of your hands, while keeping your palms clean.
Natural alternatives and complementary methods
In addition to classic self-tanners, there are several complementary methods to enhance your complexion. These can be combined for an even more natural and radiant result.
Nutrition for a healthy glow
Your skin color is also influenced by what you eat. Foods rich in beta-carotene can give your skin a subtle, warm glow. Think of:
Carrots and sweet potatoes
Pumpkin and butternut squash
Spinach and kale
Mango and apricots
Peppers and tomatoes
This natural method works gradually and never gives a dramatic effect, but it does contribute to a healthy appearance. Tips for a summery complexion often combine nutrition with external products for optimal results.
Bronzing powders and make-up
For a temporary boost, you can use bronzing powders on your face, décolletage, and shoulders. These products wash off instantly and are perfect for special occasions. Combine them with your daily self-tanner for extra dimension and radiance. Apply bronzer to the highest points of your face where the sun would naturally hit: cheekbones, bridge of the nose, and forehead.
Sustainability and conscious choices
In 2026, sustainability is becoming increasingly important when choosing cosmetics. Getting a tan without sun can also be a conscious, environmentally friendly choice if you pay attention to the composition and packaging of your products.
Natural ingredients and certifications
Many modern self-tanners contain natural ingredients in addition to DHA, such as aloe vera for hydration, vitamin E for antioxidants, and botanical oils for nourishment. The organic self-tanning creams are developed with attention to both your skin and the environment. Look for:
Vegan formulas without animal ingredients
Organically certified raw materials
Free from parabens and sulfates
Sustainable packaging made from recycled materials
Reef-safe formulas without harmful chemicals
Conscious consumers can now choose brands that are transparent about their production process and committed to sustainability. Websites like Tinc offer a wide range of zero-waste and sustainable products that perfectly fit a conscious lifestyle, including natural skincare that complements your beauty routine.
Packaging and waste reduction
Where possible, opt for products in glass bottles or recycled plastic packaging. Some brands offer refillable options or concentrates that you can mix yourself, drastically reducing plastic waste. Drops are an excellent choice in this regard, as a small bottle can last for months.
Self-tanner for different seasons
Using self-tanner is suitable for all seasons, but the approach varies depending on the time of year. In winter, you maintain a healthy glow, while in summer you can enhance your natural tan.
Maintaining a winter complexion
The winter months are ideal for making a tan without sun a routine. Your skin often looks pale and dull due to a lack of sunlight and lower vitamin D levels. A subtle self-tanner gives you:
A healthy, vital appearance despite the gloomy weather
More self-confidence during festive occasions
An even base for your make-up
Protection against the sallow winter face
Start in autumn with a light formula and gradually build up. This prevents a dramatic color difference between summer and winter. The best-selling products are often specially adapted to different seasons and intensities.
Summer enhancement
In summer, you can use self-tanner as a base before going on holiday or to enhance and even out your natural tan. This gives a more even result than just sunbathing. Apply a light layer for subtle enhancement, or use drops mixed with your after-sun for gradual buildup.
Choosing the Right Formula for Your Skin
Not every self-tanner works the same for every skin type. Finding the right match between product and skin is essential for a beautiful, natural result.
Skin Type and Product Formula
Skin Type |
Best Formula |
Why |
|---|---|---|
Dry skin |
Lotion/Cream |
Provides extra hydration and prevents streaks |
Oily skin |
Mousse/Spray |
Light texture that absorbs quickly |
Sensitive skin |
Hypoallergenic drops |
Fewer additives, blendable with your own cream |
Combination skin |
Universal lotion |
Works on all areas, adjustable intensity |
For dry skin, products with nourishing oils and shea butter are ideal. They combine tanning with intensive hydration. For oily skin, lighter formulas work better, as they don't add extra shine. Sensitive skin types benefit from fragrance-free, minimalist formulas.
Adjusting Intensity to Your Natural Complexion
Always start lighter than you think you need. You can always apply a second coat, but an overly dark result is harder to correct. For light skin, choose medium formulas; for medium skin, choose medium to dark formulas. Very dark skin types often require specific products that complement dark melanin rather than creating an orange undertone.
Frequently Asked Questions About Sunless Tanning
Many people have similar questions when starting with self-tanners. Here we answer the most common doubts to help you get started.
How long does the result last?
Most quality self-tanners remain beautiful for 5-7 days with proper care. The result is visible after 2-3 hours and reaches its full intensity after 6-8 hours. For more detailed information, you can consult the frequently asked questions, which cover all aspects of use and results.
Can it stain clothes?
Modern formulas barely stain anymore if you allow the product to absorb properly. Wait at least 10-15 minutes before getting dressed, and preferably choose dark, old clothes for the first few hours. If stains do occur, wash them immediately with cold water and soap.
Does it work on all skin types?
Yes, self-tanner works on all skin types, but the choice of formula and color must be adapted to your natural complexion. Light skin types have different needs than dark skin types. Always test on a small patch of skin first to see how the color develops on your specific skin.
Does it protect against the sun?
No, a self-tanner tan does not provide UV protection. You must still use sunscreen when going out in the sun. The tan is purely cosmetic and does not mean your skin is protected from harmful radiation. Always use an SPF of at least 30 when exposed to the sun.
Tips for a Professional End Result
With the right approach, you can achieve the same professional result at home as in a beauty salon. These expert tips make the difference between an average and an excellent result.
Timing is everything
Apply self-tanner at a time when you can wait a few hours before showering or sweating. Ideally, do this in the evening before bed, so the product can absorb overnight. Wear old, dark clothes to bed or sleep on dark sheets the first night.
Plan important events smartly. Apply your self-tanner 2-3 days in advance, not the night before. This allows the color time to fully develop, and you can still correct any imperfections. For an occasion where you'll show bare legs or arms, test the product at least a week in advance.
Professional Application Techniques
Work in sections: divide your body into zones (left leg, right leg, torso, arms) and work systematically
Use the "less is more" principle: start with a thin layer
Avoid circular motions: work in long, straight lines
Blend transitions: always blend extra at wrists, ankles, and hairline
Invest in good tools: a quality mitt makes a huge difference
Applying self-tanner is a skill that improves with practice. Many people see a clear improvement in their technique and end result after 3-4 applications. Give yourself time to learn and experiment with different methods until you find what works best for you.
Achieving a natural, radiant complexion without harmful sun rays is more accessible and effective than ever in 2026. With the right preparation, product choice, and application technique, you can create that coveted sunkissed glow all year round. Tanning Glamour offers natural self-tanners that are visible within 2-3 hours, stay beautiful for 5-7 days, and give you an even tan without streaks or orange undertones. Discover for yourself how easy it is to look radiant all year round.
Read more
Q: Is it safe for my skin? What's in it? A: Yes. The lotion contains DHA from sugar cane, a safe ingredient that only colors the top layer of skin. It gives a natural tan without sun or UV rays. ...
Discover how to create a perfect tan at home with natural self-tanners. Tips for an even, radiant complexion without sun in 2026.