Self-tanning lotion: how to create a natural glow
A healthy, radiant complexion immediately gives a well-groomed appearance and a boost of self-confidence. However, prolonged sun exposure is not the best choice for your skin. Fortunately, there is a safe, effective way to achieve that sun-kissed glow: self-tanning lotion. These innovative formulas give you a natural tan within hours, without harmful UV radiation. Whether you are preparing for a special occasion or simply want a golden glow all year round, self-tanning lotion offers the perfect solution for an even, well-groomed complexion that lasts for several days.
What is self-tanning lotion and how does it work?
Self-tanning lotion is a cosmetic product that gives your skin a tan without exposure to sunlight. The active ingredient in these lotions is usually dihydroxyacetone (DHA), a colorless sugar that reacts with amino acids in the top layer of your skin.
The scientific process behind the tan
When you apply self-tanning lotion, a chemical reaction known as the Maillard reaction occurs. This process begins as soon as the DHA comes into contact with the dead skin cells on the surface of your skin. The brown pigments that are formed are melanoidins – the same substance that gives roasted bread or coffee its brown color.
Key benefits of self-tanning lotion:
- Visible results within 2-3 hours
- No harmful UV radiation
- Even, natural tan
- Long-lasting effect of 5-7 days
- Suitable for all skin types
The intensity of your tan depends on several factors, including the concentration of DHA in the product, your own skin type, and how many layers you apply.
The differences between self-tanning lotion and other self-tanners
The world of self-tanners is vast. In addition to lotions, there are sprays, mousses, creams, and drops available. Each type has its own characteristics and application possibilities.
| Product type | Benefits | Ideal for |
|---|---|---|
| Lotion | Hydrating, easy to spread | Daily use, dry skin |
| Mousse | Dries quickly, light texture | Quick application, warm days |
| Spray | Reaches tricky spots | Back and hard-to-reach areas |
| Drops | Fully customizable | Gradual build-up, personal intensity |
Self-tanning lotion stands out for its nourishing formula that also hydrates your skin. The creamy texture gives you complete control over where the product goes, which is especially important for beginners who want to avoid streaks.
Why choose a lotion formula?
The lotion texture offers several specific advantages. Its richer consistency ensures that the product does not run or drip as quickly during application. This gives you more time to spread it evenly, especially on areas that need extra attention such as knees, ankles, and elbows.
Many modern formulas also contain nourishing ingredients such as aloe vera, vitamin E, or hyaluronic acid. These substances prevent dryness and keep your skin soft and supple while the tan develops.
Preparation for a perfect result
The key to a beautiful, even tan lies in preparation. Even the best self-tanning lotion cannot deliver a perfect result on poorly prepared skin. Start these steps at least 24 hours before application.
Exfoliate for a smooth base
Dead skin cells are unevenly distributed over your body, with concentrations on rougher areas such as knees, elbows, and ankles. If you apply self-tanning lotion to these cells, the result will be patchy and will not last long.
Effective exfoliation method:
- Use a scrub with fine grains for your entire body
- Pay extra attention to rougher areas
- Exfoliate 24 hours before applying your self-tanning lotion
- Remove all old self-tanner completely
- Rinse well with warm water
Be careful not to scrub too aggressively. Your skin should be smooth, but not irritated or red. Irritated skin can react unpredictably to self-tanning lotion.
Hydration and timing
After exfoliating, your skin is extra absorbent. Apply a light, unscented body lotion to very dry areas such as knees, elbows, ankles, and hands. This creates a barrier that prevents these spots from becoming too dark.
Make sure your skin is completely dry before applying the self-tanning lotion. Moisture can dilute the product and lead to uneven distribution. Many people make the mistake of starting immediately after showering – wait at least 30 minutes.

The correct application technique for an even tan
Even with the best preparation, your application technique determines the final result. Self-tanning lotion requires a systematic approach to prevent streaks, patches, and orange undertones.
Working with an applicator mitt
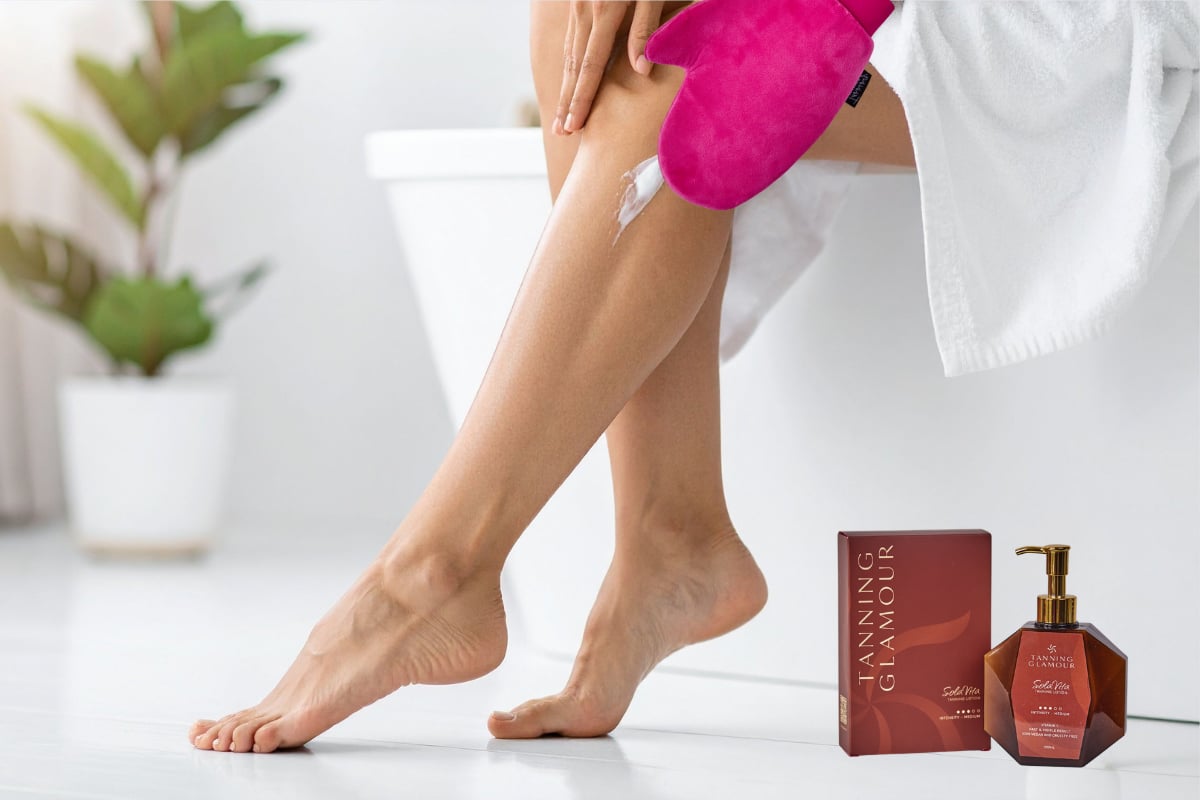
A professional self-tanning mitt is not a luxury but a necessity. Your bare hands absorb the self-tanning lotion, leading to dark-stained palms – a clear sign that you've used self-tanner.
The soft velvet texture of a quality mitt spreads the product effortlessly and evenly. Apply the lotion in circular motions, working upwards from your ankles. This prevents you from rubbing over freshly treated areas and creating streaks.
Start with your legs, then work on your stomach and torso, then your arms, and finish with your face and neck. For your back, you can use a special back applicator or ask someone for help.
Dosage and distribution per body zone
Too much product in one spot creates dark patches, while too little leads to streaking. Always start with a small amount and build up gradually.
| Body zone | Recommended amount | Points of attention |
|---|---|---|
| Per leg | Walnut-sized pump | Dilute extra at knees and ankles |
| Torso | Two pumps | Distribute evenly over stomach and back |
| Arms | Half a pump per arm | Careful at elbows |
| Face | Pea-sized amount | Mix with day cream for subtle effect |
For areas that tend to get too dark – such as knees, elbows, ankles, hands, and feet – use minimal product. Spread this with the residue on your mitt after treating larger areas. This technique prevents these areas from standing out as dark patches.
Development time and optimal results
After applying your self-tanning lotion, the waiting begins. The first few hours are crucial for the final result. What you do and don't do during this period determines whether you get an even, natural tan or are disappointed.
The first 24 hours after application
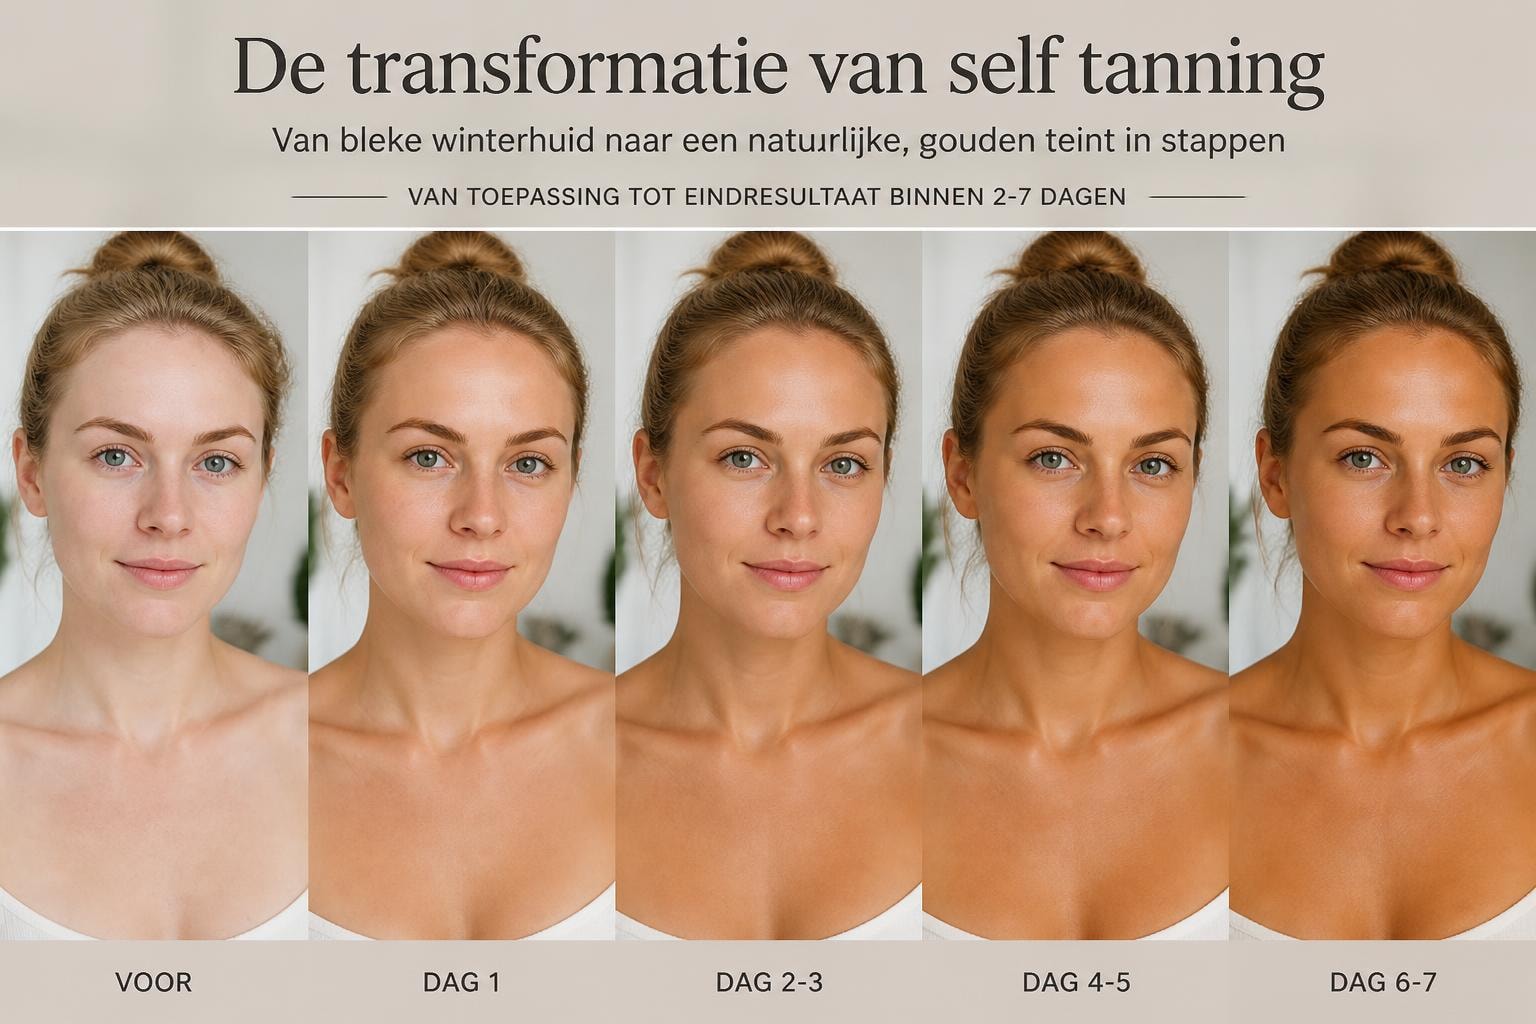
The tan develops gradually. You will see clear results within 2-3 hours, but the full depth of the shade reaches its peak after about 8-12 hours. Modern self-tanning lotion formulas often contain a guide color – a temporary tint that immediately shows you where you have applied the product.
Crucial do's and don'ts during development:
- Wear loose, dark clothing that doesn't rub your skin
- Avoid sweating from intense activities
- Do not shower or bathe in the first 6-8 hours
- Do not touch your skin with wet hands
- Sleep on dark sheets the first night
- Wait at least 6 hours before applying other products
Water is the biggest enemy during the development phase. Even a little sweat can disrupt the DHA reaction and cause streaks. Therefore, plan your self-tanning lotion application for the evening, so the product can work while you sleep.
First shower and color development
When you shower for the first time after applying self-tanning lotion, you will see the guide color rinse away. This is completely normal and no cause for panic. The real tan is deeper in your skin and will remain.
Use lukewarm water and a mild, moisturizing shower gel. Do not rub too hard and gently pat your skin dry with a towel instead of scrubbing. Immediately after showering, apply a moisturizing body lotion to seal and prolong the tan.
Maintaining and extending your glow
A beautiful self-tanning lotion tan lasts an average of 5-7 days, but with proper care, you can significantly extend this. The tan gradually fades as your skin renews itself – a natural process that occurs every 28 days.
Daily hydration is essential
Dry skin exfoliates faster and more unevenly, leading to a patchy fade of your self-tanning lotion. Moisture is the best friend of a long-lasting tan. Apply a rich, nourishing body lotion twice a day – in the morning and evening.
Preferably choose a fragrance-free lotion without alcohol, as these ingredients can dry out your skin. Extra hydration on areas that dry out quickly, such as shins and forearms, significantly extends the even appearance.
Layering for intensity and durability
Instead of waiting until your tan has completely faded, you can apply a thin layer of self-tanning lotion every 3-4 days. This layering technique ensures a constant, even glow without increasing intensity.
If you want a deeper shade, build it up gradually with multiple thin layers instead of one thick application. This gives a more natural result and prevents orange undertones from appearing. Wait at least 24 hours between each layer so you can assess the effect.
Many people choose to use a lighter concentration of self-tanning lotion for maintenance than for the initial build-up. SolaVita Self-Tanning Lotion, for example, offers a balanced formula that is suitable for both initial application and maintaining your glow, with results within a few hours and a natural tan that remains beautiful for up to 5-7 days.
Common mistakes and how to avoid them
Even experienced users sometimes make mistakes with self-tanning lotion. Fortunately, most problems can be avoided with the right knowledge and approach.
Avoiding orange undertones
An orange tan instead of a natural brown glow is the most feared self-tanner fail. This usually happens due to one of these causes:
Causes of orange result:
- Product with too high DHA concentration for your skin type
- Too much product applied at once
- Not properly exfoliated before application
- Application on non-neutral skin pH
- Interaction with other skincare products
Always choose a self-tanning lotion that matches your natural skin tone. Lighter skin types need a lower DHA concentration than darker skin types. First, test a new product on a small patch of skin, for example, on the inside of your wrist.
Correcting streaks and patches
Despite all precautions, you may notice streaks or patches. Quick action prevents these from becoming permanent during the development phase.
| Problem | Solution | Prevention |
|---|---|---|
| Dark streaks | Exfoliate with scrub and lemon juice | Distribute evenly with mitt |
| Stains on hands | Nail brush with soap and lemon | Wash hands immediately after application |
| Dark knees | Extra exfoliate and hydrate | Minimal product on these areas |
| Light spots | Carefully touch up with little product | Work systematically by zone |
If you discover streaks within the first few hours, you can sometimes still remove them with a damp towel and circular motions. After 6-8 hours, only exfoliation works, but be careful not to disturb the rest of your tan.
Self-tanning lotion for different skin types
Not every skin type reacts the same to self-tanning lotion. Understanding your own skin helps you choose the best product and the right approach.
Sensitive skin and allergies
People with sensitive skin or eczema can often use self-tanning lotion, but need to be extra careful with product selection. Look for formulas without alcohol, perfume, or harsh chemicals.
Always test on a small patch of skin first, for example behind your ear or on the inside of your elbow. Wait 24 hours and check for redness, itching, or irritation. Some people are sensitive to DHA itself, although this is rare.
For extra sensitive skin, you can start with a lower concentration or mix the product with a regular body lotion to reduce the intensity. This gives your skin time to get used to the formula.
Dry versus oily skin
Dry skin tends to absorb self-tanning lotion unevenly, which can lead to patchiness. Extra hydration in the days before application is crucial. Use a rich body lotion daily and concentrate on areas that are extra dry.
Oily skin often has the opposite problem – the product can slip or not adhere well. Light exfoliation just before application helps, as does carefully drying your skin. Some people with oily skin have better results with a mousse or spray than with a lotion.
Combining with other skincare products
Self-tanning lotion is part of your beauty routine, not a replacement for your regular skincare. Smart product combining gives the best results.
Timing of other products
Certain ingredients can affect how self-tanning lotion works. Strong exfoliants like glycolic acid, salicylic acid, or retinoids accelerate cell turnover, causing your tan to fade faster. Do not use these products within 24 hours before or after applying your self-tanning lotion.
Oily products can also interfere with the DHA reaction. Wait at least an hour after applying your self-tanning lotion before using other body products. The same principle applies to facial skincare – first apply your serum and cream, wait until they are completely dry, and only then apply your self-tanner.
Sun protection remains necessary
A common misconception is that self-tanning lotion protects you from the sun. This is absolutely not true. The tan created by DHA offers no UV protection whatsoever. Your skin needs the same sun protection as before.
Use an SPF daily, even if you are not directly in the sun. UVA rays penetrate clouds and windows. A good sunscreen not only prevents skin damage and premature aging but also helps keep your self-tanning lotion looking good longer by preventing dryness.
For questions about using self-tanners in combination with other products, check the frequently asked questions where common situations are discussed.
Seasonal tips for self-tanning lotion
Your approach to self-tanning lotion can vary depending on the season and your activities. Each time of year brings its own challenges and opportunities.
Summer strategy
In the summer months, you sweat more, swim more often, and wear lighter clothing. This requires an adapted approach. Apply your self-tanning lotion for special occasions or events, not as a daily routine during a beach holiday.
Swimming in chlorinated or salt water accelerates the fading of your tan. So, plan your application strategically – for example, a day before a party or event, not right before a swimming day. After swimming, rinse immediately with clean water and apply a moisturizing lotion.
Summer adjustments:
- Choose lighter formulas that don't feel sticky in the heat
- Apply in the evening when it's cooler
- Extra hydration due to increased perspiration loss
- Protect your tan with water-resistant SPF
- Use less product for a more subtle summer glow
Winter maintenance
In winter, your skin is drier due to heating and cold wind. This is actually the perfect season for self-tanning lotion because your tan lasts longer on well-hydrated skin. The winter months are also ideal for experimenting and perfecting your technique, as you usually wear more clothing that covers any mistakes.
Significantly increase your hydration routine in winter. Use richer body lotions and consider a humidifier in your bedroom to prevent dryness overnight. Your self-tanning lotion result will be more uniform and long-lasting on well-cared-for winter skin.
Environmentally friendly and natural choices
More and more people are looking for self-tanning lotion that is not only good for their skin but also for the environment. Fortunately, the supply of natural and sustainable options is growing.
Ingredients to look for and avoid
Quality products contain nourishing natural ingredients alongside the active DHA. Look for formulas with aloe vera, coconut oil, shea butter, vitamin E, or hyaluronic acid. These ingredients hydrate your skin and improve the result.
Avoid products with parabens, sulfates, mineral oils, or synthetic fragrances. These ingredients can irritate your skin and are often harmful to the environment. A good self-tanning lotion has a natural, mild scent or is completely fragrance-free.
Also pay attention to the packaging. Brands that invest in recycled materials, refillable bottles, or biodegradable packaging demonstrate their commitment to sustainability. These are often the same brands that pay attention to the quality of their formulas.
Vegan and cruelty-free options
Many modern self-tanning lotion brands are vegan and not tested on animals. Always check if the product is certified by organizations such as Leaping Bunny or PETA. These certifications guarantee that no ingredient or the final product has been tested on animals.
Vegan formulas do not contain animal ingredients such as honey, beeswax, lanolin, or collagen. For people who make conscious choices in their beauty products, these are important criteria. Fortunately, vegan self-tanning lotion performs just as well as conventional formulas.
Traveling with self-tanning lotion
Whether you're traveling for business or pleasure, taking your self-tanning lotion with you requires planning. Liquids in your carry-on are restricted to 100ml, so consider travel sizes or solid alternatives.
Carry-on rules and practical tips
For air travel, pack your self-tanning lotion in a clear, resealable plastic bag along with your other liquids. Many brands offer travel sizes of 50-100ml that fit perfectly within the rules. Alternatively, you can transfer some of your regular product to an empty travel bottle.
In your checked luggage, you can take larger packages without problems. Make sure the cap is tightly closed and pack the bottle in a plastic bag to prevent leakage. Temperature fluctuations in the cargo hold can sometimes lead to product expansion.
If you want to apply on location, also bring your mitt and a small scrub for preparation. Packing list for self-tanning lotion when traveling:
- Self-tanning lotion (travel size or well-packaged)
- Applicator mitt
- Mini body lotion for hydration
- Small exfoliation scrub
- Dark towel (for stains)
Application in a hotel room
Hotel bathrooms are often smaller and have brighter lighting than at home, which is actually ideal for seeing what you're doing. Place a dark towel on the floor to catch any drips. Many hotels have white towels and rugs that can stain.
Ensure good ventilation and take your time. Haste leads to mistakes. If you are unsure about the result, apply a lighter layer - you can always add more, but removing too much is difficult. For important events, apply at least 24 hours in advance, not the morning of.
Self-tanning lotion offers a safe, effective way to enjoy a natural, radiant complexion all year round. With the right preparation, application technique, and care, you can create an even glow that lasts for days and looks completely natural. Ready to create your own sun-kissed look? Tanning Glamour offers natural self-tanners that are visible within 2-3 hours, stay beautiful for 5-7 days, and are completely free of streaks and orange undertones - for that perfect vacation feeling without the sun.
Read more
Discover the best self-tanner for your body for an even, natural, streak-free tan. Tips, techniques, and advice for a radiant glow.
Discover how self-tanning works, what products you need, and how to create a natural, even tan without streaks or orange undertones.