Self-tanning lotion: how to get a natural glow without the sun
A radiant, tanned complexion gives a well-groomed appearance and that wonderful holiday feeling, even in the middle of winter. But years of sunbathing is not the healthiest choice for your skin. Fortunately, self-tanning cream offers a safe and effective alternative. These products give you a natural, golden glow within hours without harmful UV radiation. In this article, you'll discover everything about how self-tanners work, the benefits they offer, and how to achieve the best results. Whether you're a beginner or already experienced, the right knowledge ensures an even, long-lasting glow that looks like you've just returned from a sunny holiday.
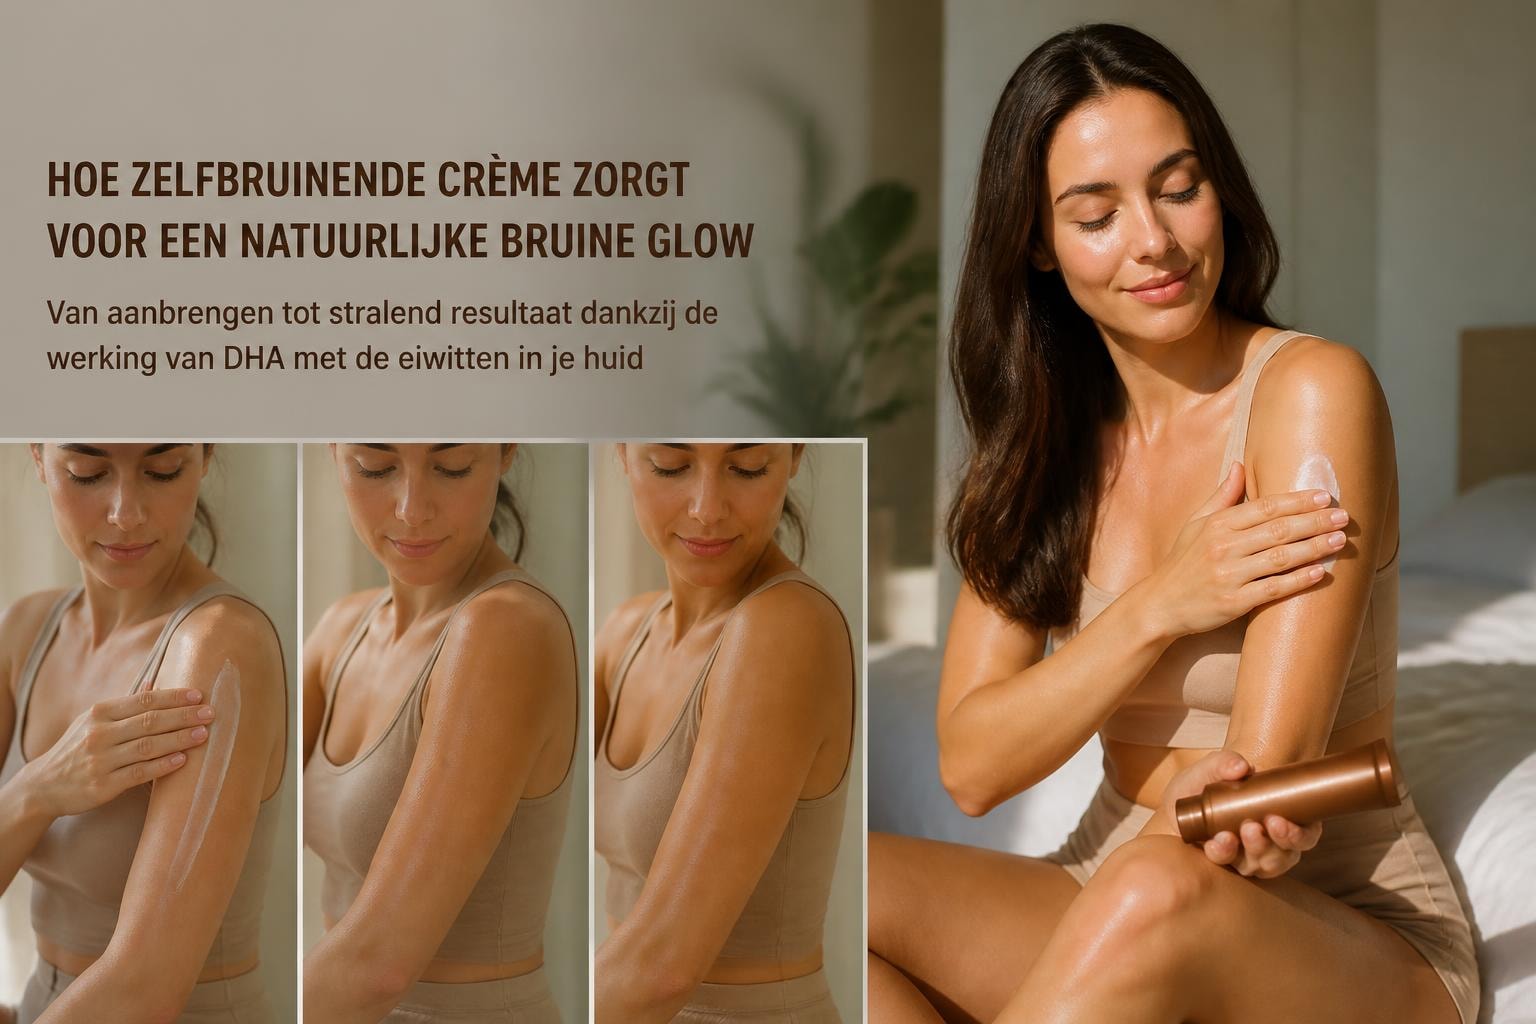
How self-tanning cream works
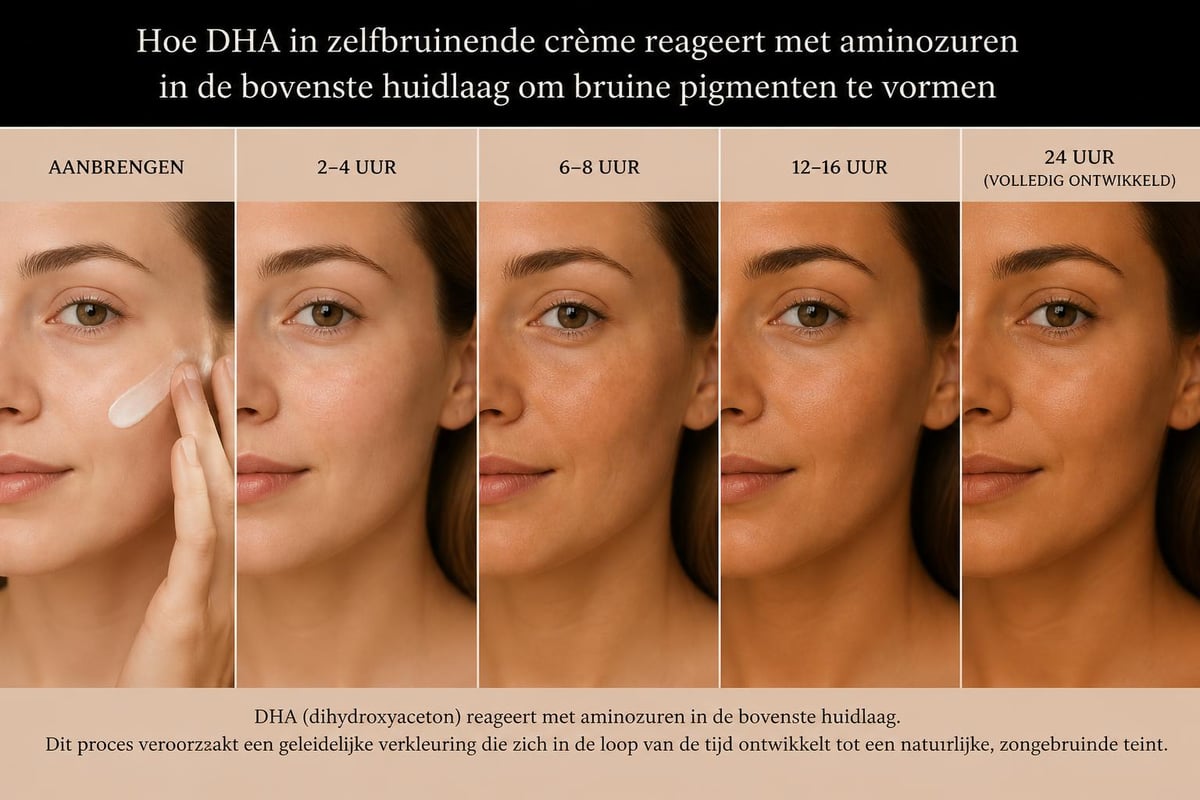
The secret behind a good self-tanner lies in an active ingredient called dihydroxyacetone, better known as DHA. This sugar compound reacts with the amino acids in the upper layer of your skin, creating brown pigments called melanoidins. This process is known as the Maillard reaction.
The reaction begins within an hour of application, but the full result only becomes visible after 2 to 8 hours. The intensity of the tan depends on several factors: the concentration of DHA in the product, your own skin type, and how well your skin is prepared. Products with a higher DHA concentration give a deeper tan, but also require more precision during application.
The difference between DHA and natural melanin
Unlike natural tanning caused by the sun, where melanin is produced in the deeper skin layers, DHA only works on the surface. This means that a self-tanning cream offers no protection against UV radiation. Your skin will get a beautiful colour, but you still need to use sunscreen when exposed to the sun.
The tan gradually fades as your skin cells renew, which usually takes 5 to 7 days. This natural process means you'll need to reapply regularly to maintain your glow.
Benefits of self-tanners over sunbathing
The popularity of self-tanners has grown enormously in recent years, and for good reason. These products offer numerous benefits beyond just a beautiful colour.
Health benefits at a glance:
- No increased risk of skin cancer from UV radiation
- Prevents premature skin ageing and pigment spots
- No risk of sunburn or damaged skin
- Suitable for people with sensitive skin who cannot tolerate the sun well
- Safe during pregnancy when sunbathing is advised against
In addition to the health benefits, a self-tanning cream also offers practical advantages. You are not dependent on the weather or the seasons. Even in the middle of winter, you can enjoy a sunkissed glow that boosts your self-confidence.
Control over the result
With a self-tanner, you determine how intense your tan will be. Do you want a subtle, natural tan or a deeper bronze look? By adjusting the amount of product and the number of applications, you create exactly the colour that suits you. According to information on self-tanners, you can achieve a very natural result with modern formulas.
| Benefit | Self-tanner | Natural sunbathing | Sunbed |
|---|---|---|---|
| UV protection | Extra SPF needed | Risky | Harmful |
| Time investment | 2-3 hours development time | Hours in the sun | Multiple sessions |
| Control over intensity | Fully customisable | Difficult to dose | Limited adjustability |
| Skin ageing | No extra risk | Accelerated | Very accelerated |
| Year-round possible | Yes | Seasonal | Yes, but harmful |
The right preparation for an even result
A perfect tan doesn't start with applying the cream, but with thorough preparation of your skin. This step largely determines how even and natural the final result will be.
Exfoliation is essential. By removing dead skin cells, you create a smooth surface for the self-tanner to adhere to evenly. Focus especially on areas where the skin tends to become rougher.
Important preparation steps:
- Exfoliate your body 24 hours before application - not immediately before, as this can cause irritation
- Shave or wax at least 12 hours beforehand - fresh hair follicles can cause small dots
- Wash and dry your skin thoroughly - oil or moisture prevent good adhesion
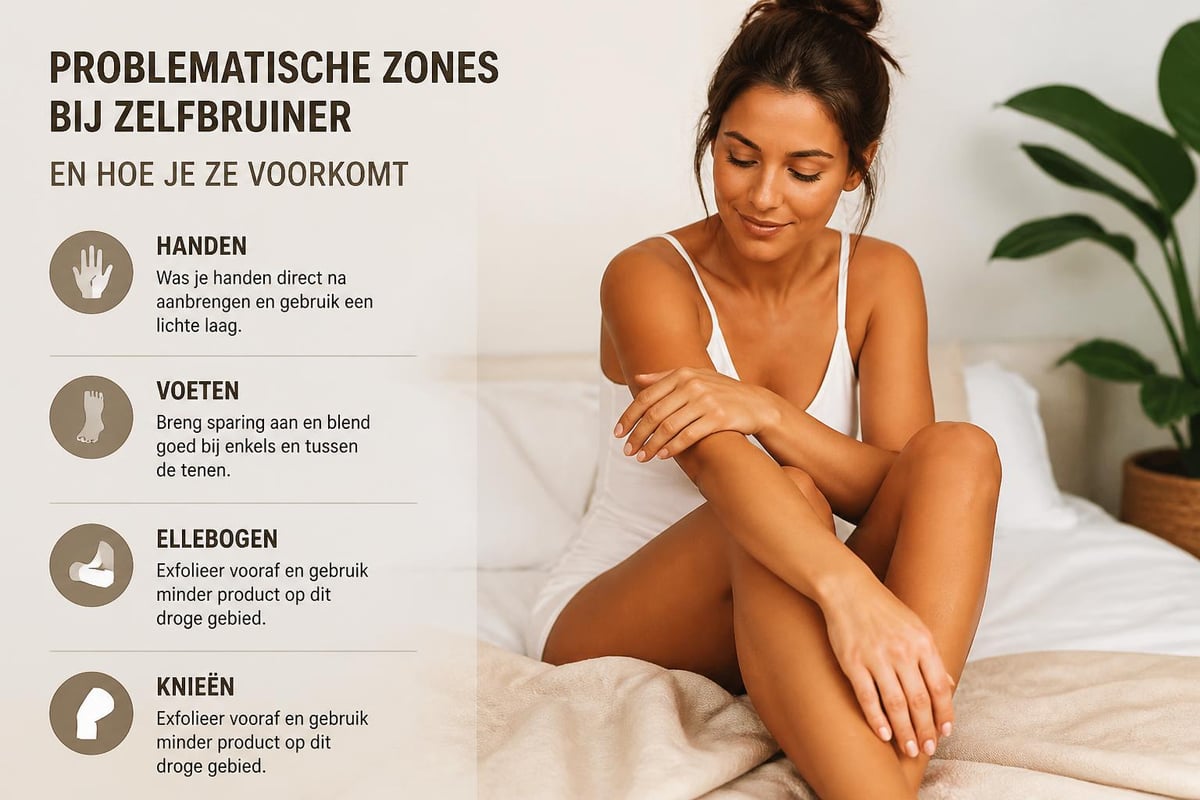
- Apply a light moisturizer to dry areas such as elbows, knees, ankles, and hands
Don't forget to clean your nails thoroughly. Self-tanning cream can accumulate under your nails and cause brown edges. Many people use gloves during application, which not only protects your hands but also ensures even distribution.
Treating dry areas
Certain body parts such as elbows, knees, and ankles absorb more product due to thicker skin. By moisturizing these areas beforehand with a light, oil-free cream, you prevent them from becoming too dark. This simple step makes the difference between a professional result and unwanted dark spots.
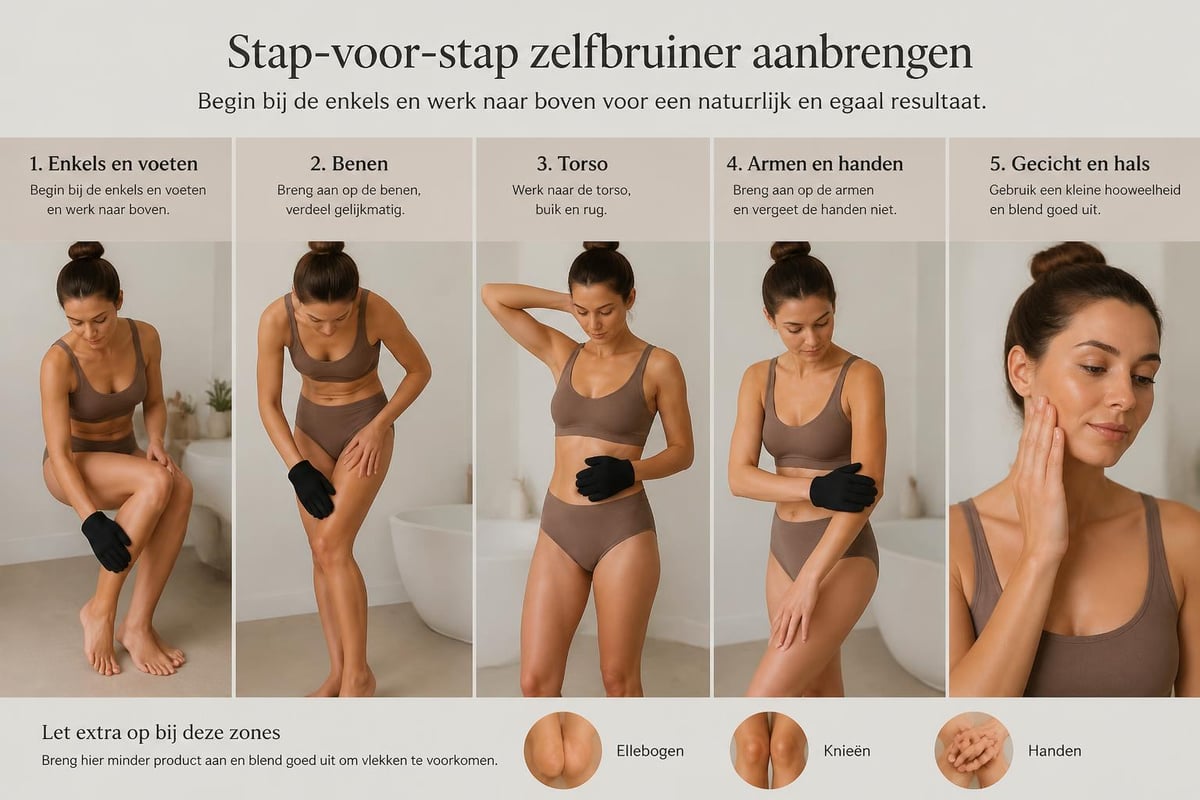
Application techniques for a streak-free result
The secret to a natural, even tan lies in the application method. With the right technique and tools, you can prevent streaks, spots, and orange tones that are unfortunately still often associated with self-tanners.
Always start at your ankles and work upwards. This method ensures that you don't accidentally brush against freshly applied cream with your arm. Apply the product in circular motions and work in sections: first your legs, then your torso, arms, and finally your face.
Essential application tips:
- Always use an application mitt for even distribution without stains on your hands
- Apply thin layers - you can always add a second layer
- Work quickly but carefully - don't let the cream sit in one spot for too long
- Mix some product with moisturizer for your face for a subtler tan
- Pay extra attention to hairlines, eyebrows, and ears
At Tanning Glamour, you'll find not only high-quality self-tanners but also professional application tools that make the process easier. A good mitt prevents your palms from turning orange and ensures a streak-free result.
Hard-to-reach areas like your back often pose a challenge. A special back applicator can help, or ask someone to assist with this area. Make sure to use the same circular motions for an even result.
The first hours after application
Immediately after applying your self-tanning cream, the development process begins. The next few hours are crucial for the final result. Patience is key now - a few simple guidelines will ensure your tan develops beautifully and evenly.
Wear loose, preferably dark clothing during the first 2-3 hours. Tight clothing can rub against your skin and cause streaks. Choose old clothes, as some formulas may leave slight discolouration on fabric, although this usually washes out.
What to avoid:
- Showering or sweating for at least 4 hours, preferably 6-8 hours
- Swimming in the first 24 hours
- Intense exercise that makes you perspire
- Contact with water on areas where you applied the cream
- Tight clothing that can rub
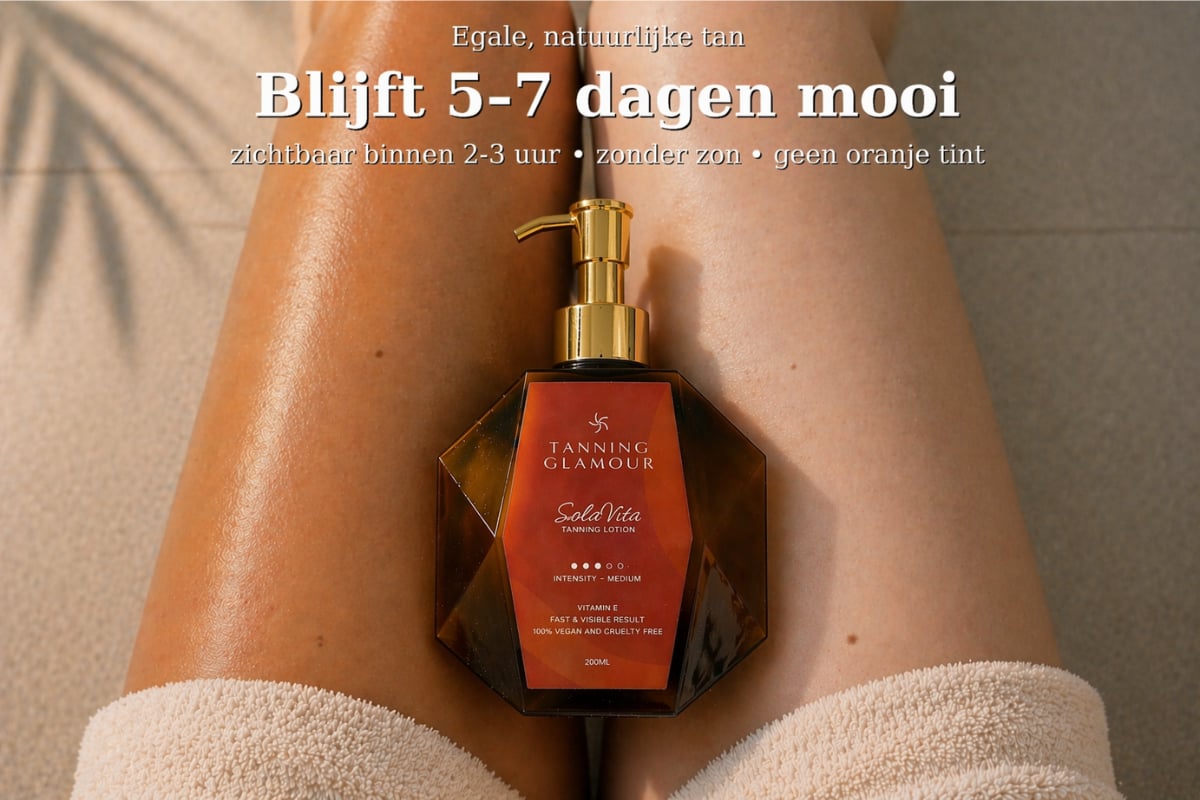
The SolaVita Self-Tanner Lotion is specially formulated to absorb quickly and feel non-sticky, making your development time more comfortable. The formula gives visible results within 2-3 hours and lasts 5-7 days, even after showering.
Many people choose to apply their self-tanner in the evening and leave it overnight. This gives the product a full night to develop. In that case, use an old towel on your pillow and preferably sleep on your back to minimize friction.
Maintenance and extending your tan
A beautiful tan deserves good maintenance. With the right care, you can keep your glow looking beautiful and even for longer. The average self-tanner remains visible for 5 to 7 days, but this depends on your skin type and care routine.
Hydration is key to a long-lasting tan. Dry skin sheds faster, causing your tan to fade unevenly. Therefore, apply a nourishing, oil-free body lotion daily. Oil-based products can actually break down your tan faster.
Care tips for long-lasting results:
- Hydrate daily with a light, oil-free lotion
- Shower lukewarm instead of hot - too hot water dries out your skin
- Pat dry instead of rubbing with your towel
- Do not exfoliate during the first few days after application
- Apply a new layer every 3-4 days for a constant glow
Also pay attention to your diet for healthy skin that retains your tan better. The Voedingscentrum (Dutch Nutrition Centre) emphasizes that sufficient fluid intake and vitamins contribute to a healthy skin barrier.
| Activity | Impact on tan | Advice |
|---|---|---|
| Daily showering | Moderately negative | Short, lukewarm showers |
| Swimming (chlorine) | Highly negative | Avoid first 48 hours |
| Sauna/hammam | Very negative | Not recommended |
| Exercise/sweating | Slightly negative | Rinse off immediately afterwards |
| Daily moisturizer | Positive | Recommended for even fade |
Common mistakes and how to avoid them
Even with experience, things can go wrong when using a self-tanning cream. The good news? Most mistakes are easy to prevent if you know what to look out for.
The orange tint is probably the most feared mistake. This often happens due to too high a DHA concentration for your skin type or too much product applied at once. Always start with a thin layer and build up gradually. Choose a formula specifically designed to prevent orange undertones.
Top five mistakes and solutions:
- Streaks and patches → Use an application mitt and work in circular motions
- Dark spots on dry areas → Apply moisturizer to elbows, knees, and feet first
- Brown palms → Always wear gloves or wash your hands immediately after application
- Uneven fade colour → Exfoliate thoroughly before application and hydrate daily
- Too dark result → Start with a light formula or dilute with body lotion
Don't panic if you make a mistake. A too-dark result can be softened by exfoliating with a body scrub. For streaks, a mixture of baking soda and water works as a natural exfoliant. Gently rub over the area and rinse. Repeat if necessary, but be careful not to irritate your skin. Products like Grounded Body offer natural scrubs that are effective for evening out your tan.
Different formulas for different needs
Self-tanners are available in various formulas, each with its own advantages and disadvantages. The choice depends on your experience, skin type, and desired result. Understanding these differences will help you find the perfect product for your situation.
Lotions and creams are the classic choice and ideal for beginners. They offer control during application and are easy to spread over your body. The texture makes it easy to see where you've applied the product, which prevents streaks. These formulas are often richer and more nourishing, which works well for people with normal to dry skin.
Comparison of formulas:
| Formula | Best for | Advantages | Disadvantages |
|---|---|---|---|
| Lotion/Cream | Beginners, dry skin | Control, nourishing | Longer drying time |
| Mousse | Advanced users, quick application | Lightweight, fast-drying | Harder to spread |
| Spray | Large areas, back | Easy reach | More difficult to control |
| Drops | Customizable, face | Adjustable intensity | Requires mixing |
Mousse formulas are popular due to their light texture and fast drying time. They feel non-sticky and absorb quickly, which is ideal if you don't want to wait for hours. The disadvantage is that the light colour makes it harder to see where you've applied the product, which can be challenging for beginners.
Tanning drops are gaining popularity because they offer ultimate flexibility. You mix a few drops with your daily moisturizer or serum and determine the intensity yourself. This makes them perfect for people who prefer a subtle, gradual build-up or only want to tan their face. The gradual tan approach gives a very natural result without the risk of an overly dark tan.
Seasonal applications and timing
Your self-tanning routine can vary depending on the season and special occasions. A strategic approach ensures you always look your best, whether it's the middle of winter or just before a summer holiday.
Spring and summer are naturally popular seasons for self-tanners. Many people want to look tanned in their summer clothes without having to spend weeks in the sun first. Start your self-tanning routine as early as March or April, so you've built up a natural base by the time the sun truly breaks through.
In autumn and winter, a self-tanning cream can help combat that gloomy winter feeling. A subtle glow gives you a healthy, rested appearance, even during dark, cold days. Consider a lighter formula or less frequent applications during these months for a natural result that suits the season.
Planning for special occasions:
- Wedding or party: Start 2-3 days beforehand with a test session
- Photoshoot: Apply 24-48 hours before for fully developed colour
- Beach holiday: Start a week before departure for an even base
- Business event: Choose a subtle tan that remains professional
A common mistake is to think that self-tanner is only for special occasions. Regular use actually ensures the most natural look. By applying a light layer every few days, you build up a consistent glow that always looks fresh and natural.
The role of skin type in self-tanners
Not all skin reacts the same to a self-tanning cream. Your skin type plays an important role in how quickly and intensely the tan develops, and how long it stays beautiful. Adjusting your approach to your specific skin ensures optimal results.
Dry skin tends to absorb product unevenly, especially in rougher areas. Extra exfoliation and hydration before application are essential. Choose a richer formula with nourishing ingredients that won't further dry out your skin. After application, apply a nourishing body lotion daily to keep your tan looking good for longer.
Oily skin can absorb too quickly, leading to dark spots. A lighter formula often works better, and it can help to first cleanse your skin with a mild toner to remove excess oil. Wait until your skin is completely dry before applying self-tanner.
Recommendations per skin type:
- Dry skin → Nourishing lotion formula, extra hydration before and after
- Oily skin → Light mousse or spray, mattifying primer first
- Sensitive skin → Fragrance-free formulas, test on a small area first
- Combination skin → Different formulas for face and body
- Mature skin → Hydrating formulas with anti-aging ingredients
Your natural skin tone also determines which shade suits you best. People with light skin should start cautiously with light formulas, while people with naturally olive or dark skin can use more intense products without looking unnatural.
Sensitive skin requires extra attention. Always opt for formulas without strong fragrances, parabens, or other potentially irritating ingredients. Always test any new product on a small area, such as the inside of your wrist, to check for allergic reactions before applying it to your entire body.
Combining with other skincare products
Your self-tanning cream is part of your larger skincare routine. Combining it properly with other products ensures the best results and prevents unwanted reactions or accelerated fading of your tan.
Immediately after applying your self-tanner, you should be careful about what you put on your skin. Avoid products with active ingredients such as retinol, AHAs, BHAs, or vitamin C in the first 24 hours. These can disrupt the DHA reaction and lead to uneven results.
Daily moisturizer is important, but choose an oil-free formula. Oils can break down the tan pigments and cause faster fading. Water-based lotions work best to keep your skin hydrated without affecting your tan.
Skincare compatibility:
- Immediately after self-tanner: Water-based products only
- Day 2-7: Normal routine, avoid heavy oils
- Face products: Wait at least 12 hours with active ingredients
- Sunscreen: Always use, even with self-tanner
Sunscreen remains essential, even with a beautiful tan from your self-tanner. The brown color does not offer UV protection. Apply your SPF as the last step in your routine, after your moisturizer has absorbed. Preferably choose a formula that is not white or sticky, so it does not interfere with your tan.
Scrubs and peels are fantastic for preparation, but do not use them while you want to maintain your tan. Wait until you are ready to let your tan fade before thoroughly exfoliating again. Mild, daily cleansing with a gentle body wash is sufficient to keep your skin fresh without disturbing your tan.
With the right knowledge and approach, a self-tanning cream gives you a natural, radiant complexion that boosts your confidence without the risks of sun exposure. By paying attention to preparation, application technique, and maintenance, you can enjoy a beautiful glow for weeks. Tanning Glamour helps you with natural self-tanners that are visible within a few hours, last beautifully for up to a week, and give you the radiant look you are looking for.
Read more
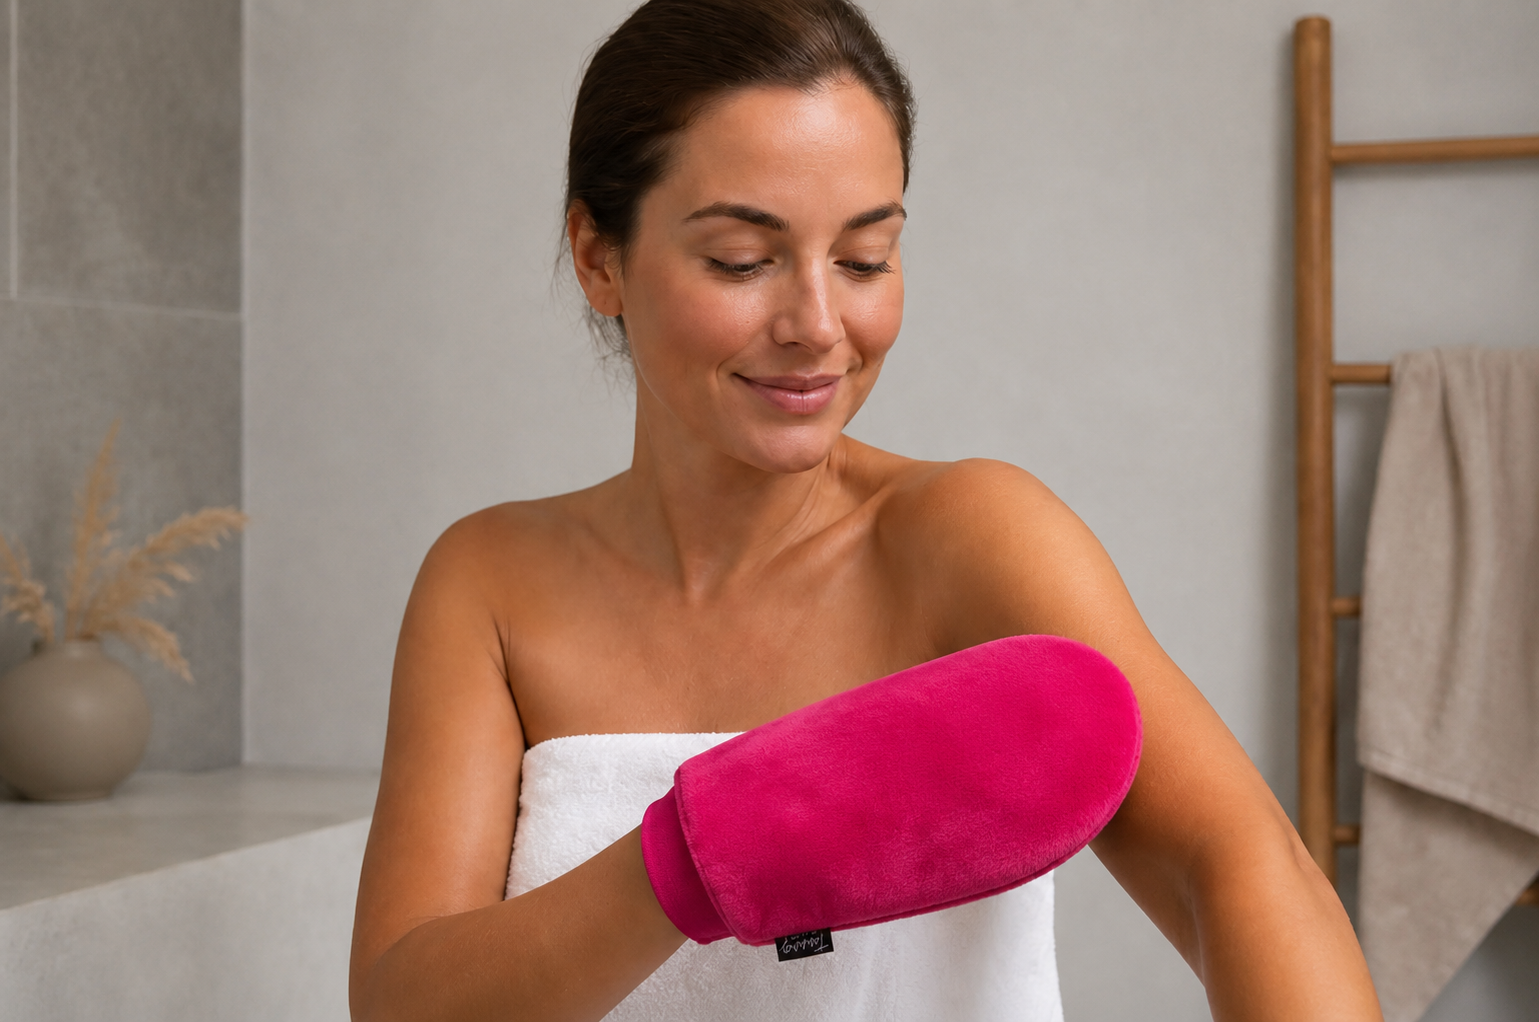
Discover how to create a perfect, streak-free tan with a self-tanner and mitt. Tips for even application and a natural glow.
Discover how to create a perfect, streak-free tan with a self-tanner and mitt. Tips for even application and a natural glow.