Self-tanning cream: everything for a natural glow

A radiant, golden tan without spending hours in the sun? With a good self-tanning cream, you can create a natural glow in just a few hours that lasts for days. Whether you want to brighten up your winter skin or extend your holiday tan, self-tanners offer a safe and effective alternative to sunbathing. In this guide, you'll discover how self-tanning products work, which formula is best for your skin, and how to achieve a perfectly even result without streaks or orange undertones.
How exactly does a self-tanning cream work?
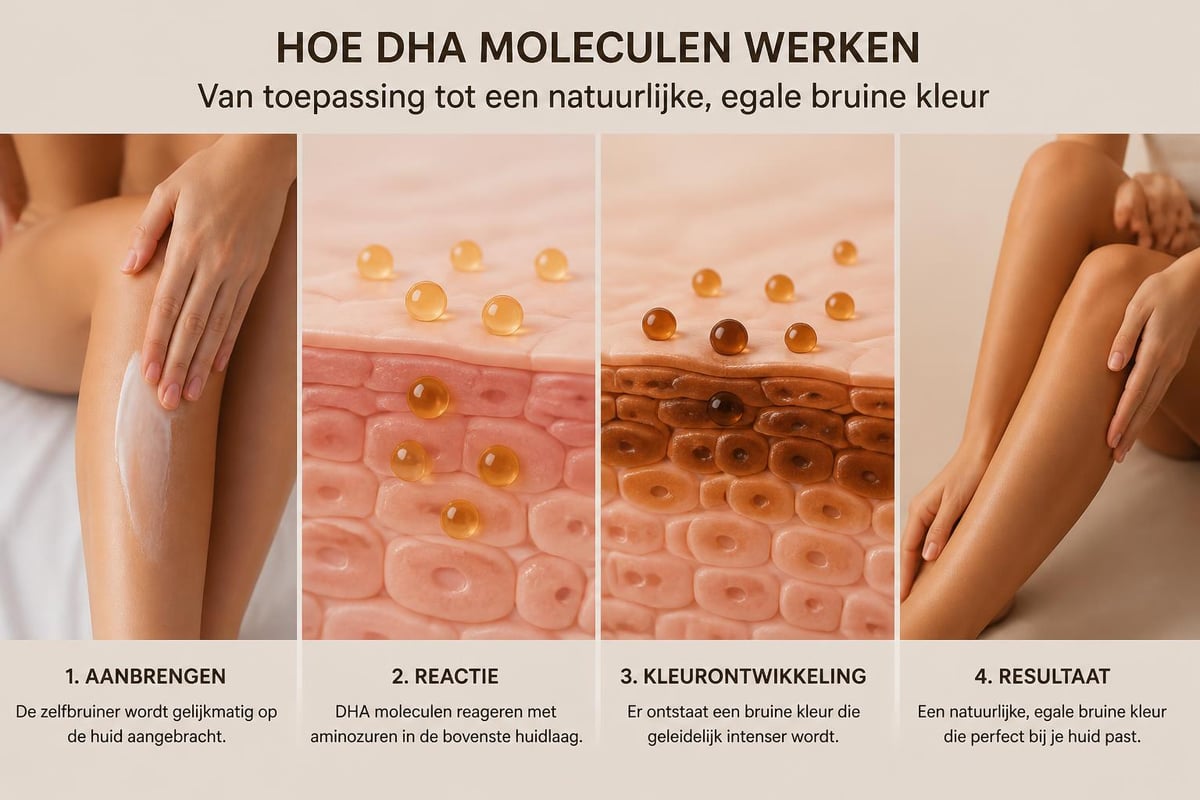
The active ingredient in almost every self-tanning cream is dihydroxyacetone, better known as DHA. This ingredient reacts with the amino acids in the top layer of your skin, creating brown pigments. The process is completely superficial and does not damage your skin.
Unlike sunbathing or tanning beds, where melanin is produced by UV radiation, DHA works without harmful radiation. The reaction takes place in the stratum corneum, the outer dead skin cells. That's why the tan fades after a few days, as these cells naturally exfoliate.
The development of your tan
After applying your self-tanner, color development begins almost immediately. The first change is usually visible within 2 to 3 hours, depending on the concentration of DHA in the product. The full color is usually visible after 4 to 8 hours.
Time |
Development |
What happens |
|---|---|---|
0-2 hours |
Reaction begins |
DHA starts binding with amino acids |
2-4 hours |
First color |
Light browning becomes visible |
4-8 hours |
Full color |
Maximum intensity reached |
5-7 days |
Peak period |
Best result, even tan |
7-10 days |
Fading |
Natural exfoliation begins |
It is important not to shower or sweat during the first few hours after application, so that the DHA can react completely. For more information about the mechanism of action, you can refer to the explanation of how self-tanners work.
Different types of self-tanning products
Lotions and creams for the whole body
Self-tanning lotions and creams are the most popular formulas for those who want to tan their entire body. They have a creamy texture that is easy to spread and suitable for larger areas.
Benefits of lotion formulas:
Easy to apply to arms, legs, and torso
Moisturizing for dry skin
Even distribution due to creamy consistency
Suitable for daily use
Most lotions contain between 3% and 8% DHA. The higher the percentage, the darker the end result. Beginners are best to start with a lower percentage to get used to the effect. For a streak-free result, the correct application technique is essential.
Mousses and spray formulas
Mousses have a light, foamy texture that absorbs very quickly. They are ideal for those who are in a hurry or don't want a sticky feeling. Spray formulas offer ultimate convenience, especially for the back and other hard-to-reach areas.
An important advantage of mousse is that you can immediately see where you have applied it. The color guide (a temporary brown tint) helps you avoid streaks. After showering, this guide disappears, and only your actual self-tan remains.
Drops and serums for customization
Tanning drops are an innovative development in the world of self-tanners. You mix a few drops with your daily moisturizer, night cream, or serum. This way, you determine exactly how intense your glow will be.
Why choose tanning drops:
Complete control over intensity
Gradual build-up of color
Can be combined with your favorite skincare
Suitable for face and body
Natural result without abrupt transition
Start with 1-2 drops and build up slowly. After a few days, you will get a subtle, natural tan that looks like you just returned from a sunny holiday. Many people find this the most natural way to tan without sun.
Choosing the right color for your skin
Light skin types and sensitive skin
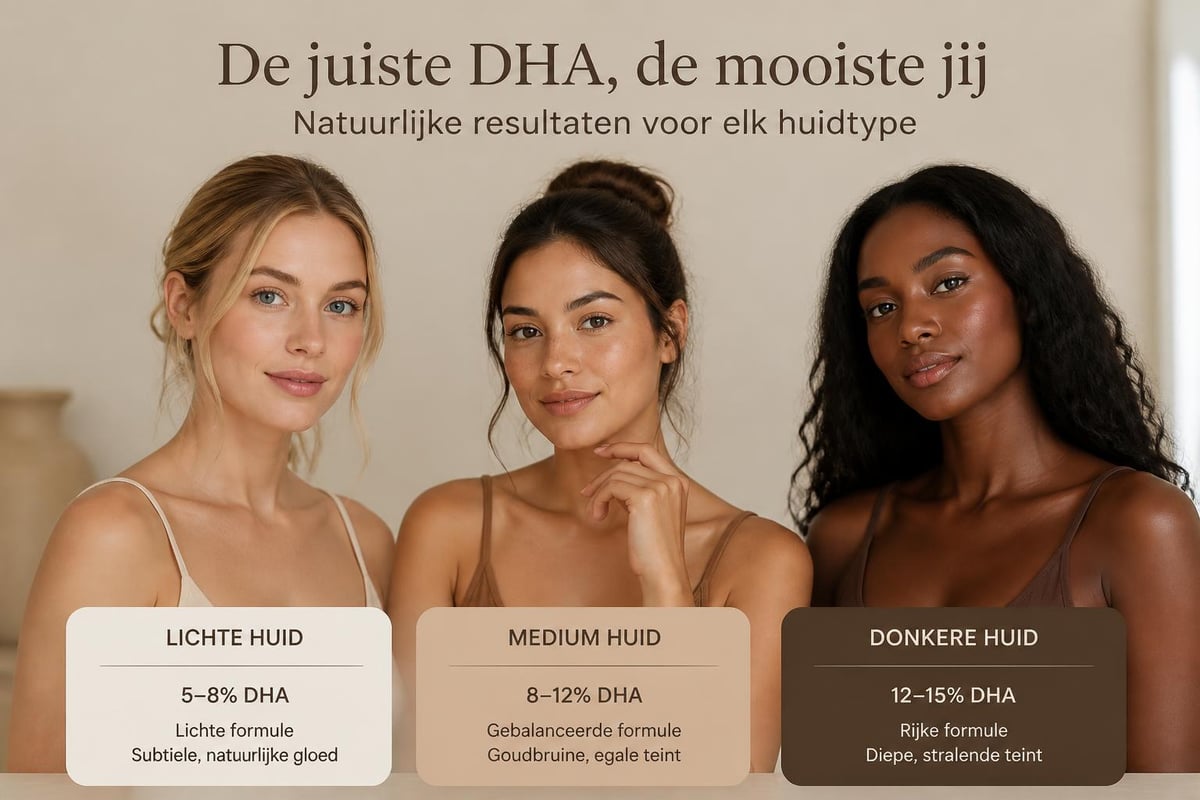
Do you have light skin that burns easily in the sun? Then choose a self-tanner with a low DHA percentage (3-5%). This gives a subtle glow without the risk of a too dark or orange result.
For sensitive skin, also look for soothing ingredients such as aloe vera, chamomile, or vitamin E. These help prevent irritation and keep your skin comfortable. Always test on a small area of skin first, for example, on your forearm.
Medium to dark skin tones
For those who already have natural pigmentation or don't burn easily, medium to high DHA concentrations (6-10%) are suitable. These give a deeper, richer color that beautifully matches warm undertones.
Darker skin types can also use self-tanners to even out the complexion, add an extra glow, or accentuate specific areas. The most important thing is to choose a formula without ashy undertones.
Seasonal variation and build-up
Many people adjust their self-tanner to the season. In winter, a lighter formula works perfectly for a fresh, healthy look. In spring and summer, it can often be more intense.
Season |
Recommended intensity |
Application |
Result |
|---|---|---|---|
Winter |
Light (3-5% DHA) |
1-2 times a week |
Subtle glow |
Spring |
Medium (5-7% DHA) |
2-3 times a week |
Sunny complexion |
Summer |
Medium-intense (6-8% DHA) |
3-4 times a week |
Holiday glow |
Autumn |
Medium (5-6% DHA) |
2 times a week |
Natural warmth |
By gradually building up, you get the most natural result. Start light and add layers until you achieve the perfect color.
Preparation for a perfect result
Exfoliation is essential
The most important step for an even self-tan? Exfoliation. By removing dead skin cells, you create a smooth canvas for the self-tanner to adhere to evenly.
Exfoliate 24 hours before application:
Use a scrub on knees, elbows, and ankles
Pay extra attention to rough spots and calluses
Rinse thoroughly and pat dry
Avoid oil-based scrubs that leave a residue
Also, shave or epilate at least 24 hours in advance. Immediately after shaving, your pores are still open, which can lead to dark spots. Give your skin some time to recover.
Finding the right hydration balance
Dry skin absorbs more product and can therefore become streaky. However, you don't want to apply a thick layer of cream just before. The solution? Ensure well-hydrated skin for days in advance.
In the 2-3 days before your self-tan, hydrate your skin well with a light body lotion. On the day itself, only apply a little moisturizer to extra dry areas such as knees, elbows, and feet. This prevents these areas from becoming too dark.
Preparing hands and feet
Hands and feet require extra attention. These areas have thicker skin with more lines where product can accumulate. Exfoliate them thoroughly and apply minimal product.
For your hands, always wash them with soap immediately after application. This prevents the typical orange palms. For your feet, it is best to use an applicator mitt and gently distribute the product.
Application techniques for an even tan
Using the right tools
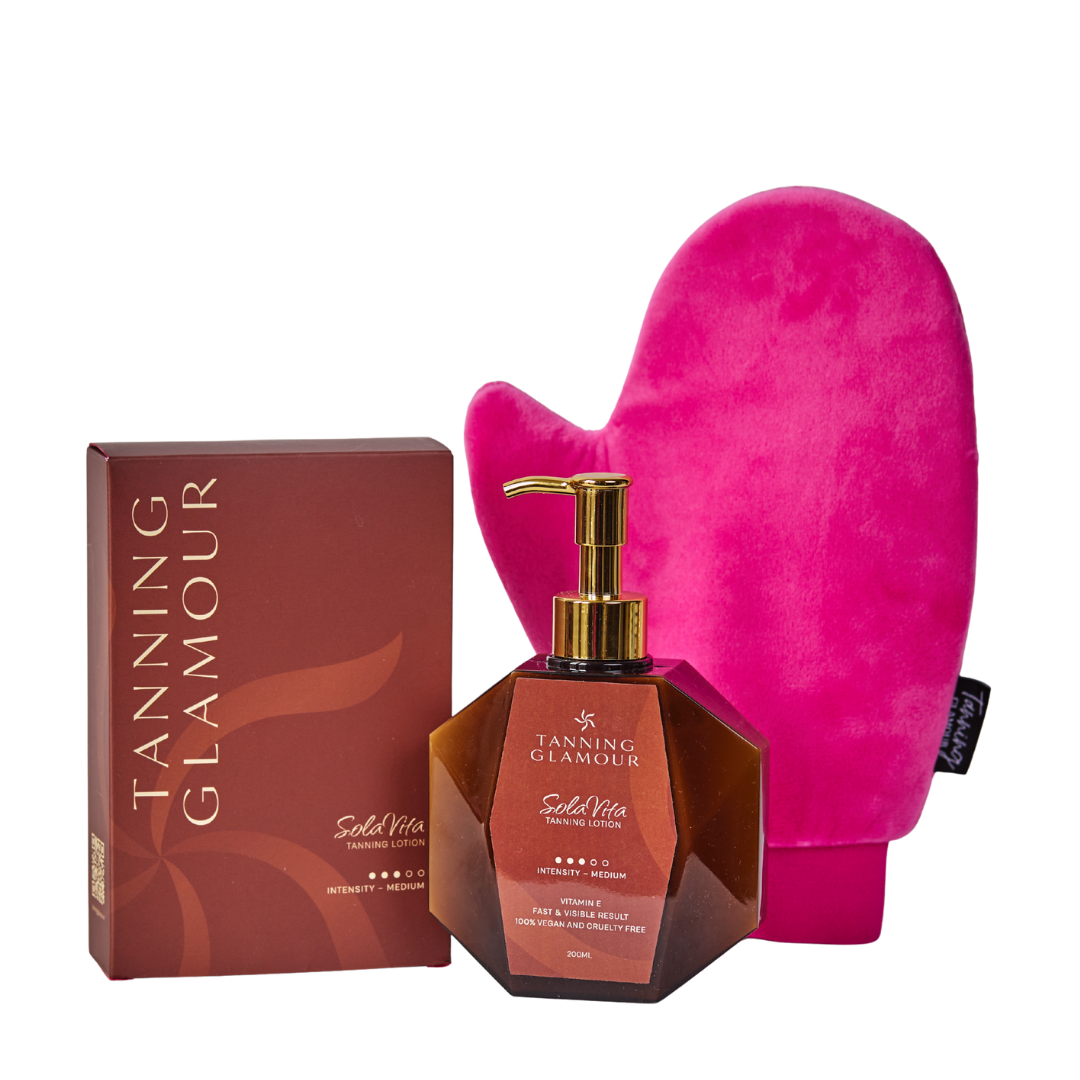
Professional results start with the right tools. An applicator mitt is indispensable for those who want to avoid streaks. The soft material distributes the product perfectly and protects your palms from discoloration.
For a natural, even finish all over your body, a complete application set is ideal. With special mitts for your body and face, plus a back applicator for hard-to-reach areas, you can reach every part of your skin. The Self-Tanner Application Set contains all the tools you need for a professional result.

Step-by-step application
Always start from top to bottom. Begin at your shoulders and work towards your feet. This prevents you from accidentally wiping over newly applied areas.
Apply in the correct order:
Shoulders and arms in circular motions
Chest and abdomen with long, vertical strokes
Back with an applicator strap or help
Legs from thigh to ankles
Feet lightly with product residue from the mitt
Face and neck last with a mini mitt
Always blend well at transitions: wrists, ankles, neck, and jawline. These areas stand out more if they don't fade naturally. Use minimal product and spread in thin layers.
Mastering difficult areas
The back is the biggest challenge for most people. Without help, it is difficult to cover your back evenly and completely. A special back applicator solves this problem.
Knees and elbows require a light touch. These areas are often drier and absorb more product. First, apply to your entire leg, then use the remaining product on your mitt for knees. The same applies to elbows.
Maintenance and long-lasting results
The first 24 hours after application
Immediately after applying your self-tanning cream, color development begins. During this crucial period, you should avoid a few things to ensure the best results.
Avoid during the first 4-8 hours:
Showering or bathing
Sweating from intense exercise
Tight clothing that can rub off
Contact with water and sweat
Swimming in chlorinated water
Wear loose, dark clothing during development time. This prevents any color guide from getting on your favorite white shirt. Most modern formulas do not cause stains, but prevention is better than cure.
Extending the result
A beautiful self-tan typically lasts 5 to 7 days, but with the right care, you can extend this result. The secret? Hydration and gentle care.
Hydrate your skin daily with a good body lotion. This slows down the natural exfoliation of skin cells and keeps your tan even longer. Preferably choose a formula without oils that can break down the self-tanner.
Maintenance Step |
Frequency |
Effect on durability |
|---|---|---|
Hydrating body lotion |
Daily |
+2 days |
Gentle shower gel |
With each wash |
+1 day |
No scrub |
5-7 days |
+2 days |
Lukewarm showers |
With each wash |
+1 day |
Layering |
Every 3-4 days |
Permanent maintenance |
Avoid harsh scrubs and overly hot water. These accelerate exfoliation and make your tan fade unevenly. Pat your skin gently dry after showering instead of rubbing.
Refreshing and touching up
For a consistently radiant tan, you don't always have to start over. Build up your color gradually by applying a new layer every few days.
Start with a full application to create your base color. Then, apply a lighter layer every 3-4 days to refresh your complexion. This gives the most natural result, as if you permanently have a sunny glow.
Troubleshooting Common Issues
Avoiding an Orange Undertone
An orange complexion is the most dreaded result of self-tanners. Fortunately, this can be completely avoided by using the right formula and technique.
Causes of orange discoloration:
DHA percentage too high for your skin type
Dry, non-exfoliated skin
Too much product applied at once
Incorrect undertone in the formula
Build-up of old self-tanner layers
Modern, quality self-tanners often contain extra ingredients that provide a natural, warm brown hue instead of orange. Look for products with erythrulose, a substance that reacts slower but gives more natural results.
Correcting Streaks and Patches
Even with the best preparation, streaks can sometimes appear. Don't panic, these are usually easy to fix. Here are the most effective correction methods:
For fresh streaks (within 24 hours), you can use a damp cloth with a little lemon juice. Gently rub over the streak to fade the color. For older streaks, light exfoliation with a scrub helps.
The same principle applies to patches. Gently exfoliate the dark spot and then apply a thin layer of self-tanner over the entire area to even it out.
Neutralizing Odor
The typical self-tanner smell is caused by the DHA reaction with your skin. Modern formulas often have added fragrances to mask this, but the underlying smell can sometimes remain noticeable.
Tips for a fresh scent:
Choose self-tanners with natural fragrances
Shower after full color development (8+ hours)
Use fragrance-free body lotion for maintenance
Ensure good ventilation during application
Choose formulas with fruit extracts
The smell usually disappears after the first shower. Until then, you can use your normal perfume, although light, fresh scents work best.
Self-tanner for different body parts
Face and Decolletage
Your face requires a more subtle approach than your body. The skin is more sensitive and delicate, and the result is immediately noticeable. Therefore, choose a special facial product or use a lower concentration.
Apply self-tanner to your face with a mini applicator mitt or clean hands. Start in the center of your face and work outwards. Don't forget your ears, neck, and décolletage for a natural transition.
Pay extra attention to your hairline, eyebrows, and nose crease. These spots can darken if not blended properly. If necessary, mix your facial self-tanner with your day cream for a very natural result.
Making Legs and Feet Look Natural
Beautiful, evenly tanned legs are the showpiece of any self-tanner. Start at your upper thighs and work down to your ankles with long, flowing movements.
For knees: bend your leg slightly during application. This prevents product from accumulating in the creases. Always use less product on knees than on the rest of your leg.
Feet are tricky because they quickly become too dark. Use the residual product from your mitt and avoid the soles and between your toes. Blend well at your ankles for a natural transition.
Protecting Arms, Hands, and Nails
For arms, the technique is similar to legs. Work from shoulder to wrist with circular movements. Use minimal product on elbows.
Protecting palms and nails:
Wash hands immediately after application
Use a nail brush for cuticles
Lightly rub the back of your hands with residual product
Blend well at wrists
Use hand cream after washing
A common mistake is applying too much product to the back of the hands and fingers. This looks unnatural. Use minimal residual product and blend towards your fingers.
Combining with other skincare
Adjusting Daily Routine
Your self-tanner fits well into your existing skincare routine, but timing is important. Wash your face in the morning with a gentle cleanser and then apply your normal serum and day cream.
For optimal results, wait until your skincare is fully absorbed before applying self-tanner. This usually takes 10-15 minutes. You can also mix self-tanner with your moisturizer for a gradual build-up.
In the evening, follow the same routine, but without active ingredients such as retinol or AHAs immediately after self-tanner. These can affect color development. Wait until the next day to use your normal active ingredients again.
Self-tanner and Sun Protection
A crucial misconception: self-tanner does not offer UV protection. Your skin looks tanned, but is not protected from the sun. Therefore, always use an SPF, even with self-tanner.
Apply your sun protection after your moisturizer and before your makeup. If you use self-tanner, do this in the evening. This way, the product has the night to develop and you can simply apply your SPF in the morning.
Some self-tanners contain SPF, but this is usually not enough for daily protection. Use a separate, broad-spectrum SPF 30 or higher for effective protection.
Anti-aging Products and Self-tanner
Retinol, vitamin C, and AHAs are wonderful anti-aging ingredients, but can sometimes interfere with self-tanner. This does not mean you have to choose between young skin and a beautiful complexion.
The solution is simple: timing. Use your active anti-aging products on evenings when you are not applying self-tanner. Or apply your self-tanner in the evening and your retinol the next morning (after the color has developed).
For daily use of vitamin C serum: apply before your moisturizer and let it absorb for at least 15 minutes before adding self-tanner. This allows both products to work optimally.
Natural Ingredients and Skin Health
What's in Quality Formulas
Modern self-tanning products contain more than just DHA. The best formulas combine effective self-tanning with skin-caring ingredients that nourish and protect your skin.
Important nourishing ingredients:
Hyaluronic acid for deep hydration
Vitamin E as an antioxidant
Aloe vera for soothing
Natural oils for softness
Green tea extract for protection
Glycerin for moisture retention
These ingredients ensure that your skin not only gets tanner but also looks healthier and more radiant. They also help prevent dryness that can result from the DHA reaction.
Ingredients to Avoid
Just as important as knowing what should be in it, is knowing what to avoid. Certain ingredients can cause irritation or negatively affect the result.
Parabens, sulfates, and synthetic fragrances can irritate sensitive skin. Mineral oils can form a barrier that prevents the self-tanner from absorbing properly. Alcohol can be drying and disrupt color development.
Always read the label and choose formulas with natural, skin-friendly ingredients. If in doubt, you can read more about the relationship between nutrition, skincare, and healthy skin.
Organic and Vegan Options
For those who make conscious choices in skincare, there are increasing numbers of natural and vegan self-tanners available. These contain plant-based DHA and are free from animal ingredients and testing.
Organic formulas use certified organic ingredients and avoid pesticides and synthetic additives. This makes them kinder to both your skin and the environment.
For vegan products, look for certifications such as Leaping Bunny or Vegan Society. These guarantee that no part of the product has been tested on animals and that all ingredients are plant-based.
Seasonal Tips and Tricks
Maintaining a Winter Glow
In winter, your natural summer tan fades, and your skin can look dull. A light self-tanning cream gives you that healthy, fresh appearance back without looking overdone.
In winter months, opt for a subtle formula with 3-5% DHA. Apply it weekly for a consistent, natural glow. Focus especially on your face, neck, and possibly hands, the most visible areas.
Don't forget to hydrate your skin extra in winter. Central heating and cold wind dry out your skin, which can lead to uneven self-tanner. A rich body lotion helps keep your complexion looking beautiful for longer.
Spring Vacation Preparation
Going on vacation with winter pallor? Start building up gradually two weeks before departure. Begin with a light layer and slowly increase the intensity.
This has two advantages: you feel more confident on the beach and your skin gradually gets used to color. Note: self-tanner does not offer sun protection, so always use SPF as soon as you are in the sun.
For those who want faster results, a more intensive formula 3-4 days before departure also works well. Combine this with professional application tools for the best result.
Maintaining a Summer Tan
In summer, you often want to prolong or intensify your natural tan. Self-tanner works perfectly as an addition to your natural complexion.
Apply your self-tanner in the evening after a day in the sun (with SPF, of course). This way, you gradually deepen your color and your complexion stays beautiful for longer, even after your vacation is over.
Note that in summer you may need a darker formula to see an effect on your already tanned skin. A medium to high DHA percentage (6-8%) then works best.
Self-tanner for Special Occasions
Last-minute Events and Parties
Do you have a wedding, gala, or other special event tomorrow? With the right approach, you can get a beautiful glow within 24 hours. Start with thorough exfoliation and apply your self-tanner in the evening.
Choose a fast-acting formula that develops fully within 4-6 hours. Let the product work overnight and shower the next morning. Your skin will then have the perfect, natural complexion.
Timeline for last-minute tanning:
Day -1, morning: Exfoliate and hydrate
Day -1, evening: Apply self-tanner (8:00 PM)
Day 0, morning: Shower (8:00 AM)
Day 0, afternoon: Event (2:00 PM+)
However, test this method first for a less important event. This way you can be sure that your skin reacts well and the result is as you expect.
Photoshoots and Video Recordings
For professional photos or videos, you want an even, perfectly blended complexion without shiny spots or streaks. Start building up 3-4 days in advance.
Apply multiple light layers instead of one thick layer. This gives the most natural result that also photographs well. Pay extra attention to your face and neck, as these are most often photographed.
Use a mattifying primer for your face and body lotion with a subtle glow for your body. This will make you look fresh and natural without distracting shine in photos.
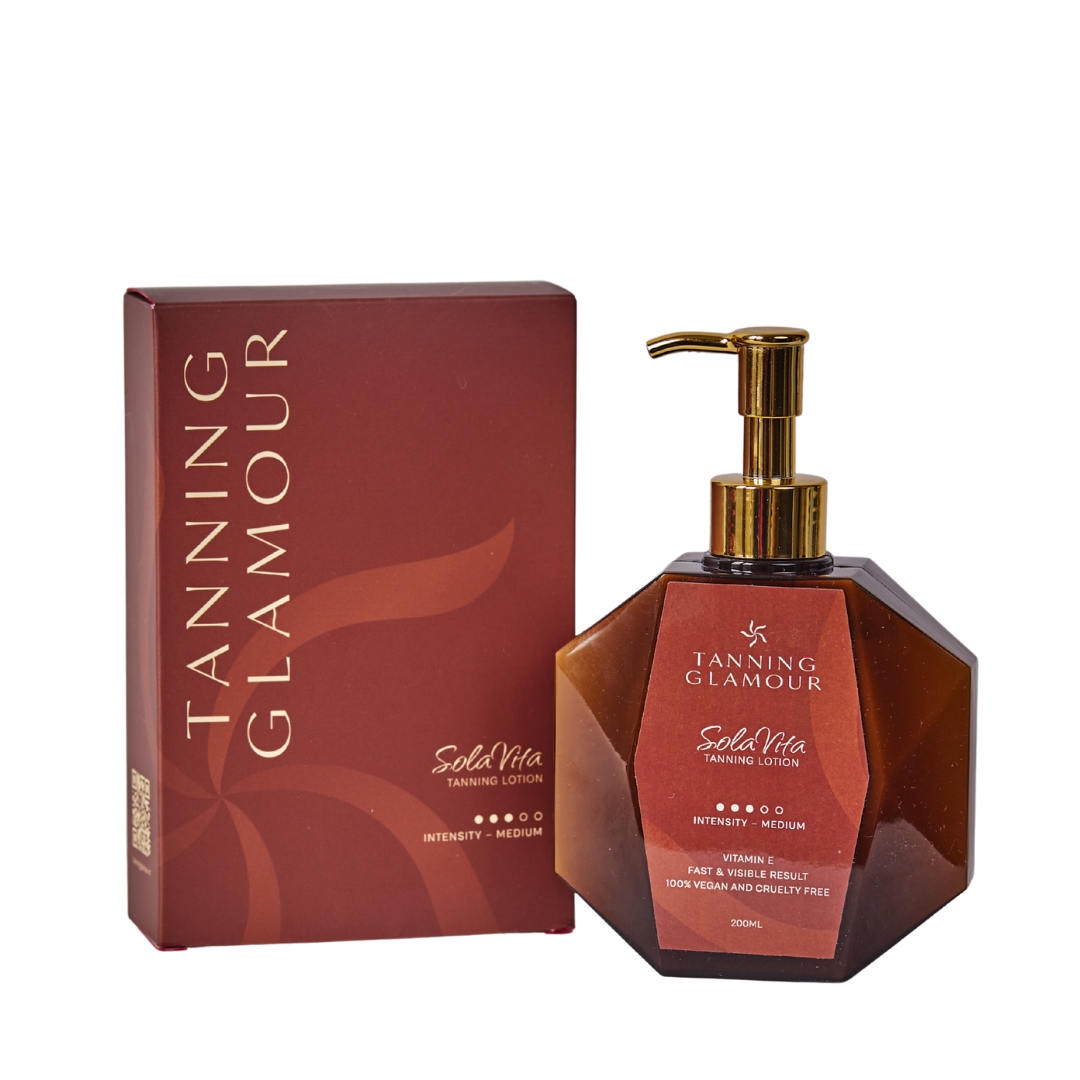
A beautiful, natural complexion without sun is easily achievable with the right self-tanning cream. By choosing the perfect formula, properly preparing your skin, and applying with the correct techniques, you create a radiant glow that lasts for days. Whether you choose a subtle winter glow or a deep summer tan, attention to quality and application makes all the difference every time. Tanning Glamour helps you with natural self-tanners that provide an even complexion within hours, last for up to a week, and are completely free of streaks and orange undertones, so you can radiate confidence every day.