Self-tanning mitt: the secret weapon for an even glow
A radiant, sun-kissed complexion without orange streaks or stains on your palms. It sounds like a dream, but with the right tool, it's simpler than you think. A self-tanning mitt is that secret weapon beauty experts have relied on for years. This simple accessory makes the difference between a professional finish and a streaky tan that gives away your secret. In this article, you'll discover why this mitt is indispensable for anyone who loves a natural glow, exactly how to use it, and the benefits you'll experience from the very first application.
Why use a self-tanning mitt
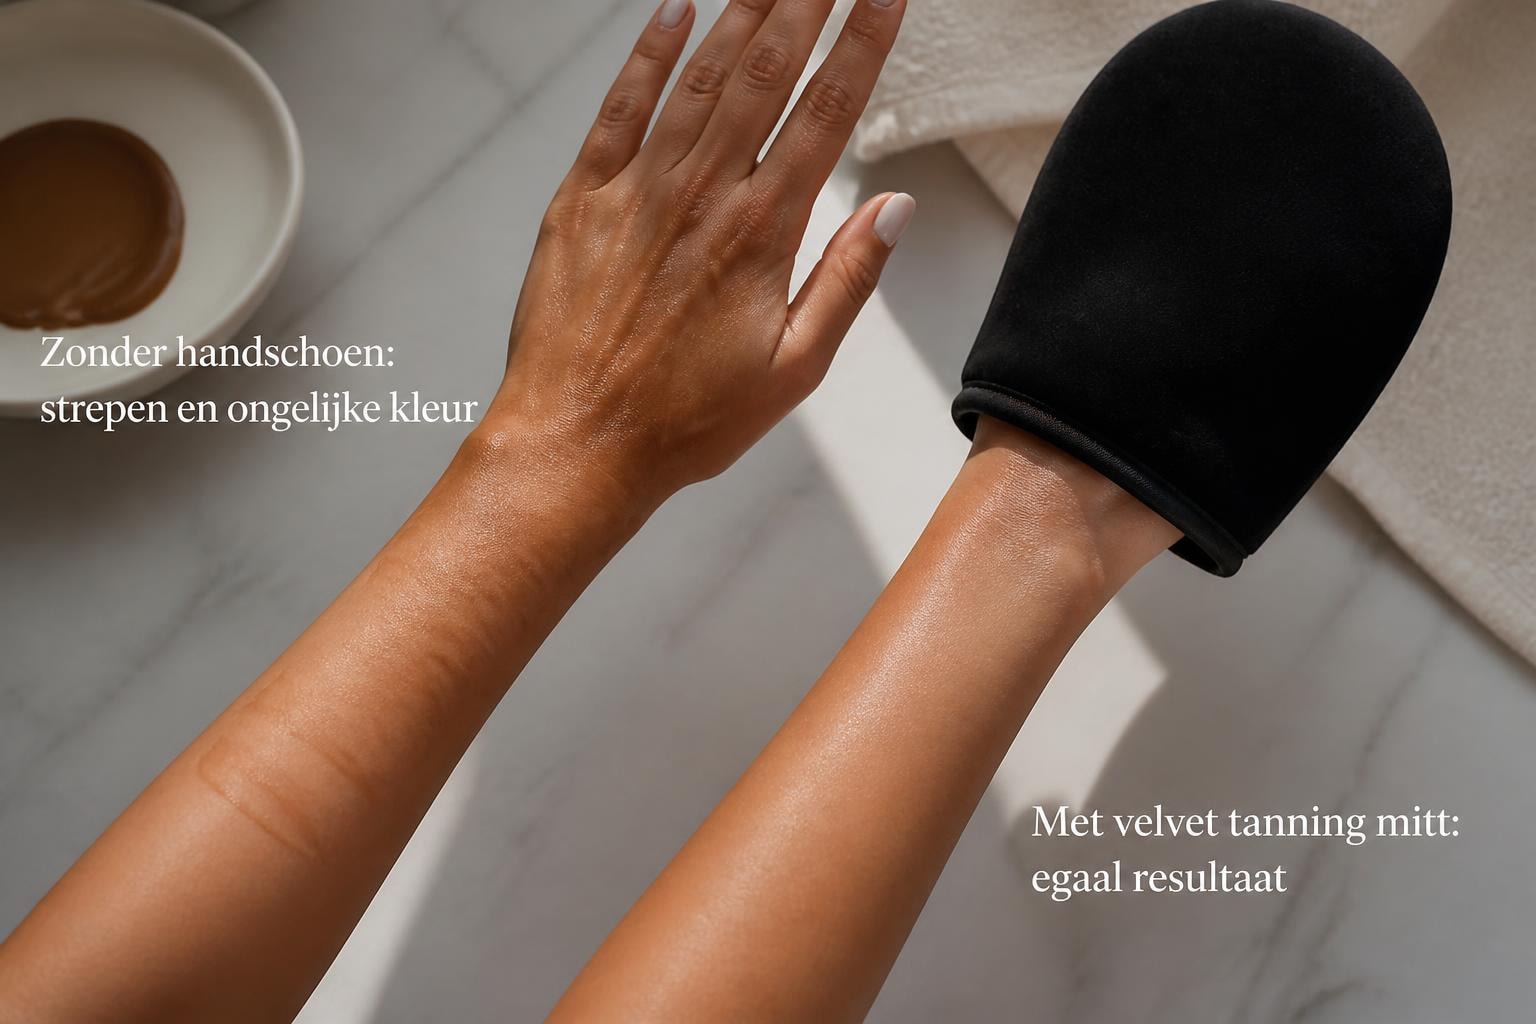
Palms are tricky. They absorb self-tanning product differently than the rest of your skin, often resulting in a darker color than intended. Without protection, you end up with orange palms that remain visible for days and immediately reveal that you've used self-tanner.
A self-tanning mitt completely prevents this problem. Its soft material creates a barrier between your hands and the product, while simultaneously ensuring an even distribution over your skin. This means no streaks, no patches, and no unnatural color differences.
Even product distribution
The biggest advantage of an applicator mitt is the way it distributes the product. The velvet structure of high-quality mitts ensures the self-tanner is applied evenly to your skin in circular motions.
Key benefits of even distribution:
No streaky patches on legs, arms, or back
Professional finish resembling a natural sun tan
Less product waste due to optimal spreading
Consistent color intensity across the entire body
The mitt itself absorbs minimal product, meaning almost everything ends up on your skin where it belongs. This not only leads to better results but also to more efficient use of your precious self-tanner.
Choosing the right self-tanning mitt
Not all applicator mitts are created equal. The material, fit, and quality make a big difference in the end result. A good mitt feels soft, stays securely on your hand, and is durable enough for multiple uses.
Material and texture
Velvet is by far the most popular material for self-tanning mitts. Its soft, velvety texture glides effortlessly over the skin and ensures a natural blend. Microfiber mitts are an alternative, but velvet generally provides the most luxurious feel and the best results.
Material Type |
Advantages |
Suitable for |
|---|---|---|
Velvet |
Soft texture, even distribution, luxurious feel |
All skin types, body and face |
Microfiber |
Durable, fast drying, affordable |
Body, frequent users |
Foam |
Compact, suitable for travel |
Small areas, touch-ups |
Fit and size
A well-fitting mitt stays in place during application without slipping. Mitts that are too loose cause uneven pressure, while those that are too tight are uncomfortable and restrict your movement.
Standard mitts are suitable for the body, but for the face, a mini version is often more convenient. According to skincare experts, this provides more control when applying around delicate areas such as the eyes, nose, and mouth.
Step-by-step: applying self-tanner with a mitt
Correctly using your mitt largely determines the end result. Follow these professional steps for a sunkissed tan that looks natural and stays beautiful for days.
Preparation is essential
Always start with clean, exfoliated skin. Dead skin cells cause uneven self-tanner absorption, leading to patches and premature fading. Exfoliate your skin 24 hours before application for optimal results.
Preparation checklist:
Scrub your entire body, paying extra attention to rough areas (elbows, knees, ankles)
Shave or epilate if desired (at least 24 hours before application)
Apply a light moisturizer to dry areas
Ensure your skin is completely dry before application
Put the mitt on your non-dominant hand
Application technique for a golden tan
Apply a small amount of self-tanner to the mitt, not directly to your skin. Start at your ankles and work upwards in long, smooth circular motions. This prevents you from accidentally missing areas or applying twice.
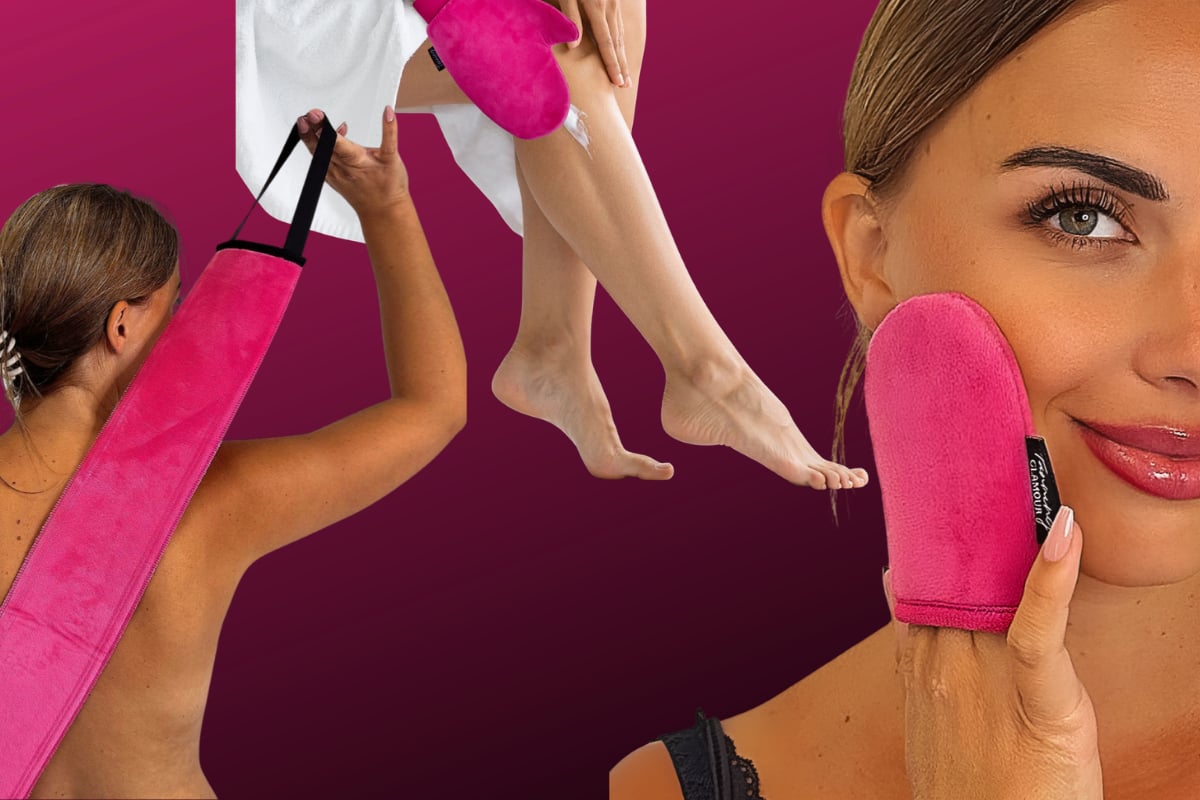
For hard-to-reach areas like your back, a special back applicator is ideal. The Self-Tanner Application Set (Mitt + Back Applicator) contains everything you need for full body coverage without assistance. With the velvet back applicator, you can easily reach your back and shoulders for a completely even tan.

Facial application
The face requires a delicate approach. Use a mini mitt or the corners of your standard mitt for better control. Apply the product in light, buildable layers for a natural glow that doesn't look artificial.
Pay extra attention to the hairline, eyebrows, and jawlines. These areas tend to trap product residue, which can cause dark lines. Always blend carefully towards the hairline for a seamless transition.
Caring for your self-tanning mitt
A well-maintained mitt can last months, sometimes even years. Regular cleaning is crucial to remove product residue and prevent bacterial growth.
Clean after every use
Rinse the mitt immediately after use with lukewarm water until the water runs clear. If necessary, use a mild soap, but avoid harsh chemicals that can damage the velvet structure. Gently wring out and air dry.
Do's and don'ts of mitt care:
✓ Rinse immediately after use
✓ Allow to dry completely between applications
✓ Store in a dry, well-ventilated area
✗ Do not machine wash (unless explicitly permitted)
✗ Do not dry in direct sunlight
✗ Do not use bleach or harsh cleaning agents
Extending lifespan
With proper use and care, a quality mitt remains effective for up to six months or longer. Replace your mitt when the texture becomes rough, the material shows signs of wear, or stains can no longer be completely removed.
Investing in multiple mitts is practical if you use self-tanner regularly. This allows each mitt time to dry completely between applications, significantly extending its lifespan.
Avoiding common mistakes
Even with the best mitt, mistakes can happen. Recognizing and avoiding these pitfalls ensures consistent, professional results with every application.
Using too much product
The most common mistake is applying excessive product to the mitt. More is not better with self-tanner. A small amount, evenly distributed, yields better results than large blobs that can streak or stain.
Always start with less than you think you need. You can always add more, but removing too much product is virtually impossible without redoing the entire application.
Insufficient blending
Hasty application leads to visible transitions and streaks. Take your time to thoroughly blend each area, especially at joints and transitions between body parts. The investment in extra time pays off with a natural, sun-kissed look.
According to tanning experts, circular blending is the most effective technique. This ensures even distribution without clear start and end points that can cause streaks.
Different applications and techniques
A self-tanning mitt is more versatile than you might think. From full body tanning to subtle touch-ups, proper use opens up a world of possibilities.
Contouring with self-tanner
Just like makeup contouring, you can strategically apply self-tanner to accentuate certain body parts. Use your mitt to apply product slightly heavier along muscle groups, such as the sides of your legs or shoulders.
For facial contouring, a mini mitt applies the product more precisely. Focus on the cheekbones, jawlines, and sides of the nose for subtle definition that gives your face more dimension.
Touch-ups and maintenance
Between full applications, your tan naturally fades. Use your mitt for targeted touch-ups on areas that fade faster, such as hands, feet, and face. This extends the life of your glow without a full reapplication.
Touch-ups work best with lighter products or diluted formulas. Mix your regular self-tanner with a moisturizer for a more subtle build-up that blends seamlessly with your existing tan.
Combining with other self-tanning products
The mitt is compatible with virtually all self-tanning formulas. Whether you use lotions, mousse, spray, or drops, the right technique maximizes the results of each product.
Lotions and mousses
These classic formulas work optimally with a mitt. The mitt's texture helps mousse lose its air bubbles and transforms it into an even layer on your skin. Lotions spread effortlessly without clumps or uneven coverage.
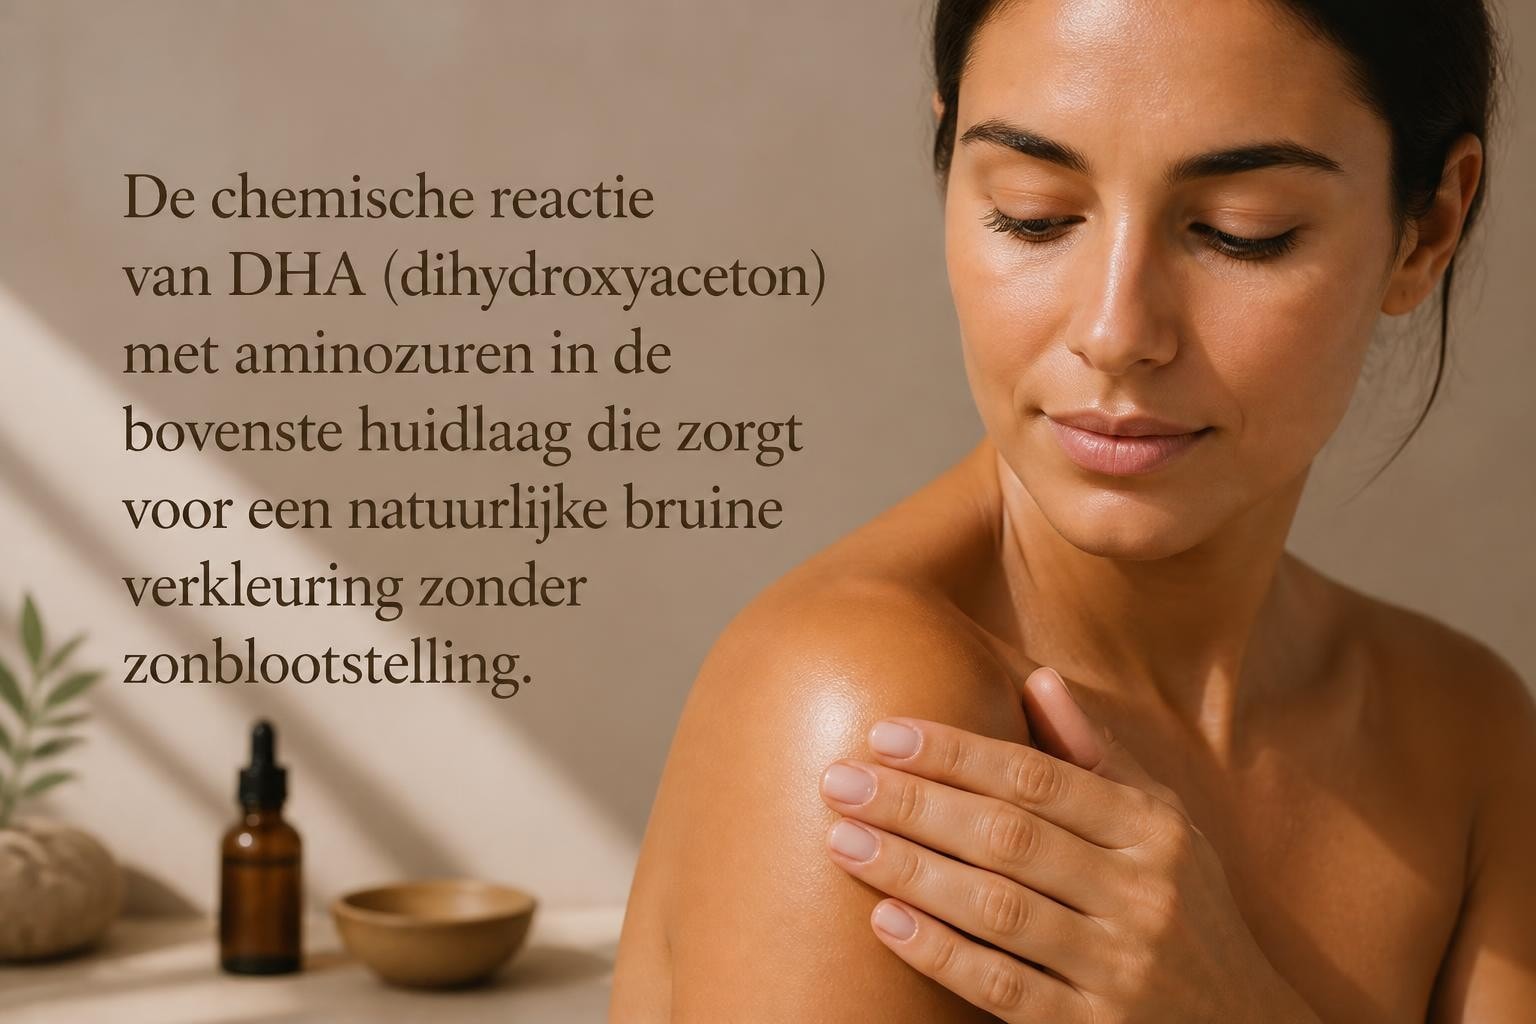
For more information on how self-tanner works, you can consult specialized sources that explain the process in detail.
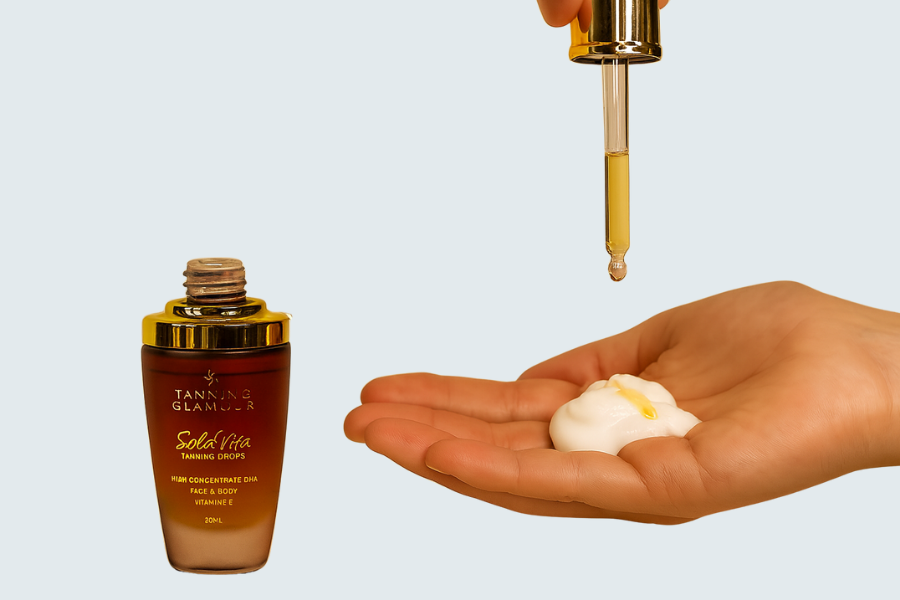
Tanning drops and serums
Drops require a slightly different approach. First, mix them with your moisturizer on the palm of your bare hand, then put on your mitt and apply the mixture. This ensures even distribution of the drops without concentration in certain areas.
The flexibility of drops makes them ideal for personalized tanning. You control the intensity by adjusting the number of drops to your desired result.
Advantages over other application methods
Compared to other application methods, a self-tanning mitt offers unparalleled advantages that make the difference between amateur and professional results.
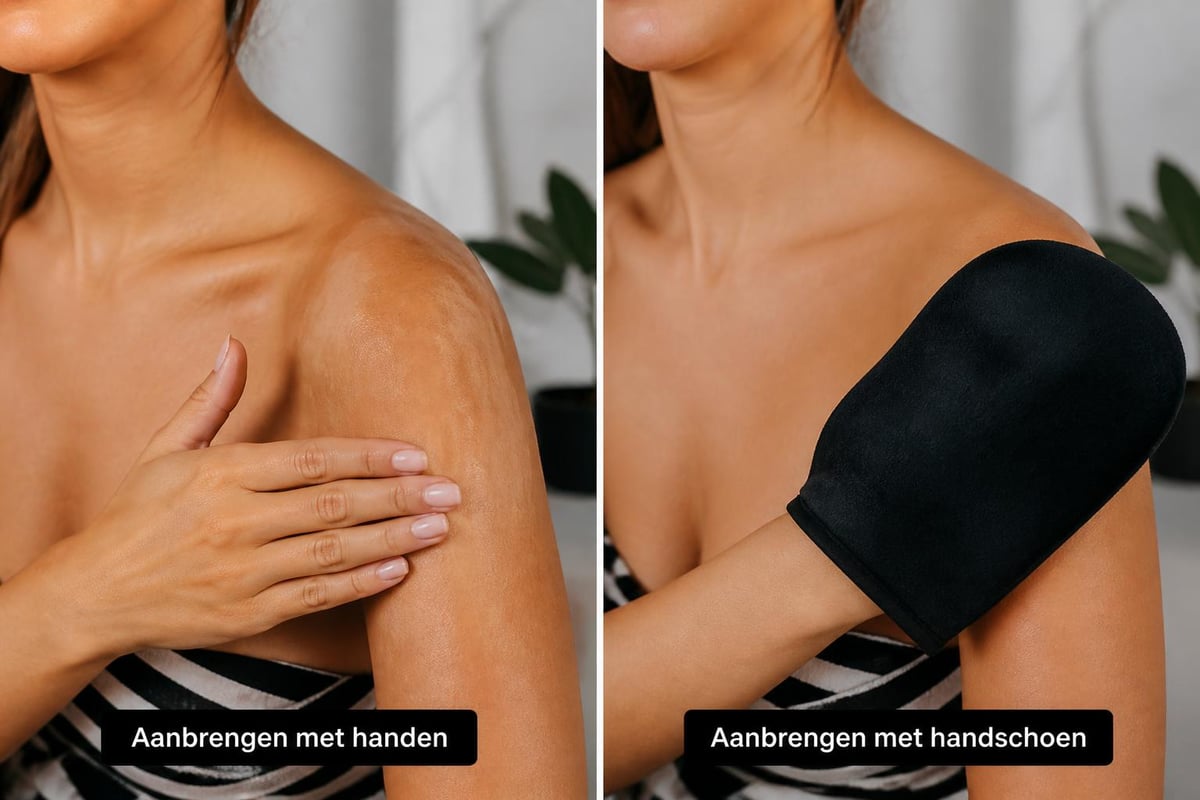
Mitt versus bare hands
Applying with bare hands seems like the natural choice, but almost always leads to stained palms. Even immediate washing after application doesn't prevent absorption. A mitt completely eliminates this problem.
Moreover, the texture of your palms does not provide even distribution. The lines and creases in your skin create uneven pressure points that result in streaky applications.
Method |
Advantages |
Disadvantages |
|---|---|---|
Mitt |
Even distribution, no stained hands, professional result |
Requires purchase and maintenance |
Bare hands |
Free, always available |
Orange palms, uneven distribution, streaking |
Spray application |
Fast for large areas |
Difficult to control, waste, uneven coverage |
Professional spray tan |
Perfect result, no self-application |
Expensive, requires appointments, less flexible |
Mitt versus spray application
Spray tanning guns seem professional but require considerable experience for proper use. Overspray wastes product and potentially creates uneven coverage. A mitt provides direct control and tactile feedback, resulting in more consistent results.
For home use, the mitt method is more reliable and user-friendly, even for beginners.
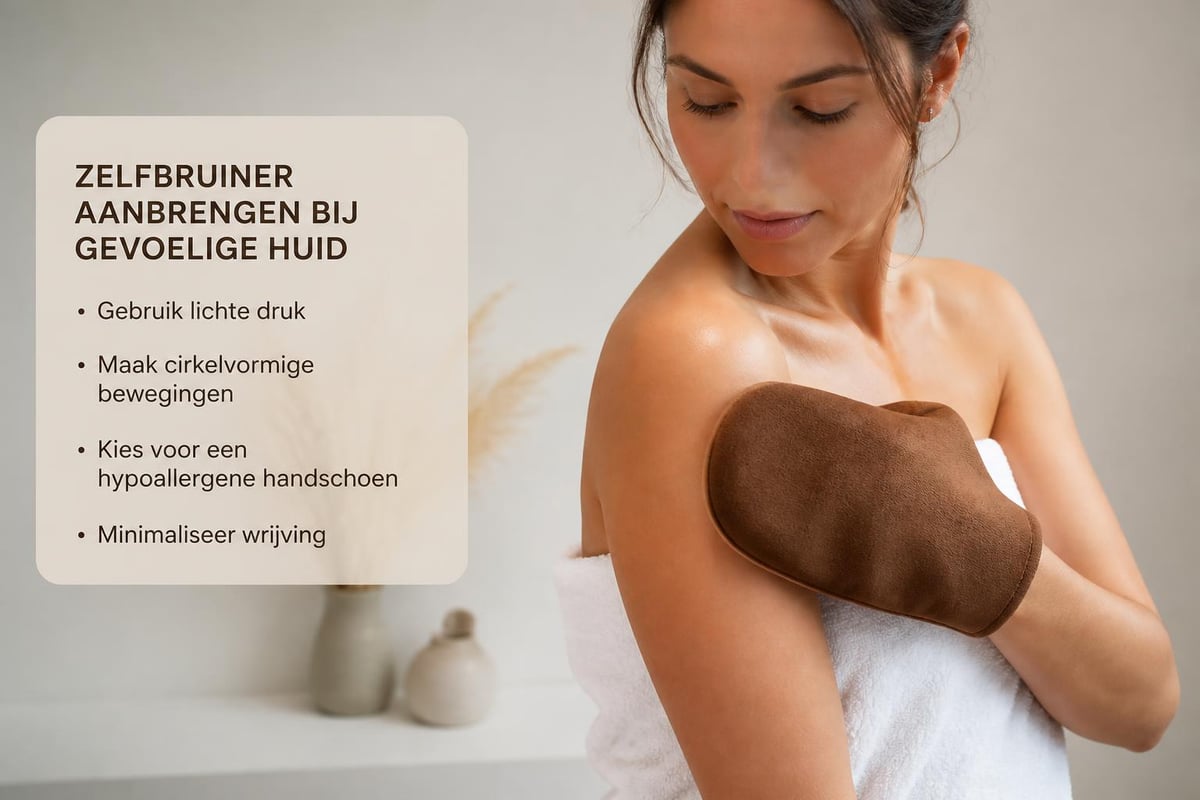
Special considerations for sensitive skin
Those with sensitive skin benefit extra from a self-tanning mitt. The soft velvet texture minimizes friction and irritation during application.
Preventing material reactions
Choose mitts made of hypoallergenic materials if you tend to develop skin reactions. High-quality velvet mitts are generally suitable even for the most sensitive skin. If in doubt, test on a small skin area first.
Wash new mitts before first use to remove any production residues that could cause irritation.
Extra gentle application
For sensitive skin, pressure during application is crucial. Use light, circular motions without hard rubbing. The mitt does the work; you don't need to exert force for even distribution.
Skincare experts emphasize that gentle application also minimizes the risk of irritation from the self-tanner product itself.
Tips for long-lasting results
Maintaining a beautiful tan goes beyond correct application. Aftercare determines how long your glow remains natural and even.
Hydration is crucial
Dry skin fades faster and unevenly. Apply a nourishing moisturizer daily to keep your tan fresh. Pay special attention to areas that are naturally drier, such as elbows and knees.
Hydration tips for a longer glow:
Use an oil-free moisturizer that won't affect your tan
Hydrate twice a day for optimal results
Choose products without AHAs or BHAs that exfoliate
Drink plenty of water for hydration from within
Exfoliation timing
Wait at least five days before your first post-tanning exfoliation. Scrubbing too soon will remove your fresh tan. When you do exfoliate, do so lightly and evenly over your entire body to prevent uneven fading.
For the best results, you can look for professional tips for applying self-tanner that guide you through the entire process.
Traveling with your self-tanning mitt
A self-tanning mitt is compact and lightweight, perfect for your travel bag. This way, you can maintain your golden tan even on vacation or business trips.
Packing and protection
Ensure your mitt is completely dry before packing it. Pack it in a separate plastic bag to prevent contact with clothing. Some mitts come with a storage pouch, ideal for on the go.
Also, bring a small amount of your favorite self-tanner in a travel size. This way, you can do touch-ups on the go and maintain your radiant tan, no matter where you are.
Use in hotel rooms
Bring a dark towel to protect against any spills. Hotel rooms often have different lighting than at home, so take your time and work carefully for consistent results. At Tanning Glamour, you'll find compact sets that are perfect for travel.
Sustainability and environmental impact
In 2026, sustainability is more important than ever. A reusable self-tanning mitt is an eco-friendly alternative to disposable applicators.
Reusable versus disposable
Disposable applicators create unnecessary waste. A quality mitt can be used hundreds of times, significantly reducing your ecological footprint. This is not only better for the environment but also more economical in the long run.
Responsible disposal
When your mitt finally needs replacing, dispose of it with general waste. Velvet and microfiber are difficult to recycle, but their long lifespan compensates for this. Consider mitts from brands with sustainability programs or recycling initiatives.
A self-tanning mitt transforms your tanning routine from frustrating to wonderfully relaxing, with professional results that boost your confidence. The right accessory, correct technique, and proper aftercare together create that natural, sun-kissed glow you crave. At Tanning Glamour, you'll find high-quality self-tanners and application tools that work together for a radiant tan without streaks, spots, or orange undertones.
Read more
Q: Is it good for my skin? A: Yes. The formula contains DHA from sugar cane: safe, gentle on the skin, and UV-free. Suitable for daily use. If you have sensitive skin, test first. Q: How do I us...
Ontdek hoe werkt zelfbruiner precies en waarom je binnen enkele uren een mooie bruine teint krijgt. Alles over DHA, veiligheid en tips.