Self-tanner for legs: tips for a beautiful even tan
Beautiful, even-toned legs can complete your outfit and boost your confidence. But applying self-tanner to your legs requires the right approach. With the correct preparation, application technique, and aftercare, you can achieve that desired sun-kissed look. Whether you're new to self-tanning or want to refine your technique, this article provides practical tips and steps for a perfect, streak-free, and blemish-free result.
Why self-tanner for legs is a good choice
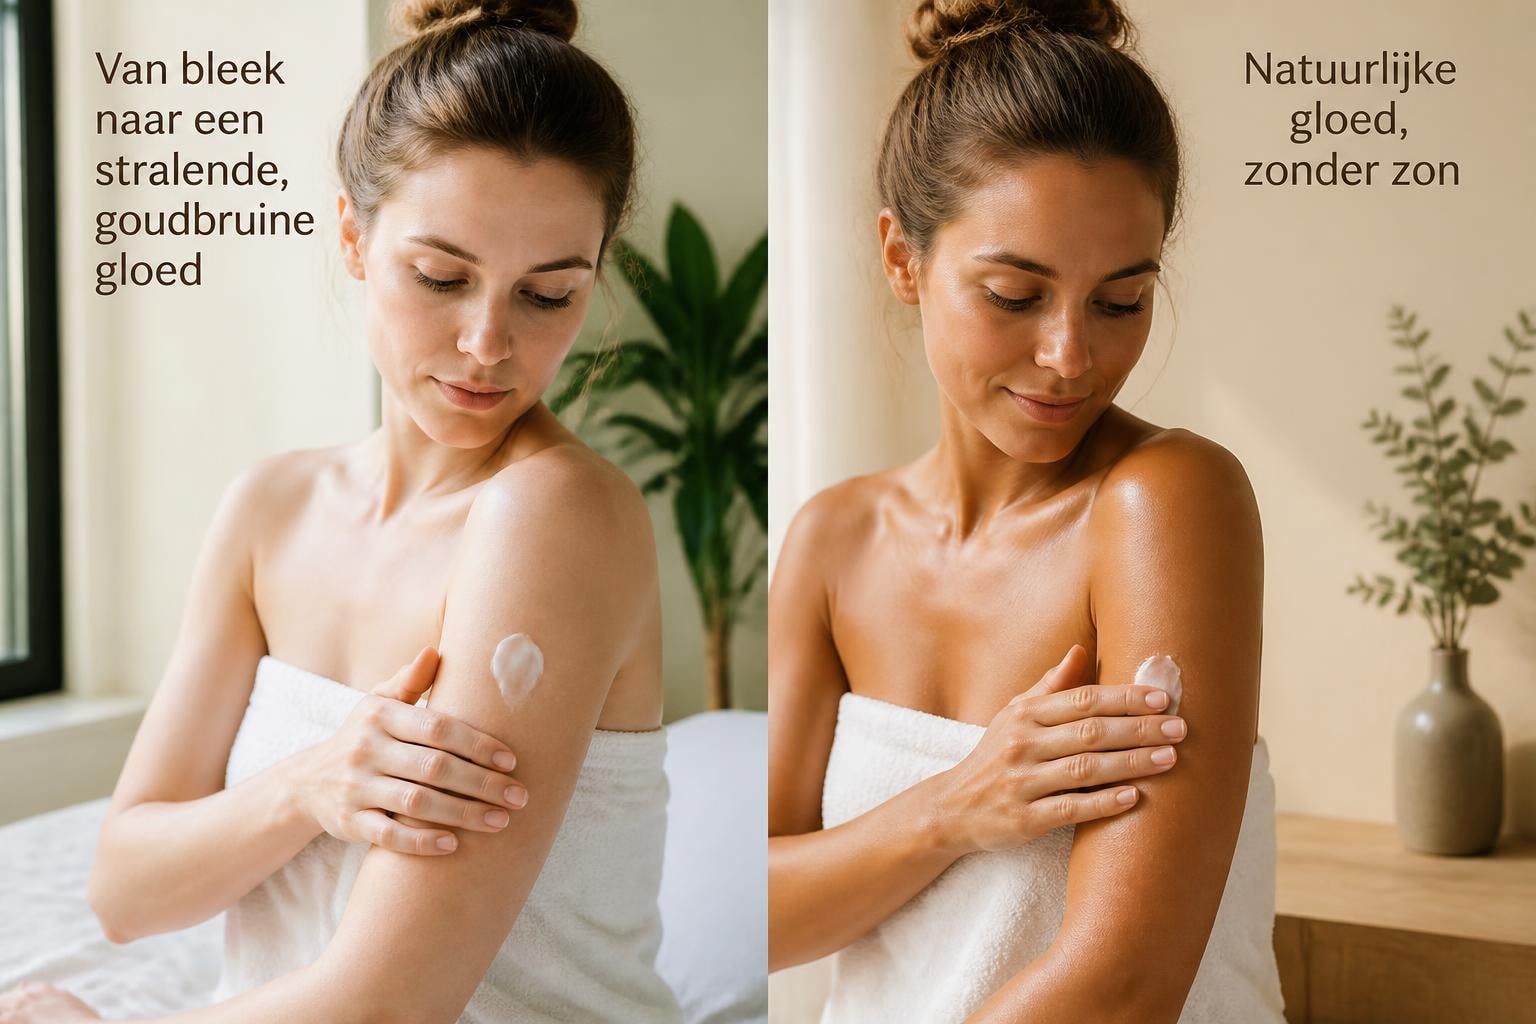
Self-tanner offers a safe alternative to sunbathing or tanning beds. You get a natural tan within hours without harmful UV radiation. This is ideal for your legs, in particular, as these body parts often remain paler and are difficult to tan evenly in the sun.
A quality self-tanner for legs gives you that polished look you're after. It makes your skin appear smoother and more even, giving you more confidence to wear skirts, shorts, or dresses. Moreover, you have complete control over the intensity and can gradually build up the result.
Benefits of modern self-tanners
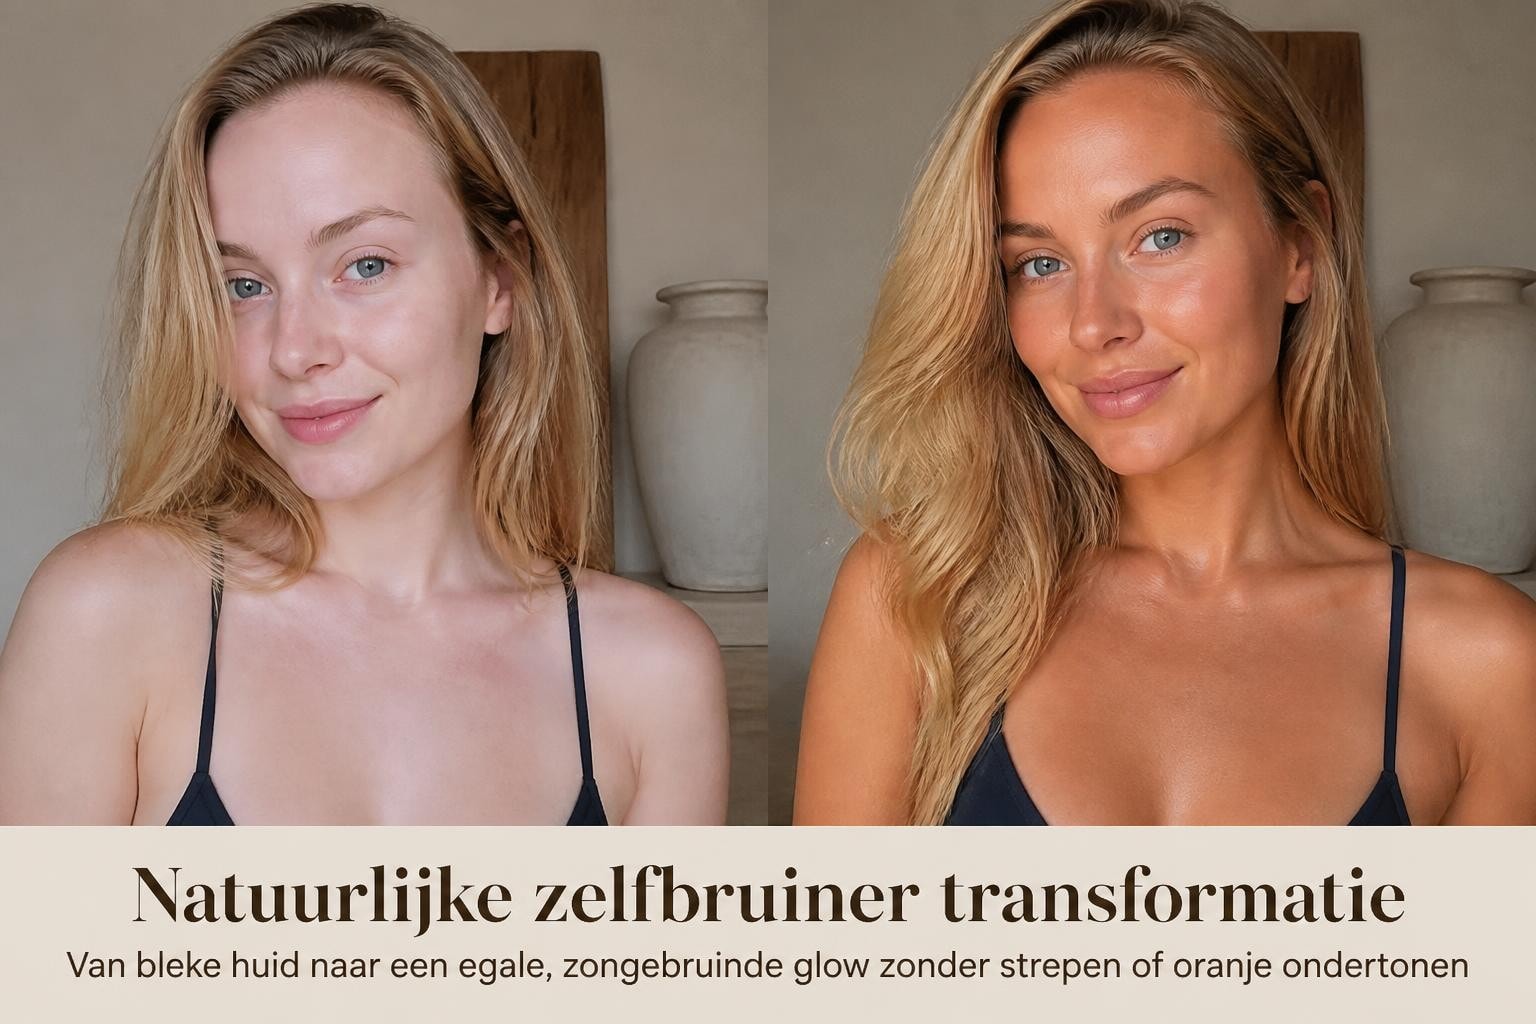
Today's generation of self-tanners has little in common with the orange, streaky results of the past. Modern formulas are developed with natural ingredients that ensure:
- An even, natural-looking tan without orange undertones
- Rapid color development, often visible within 2-3 hours
- Long-lasting durability of 5-7 days
- Nourishing properties due to added hydrating ingredients
- No sticky or unpleasant texture
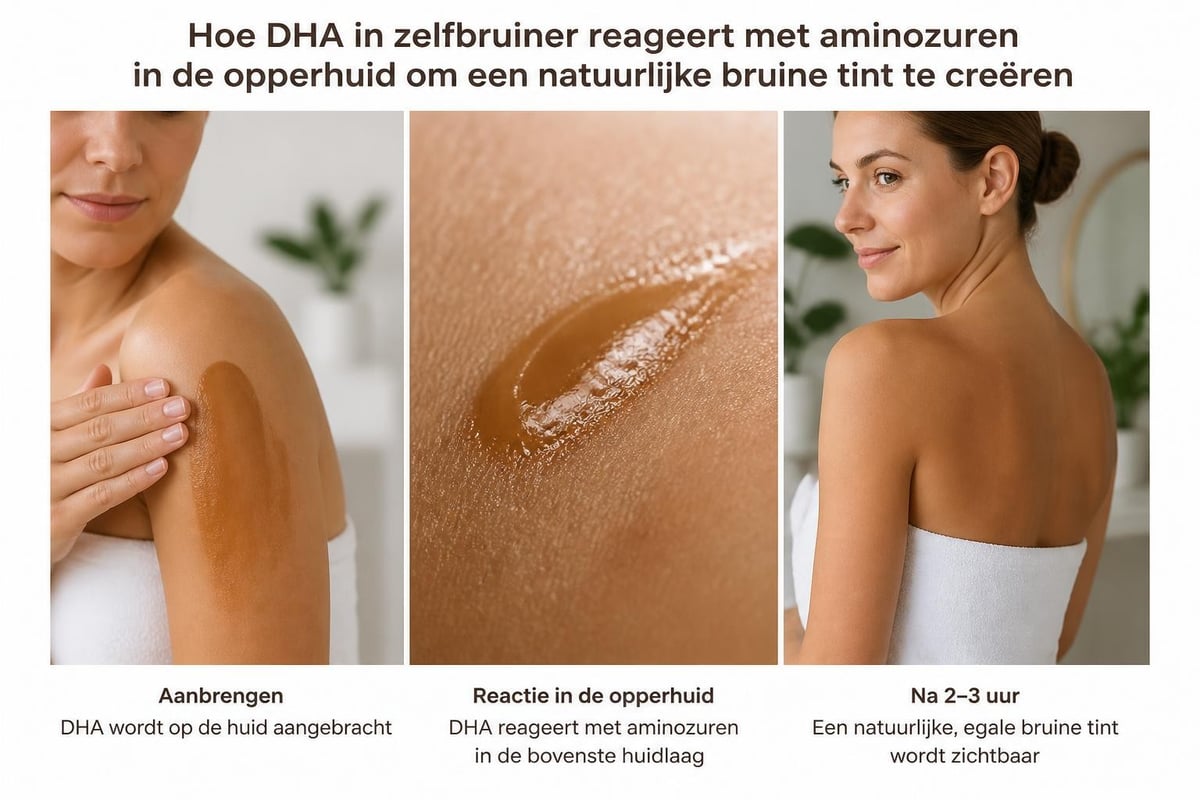
The action of self-tanner is based on the ingredient DHA (dihydroxyacetone), a sugar that reacts with the amino acids in the outermost layer of the skin. This reaction is completely safe and causes a temporary discoloration that gradually fades as your skin renews itself.
The perfect preparation for self-tanner on your legs
Preparation is the key to a beautiful result. Without the right pre-treatment, dry patches, imperfections, or hair can lead to an uneven final result. Start these steps at least one day before applying your self-tanner.
Exfoliate for an even canvas
Exfoliating removes dead skin cells and creates a smooth base. Pay extra attention to your knees, ankles, and feet, as these areas are often drier and absorb more product. Use a gentle body scrub or an exfoliating mitt in circular motions.
Important exfoliating considerations:
- Do this 24 hours before applying self-tanner
- Avoid aggressive scrubs that can irritate your skin
- Focus on dry areas such as knees, ankles, and shins
- Rinse thoroughly with lukewarm water
- Pat your skin dry with a soft towel
Hair removal from your legs should also preferably be done at least 24 hours in advance. Whether you shave, wax, or epilate, your skin needs time to calm down. Shaving immediately before application can lead to irritation and small imperfections that become visible under the self-tanner.
Hydration and skin preparation
After exfoliating, apply a light, fast-absorbing body lotion. This creates a supple, hydrated base. Please note: do not use heavy creams or oils on the day of application, as these can form a barrier that causes the self-tanner to absorb unevenly.
Dry areas such as knees, ankles, and feet deserve extra attention. These zones absorb more product and can therefore become darker. Apply a thin layer of petroleum jelly or moisturizer here just before applying your self-tanner. This creates a subtle barrier that ensures a more natural transition.
| Area | Preparation | Extra attention |
|---|---|---|
| Upper legs | Exfoliate, light moisturizer | Inner thighs may be more sensitive |
| Knees | Intensive exfoliation, barrier cream | Tends to develop dark spots |
| Lower legs | Exfoliate, create a smooth base | Watch out for stubble |
| Ankles | Extra exfoliation, protective cream | Dries out quickly |
| Feet | Scrub, hydrate | Use minimal product |
Application techniques for a streak-free result
The actual application of self-tanner for legs requires precision and patience. The way you distribute the product largely determines the final result. A systematic approach prevents missed spots and streaks.
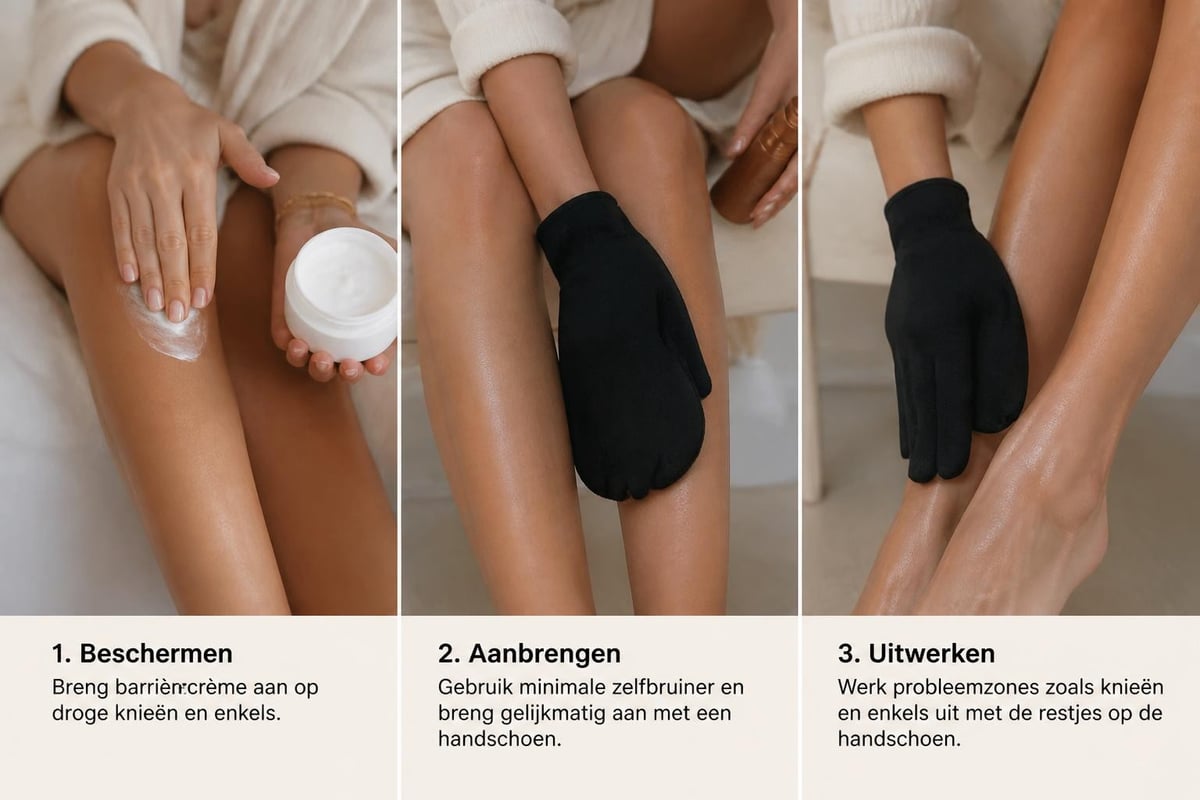
The right tools make all the difference
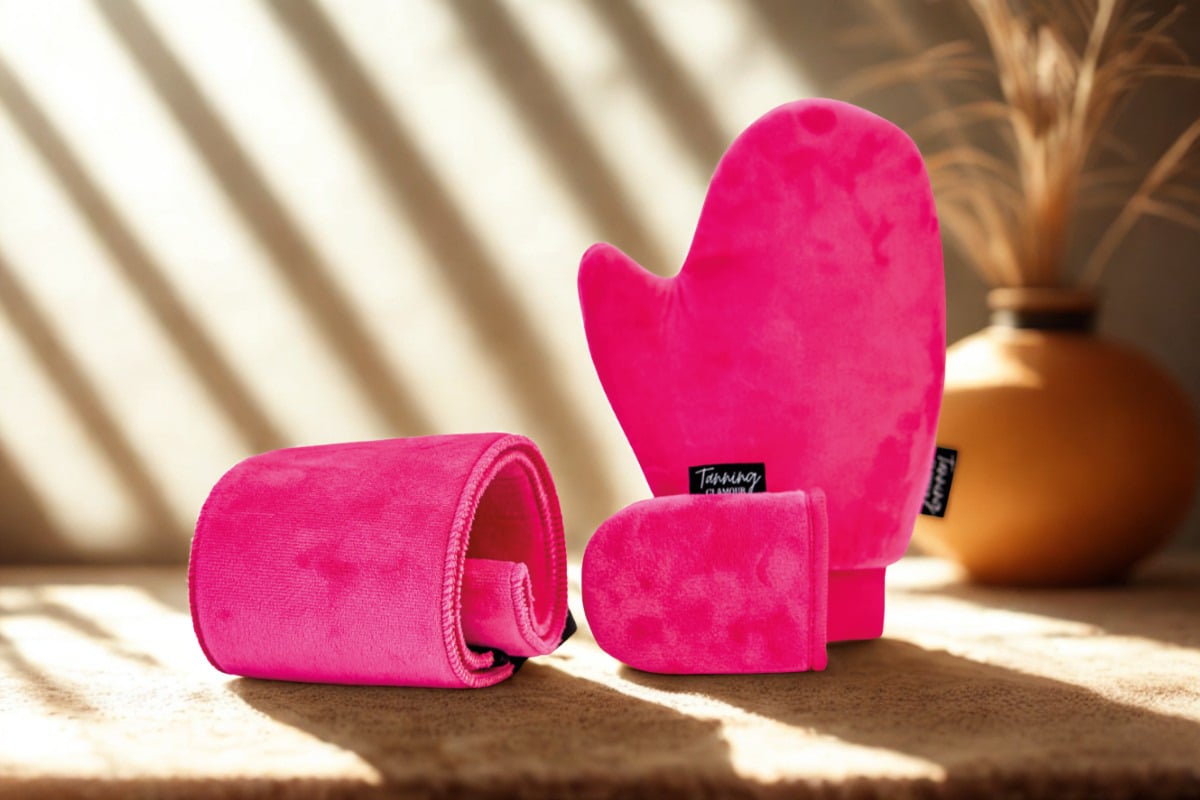
While you can apply self-tanner with your hands, an application mitt gives a much more professional and even result. The soft velvet fabric distributes the product effortlessly and prevents your palms from staining. For hard-to-reach areas such as your upper back thighs and back, a special applicator is indispensable.
The Self-Tanner Application Set (Gloves + Back Strap) contains all the tools you need for a complete, streak-free application all over your body. This allows you to reach even difficult areas without the help of others and get an even distribution everywhere.
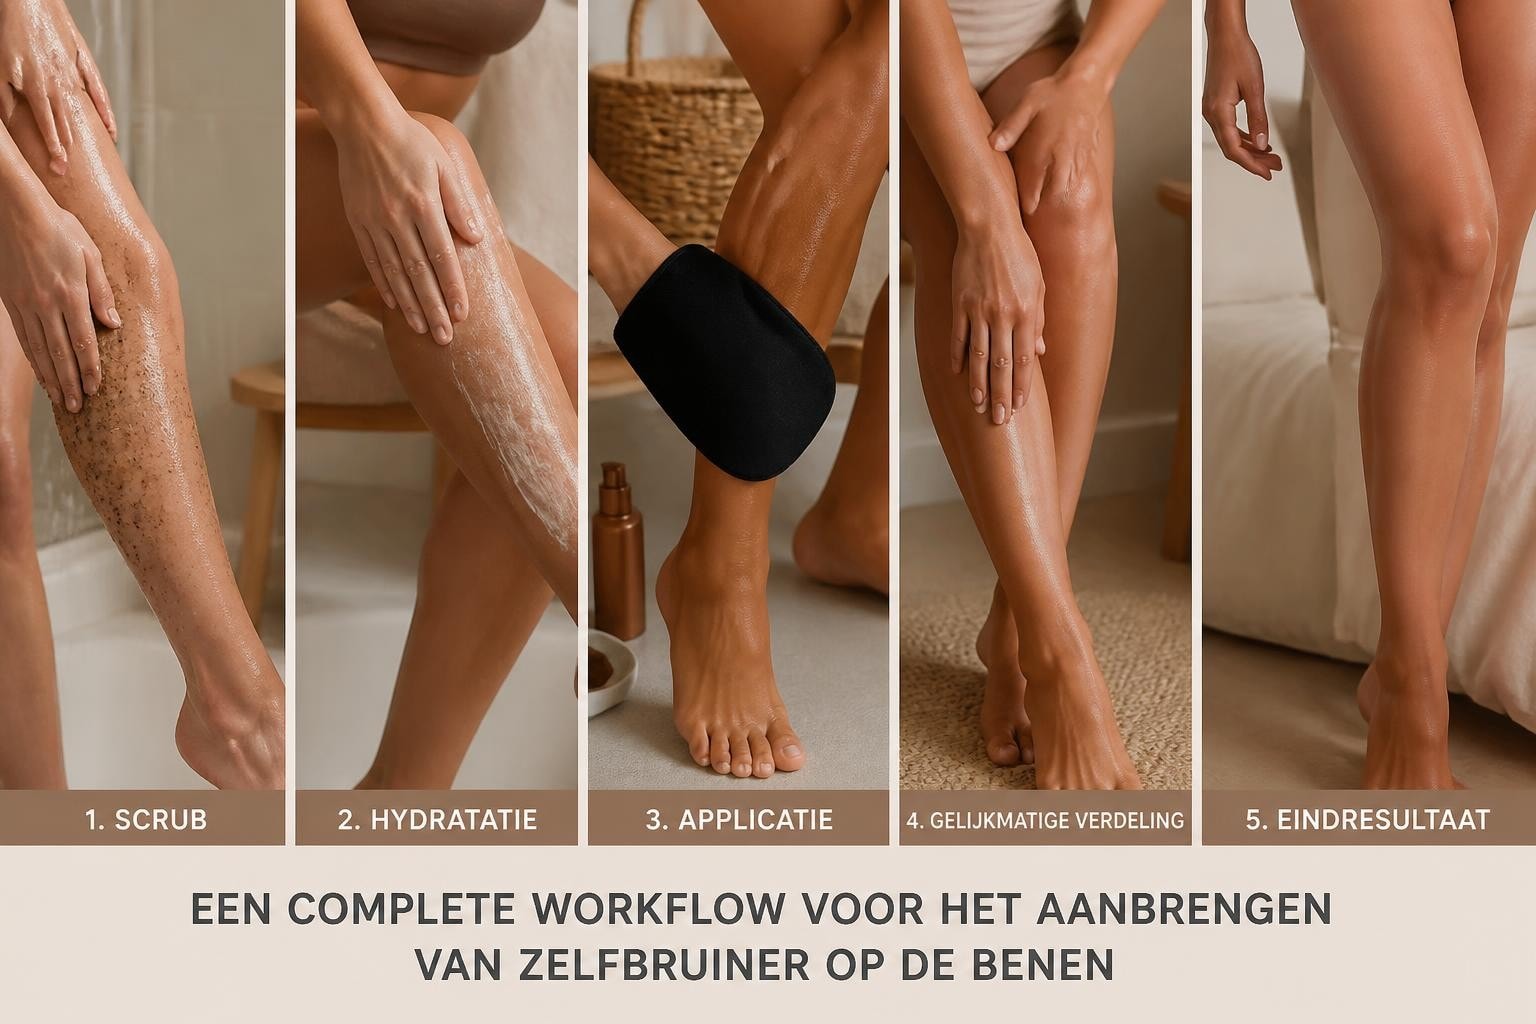
Step-by-step application method
Always start at the bottom of your legs and work your way up. This prevents you from accidentally wiping over freshly applied self-tanner. Apply the product in long, vertical strokes and then blend it evenly in circular motions.
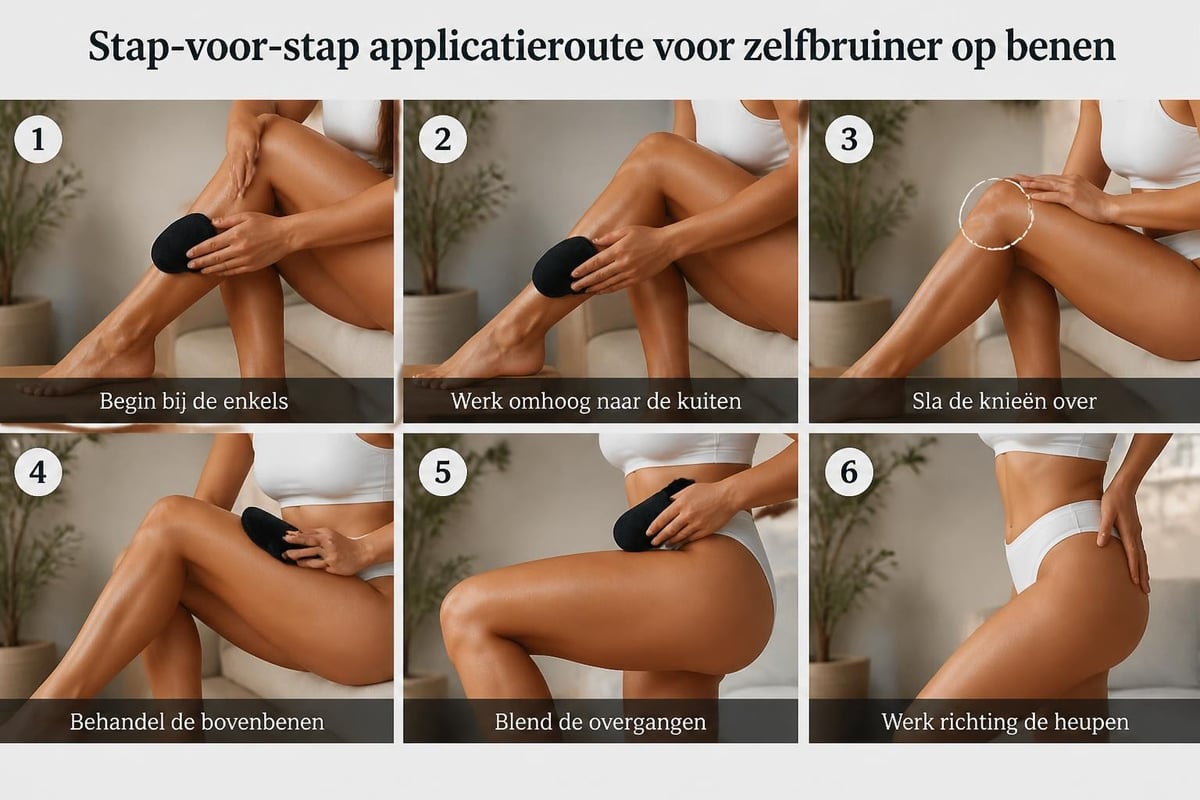
The optimal application route:
- Start at your ankles and the tops of your feet
- Work your way up to your calves with even strokes
- Distribute the product over your knees with extra attention to even distribution
- Apply to your upper legs in long, fluid movements
- Use less product on knees and ankles than on the rest of your leg
- Blend the transitions to your hips and buttocks for a natural flow
For the best results, experts advise applying self-tanner in thin layers. You can always add a second layer after a few hours, but a result that is too dark is difficult to correct.
Attention to problem areas
Certain areas on your legs require extra care. Knees are notorious for developing dark spots. Bend your knee during application and use minimal product. Blend it well and do not leave product buildup in the creases.
For ankles and feet, less is more. These areas need less product than the rest of your leg. Many people make the mistake of applying too much here, resulting in unnaturally dark feet. Use the leftover product on your mitt for a subtle tint.
Managing intensity and color build-up
A common question is how dark the result will be. This depends on several factors: your natural skin tone, the type of self-tanner, and the number of layers you apply. A gradual build-up gives the most natural look.
Building up to your desired shade
For a subtle glow, one thin layer of self-tanner for legs is often sufficient. Do you want a deeper tan? Let the first layer develop completely (usually 4-6 hours) before applying a second layer. This layered approach provides more control and a more natural result than a single thick application.
| Number of layers | Development time | Result | Best for |
|---|---|---|---|
| 1 thin layer | 3-4 hours | Subtle glow, light tan | Daily use, natural look |
| 1 normal layer | 4-6 hours | Visible tan, medium tan | Weekend look, special occasions |
| 2 layers | 8-12 hours total | Deep tan, vacation tan | Events, vacation preparation |
Most modern self-tanners show first results within 2-3 hours. Full color development usually takes 6-8 hours. So plan your application with this timeframe in mind. An evening application will give you your final result in the morning.
Color results for different skin types
Your natural skin tone also determines the final result. Lighter skin types get a visible result faster, while darker skin types often need more product or multiple layers. Always test on a small patch of skin first to see how your skin reacts.
For the most natural result, choose a self-tanner that matches your own undertone. Warm undertones do well with golden-toned self-tanners, while cooler undertones benefit from formulas with a more neutral base. Self-tanning products of good quality are developed to cater to different skin types.
Maintenance and fading of your self-tanner
Maintaining a beautiful tan requires proper care. With the right approach, your self-tanner for legs will stay beautiful and even for up to a week. The secret lies in hydration and gentle care.
Daily care for long-lasting results
Hydration is essential for maintaining your self-tanner. Dry skin sheds faster, causing your tan to fade unevenly. Apply a nourishing body lotion daily, preferably twice a day. This not only extends the durability but also keeps your skin healthy and supple.
Tips for optimal maintenance:
- Shower with lukewarm water instead of hot water
- Use mild, sulfate-free shower products
- Pat your skin dry instead of rubbing
- Apply body lotion immediately after showering
- Avoid prolonged bathing, especially with bubble baths or bath salts
- Do not exfoliate until you are ready for a new application
Swimming in chlorinated water or seawater accelerates fading. If you know you're going swimming, plan your self-tanner application accordingly. A day after swimming, your tan will often have lightened a bit.
Even fading
The natural fading process takes 5-7 days. During this period, your skin renews itself and gradually loses its tan. For an even fading process, hydration is crucial. Dry spots fade faster and unevenly, which can lead to streaky legs.
If you want to stop using your self-tanner sooner or are dissatisfied with the result, you can speed up the fading process. A gentle scrub or exfoliating mitt helps remove the tanned layer faster. Do this gradually over several days for the best result.
Common mistakes and how to avoid them
Even with the best self-tanner, things can go wrong. Most problems can be prevented by working proactively and avoiding known pitfalls. Here are the most common mistakes when using self-tanner for legs.
Solving streaks and spots
Streaks usually occur due to uneven distribution or too much product in certain places. The solution lies in a systematic approach and taking enough time for application. Haste is the enemy of a beautiful result.
If you do discover streaks after application, react quickly. Dampen a towel with warm water and gently wipe the streaked area. This works best within the first hour after application. Tips for preventing streaks emphasize the importance of good blending and working it in.
Avoiding dark knees and ankles
This is perhaps the most common complaint. Knees and ankles naturally have drier skin that absorbs more product. The solution is twofold: use less product on these areas and apply a light barrier cream beforehand.
An effective technique is to use an almost 'dry' mitt for knees and ankles. First, distribute the product over your upper thighs and calves, and then use the leftover product on your mitt for the knees. This gives a more subtle coverage.
Respecting timing and drying time
Putting on clothes too early is a common mistake. Give your self-tanner at least 10-15 minutes to absorb before putting anything on. Preferably wear loose, dark clothing in the first few hours after application. This prevents stains on your favorite outfit and friction that can disrupt the result.
Also avoid activities that make you sweat in the first 4-6 hours. Sweat can disrupt the development of your self-tanner and lead to uneven results. Therefore, plan your application for a time when you can relax.
Combining with other products and treatments
Self-tanner for legs works best in combination with the right supportive products. An integrated care routine maximizes both the durability and the visual result of your tan.
Moisturizers and skincare products
The cream or lotion you use in the days after application affects how your tan continues to look. Choose nourishing formulas without heavy oils or ingredients that can break down the self-tanner. A light, fast-absorbing body lotion is ideal for daily use.
Some people choose to combine their self-tanning routine with tanning drops. These can be added to your daily moisturizer for a gradual build-up and maintenance of your tan. This is especially useful between full applications.
Make-up and shimmers for extra effect
For special occasions, you can make your tanned legs extra radiant with subtle highlighters or body shimmers. Apply these to your shins and the tops of your calves for extra dimension. Make sure your self-tanner is fully developed and dry before adding such products.
Some people also use leg make-up over their self-tanner for events. This is possible, but always test the combination first. Certain make-up formulas may react differently to tanned skin. Always use a setting spray to prevent stains on clothing.
Seasonal tips and adjustments
Your approach to self-tanner for legs can vary by season. Different weather conditions and activities require adapted strategies for optimal results.
Summer: maintenance and protection
In summer, you'll likely need more skincare. More frequent showering and swimming shorten the durability of your self-tanner. During this period, consider touching up more often with thin layers or tanning drops for a consistent glow.
Summer maintenance tips:
- Always apply moisturizer after swimming
- Use a water-resistant sunscreen (self-tanner does not protect against UV!)
- Update your tan every 4-5 days instead of weekly
- Pay extra attention to dry areas due to air conditioning and sun exposure
Winter: intensity and hydration
The winter months bring other challenges. Central heating and cold outdoor air dry out your skin, making it difficult to maintain an even tan. Extra hydration is crucial. Consider richer body lotions, but do not apply them immediately before applying self-tanner.
In winter, you can often get away with a slightly deeper tan without looking unnatural. The dark clothing and limited sun exposure make a warm glow extra welcome. This is the perfect season to experiment with multiple layers for a vacation glow.
Special situations and events
Sometimes you want to look extra good at a specific moment. Whether it's for a wedding, photoshoot, or beach vacation, the timing and approach of your self-tanner for legs requires extra planning.
Planning for important events
For an important event, start testing at least a week in advance. Try out your chosen product to see how your skin reacts and what final result you get. This prevents unwanted surprises.
The ideal timing for your final application is 1-2 days before the event. This gives the color time to fully develop and stabilize. A day in between also gives you the chance to touch up any imperfections.
| Timing | Action | Reason |
|---|---|---|
| 1 week before | Test application on a small area | Allergy test and color check |
| 3 days before | Exfoliate and prepare | Create an optimal base |
| 1-2 days before | Full application | Color can develop and stabilize |
| On the day itself | Light touch-ups if needed, body shimmer | Final perfection |
| Day after event | Start with normal maintenance | Maintain complexion |
Holiday preparation
A beautiful base tan for your holiday starts at home. Apply your self-tanner two days before departure, so you can immediately enjoy an even glow. Research by professionals shows that this preparation also helps your natural tan develop more evenly.
Take a small bottle of tanning drops or travel-sized self-tanner with you on holiday. This way, you can touch up your tan if it becomes uneven due to swimming and sun exposure. Please note that self-tanner does not offer sun protection - always use adequate SPF.
An even, natural tan on your legs is not an art, but a matter of the right technique and products. With the tips in this article, you can create that sunkissed glow you long for, without streaks or patches. Whether you choose a subtle tint or a deep holiday tan, the key lies in good preparation and careful application. Tanning Glamour supports you with natural self-tanners that are visible within 2-3 hours and last beautifully for up to a week - for that well-groomed, confident feeling you're looking for.
Read more
Discover how self-tanning body lotion works, what its benefits are, and how to achieve a natural, even tan without sun or streaks.
Ontdek solavita, de natuurlijke zelfbruiner die je binnen enkele uren een egale, zongebruinde glow geeft. Streeploos, langdurig en zonder zon.